|
Note
|
Most of the code used throughout this manual is available in the manual demo module included in the project. |
1. Framework
1.1. Domain & Database
1.1.1. Domain Model
Domain modelling
-
Declarative, not magical
-
Visible and localized behavior
-
Safe, testable, Java-native APIs
-
Avoiding runtime introspection/config injection
Codion’s domain model layer is a declarative, type-safe representation of the underlying database schema, designed to provide expressive CRUD functionality without annotation overhead. At its heart is the Entity interface — representing a single row of data and its modifiable state, providing access to attribute values via its get() and set() methods.
Core classes
- Domain
-
Specifies a domain model, containing entity definitions, procedures, functions and reports. A Codion domain model is implemented by extending the DomainModel class and populating it with entity definitions.
- DomainType
-
A unique identifier for a domain model and a factory for EntityType instances associated with that domain model.
- EntityType
-
A unique identifier for an entity type and a factory for Attribute instances associated with that entity type.
- Attribute
-
A typed identifier for a column, foreign key or transient attribute, usually a Column or ForeignKey, allowing for type safe access to the associated value. Attributes are usually wrapped in an interface, serving as a convenient namespace.
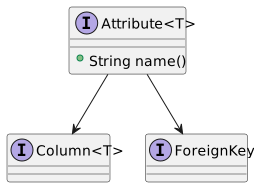
- Column
-
An Attribute subclass representing a table column.
- ForeignKey
-
An attribute subclass representing a foreign key relationship.
- EntityDefinition
-
Encapsulates the meta-data required for presenting and persisting an entity.
- AttributeDefinition
-
Each Attribute has an associated AttributeDefinition (or one of its subclasses) which encapsulates the meta-data required for presenting and persisting the associated value.
- Entity
-
Represents a row in a table (or query) and maps Attributes to their associated values while keeping track of values which have been modified since they were initially set.
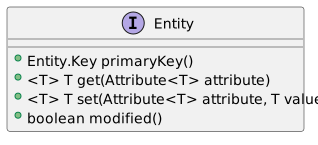
- Entity.Key
-
Represents a unique key for a given entity.
Domain API
To define a domain model API we:
-
Create a DomainType constant representing the domain.
-
Use the DomainType to create EntityType constants for each table, wrapped in a namespace interface.
-
Use the EntityTypes to create Column constants for each column and a ForeignKey constant for each foreign key.
These constants represent the domain API and are used when referring to tables, columns or foreign keys.
|
Note
|
The use of constant interfaces is discouraged in modern Java practice because all implementing classes inherit the constants, potentially polluting their namespaces. If this is a concern, use a public static final constants class instead — at the cost of slightly more typing. |
public interface Store {

  DomainType DOMAIN = DomainType.domainType("Store");

  interface City {
    EntityType TYPE = DOMAIN.entityType("store.city"); //(1)

    Column<Integer> ID = TYPE.integerColumn("id"); //(2)
    Column<String> NAME = TYPE.stringColumn("name");
  }

  interface Customer {
    EntityType TYPE = DOMAIN.entityType("store.customer");

    Column<Integer> ID = TYPE.integerColumn("id");
    Column<String> NAME = TYPE.stringColumn("name");
    Column<Integer> CITY_ID = TYPE.integerColumn("city_id");

    ForeignKey CITY_FK = TYPE.foreignKey("city", CITY_ID, City.ID);
  }
}-
The DomainType instance serves as a factory for EntityTypes associated with that domain.
-
Each EntityType instance serves as a factory for Columns and ForeignKeys associated with that entity.
Typically, the underlying table name is used as the EntityType name, but you can use whatever identifying string you want and specify the table name via the tableName() builder method when defining the entity.
The underlying column name is typically used as the Column name, but as with the EntityType you can use whatever value you want and specify the column name via the columnName() method when creating the associated ColumnDefinition.
Domain implementation
The domain model is implemented by extending the DomainModel class and populating it with EntityDefinitions based on the domain tables. An EntityDefinition consists of AttributeDefinitions based on the Attributes associated with the entity and the information required to persist and present the entity.
The EntityType and Attribute constants provide as() methods returning builders which allow for further configuration (such as nullability and maximum length for values and the caption and primary key generator for the entity definition).
|
Tip
|
Omitting a caption marks an attribute as hidden. Hidden attributes won’t appear in table views by default. |
public static class StoreImpl extends DomainModel {

  public StoreImpl() {
    super(Store.DOMAIN); //(1)
    add(city(), customer());
  }

  EntityDefinition city() {
    return City.TYPE.as()
            .attributes(
                    City.ID.as()
                            .primaryKey()
                            .generator(Generator.identity()),
                    City.NAME.as()
                            .column()
                            .caption("Name")
                            .nullable(false))
            .caption("Cities")
            .build();
  }

  EntityDefinition customer() {
    return Customer.TYPE.as()
            .attributes(
                    Customer.ID.as()
                            .primaryKey()
                            .generator(Generator.identity()),
                    Customer.NAME.as()
                            .column()
                            .caption("Name")
                            .maximumLength(42),
                    Customer.CITY_ID.as()
                            .column(),
                    Customer.CITY_FK.as()
                            .foreignKey()
                            .caption("City"))
            .caption("Customers")
            .build();
  }
}-
The DomainType constant is a required constructor parameter.
Domain is a Service Provider Interface (SPI), and it is recommended to configure the domain implementation class for the Service Loader. Without the Service Loader you are restricted to a local JDBC connection, since you must manually provide a domain instance when establishing a connection, instead of just referring to the DomainType constant.
src/main/java/module-info.java
provides is.codion.framework.domain.Domain
          with is.codion.demos.store.domain.StoreImpl;
or if not using Java Modules (JPMS)
src/main/resources/META-INF/services/is.codion.framework.domain.Domain
is.codion.demos.store.domain.StoreImpl|
Note
|
The domain model implementation must be on the classpath when running with a local JDBC connection, but when running with an RMI or HTTP connection the domain model API is sufficient. If you foresee using RMI or HTTP connections it is recommended to split your domain model into separate API and implementation modules, to simplify client configurations (see Chinook and World demo applications, see Petclinic for a simple single class domain model). |
The domain model provides an Entities instance via entities(), which contains the entity definitions and serves as a factory for Entity and Entity.Key instances.
Domain store = new StoreImpl();

Entities entities = store.entities();

Entity city = entities.entity(City.TYPE)
        .with(City.NAME, "Reykjavík")
        .build();

Entity.Key customerKey = entities.key(Customer.TYPE)
        .with(Customer.ID, 42)
        .build();

Entity customer = Entity.builder(customerKey)
        .with(Customer.NAME, "John")
        .with(Customer.CITY_FK, city)
        .build();

EntityDefinition customerDefinition = entities.definition(Customer.TYPE);

EntityDefinition cityDefinition = customerDefinition.foreignKeys().referencedBy(Customer.CITY_FK);

List<Column<?>> cityPrimaryKeyColumns = cityDefinition.primaryKey().columns();
Data type mapping
| Java type | SQL type |
|---|---|
Short |
java.sql.Types.SMALLINT |
Integer |
java.sql.Types.INTEGER |
Double |
java.sql.Types.DOUBLE |
Long |
java.sql.Types.BIGINT |
BigDecimal |
java.sql.Types.DECIMAL |
LocalDateTime |
java.sql.Types.TIMESTAMP |
LocalDate |
java.sql.Types.DATE |
LocalTime |
java.sql.Types.TIME |
OffsetTime |
java.sql.Types.TIME_WITH_TIMEZONE |
OffsetDateTime |
java.sql.Types.TIMESTAMP_WITH_TIMEZONE |
java.util.Date |
java.sql.Types.DATE |
java.sql.Time |
java.sql.Types.TIME |
java.sql.Date |
java.sql.Types.DATE |
java.sql.Timestamp |
java.sql.Types.TIMESTAMP |
String |
java.sql.Types.VARCHAR |
Boolean |
java.sql.Types.BOOLEAN |
Character |
java.sql.Types.CHAR |
byte[] |
java.sql.Types.BLOB |
Foreign keys
Examples
A simple foreign key based on a single column.
ForeignKey CAPITAL_FK = TYPE.foreignKey("capital_fk", CAPITAL, City.ID);Foreign key based on a composite key.
interface Parent {
  EntityType<Entity> TYPE = DOMAIN.entityType("parent");

  Column<Integer> ID_1 = TYPE.integerColumn("id1");
  Column<Integer> ID_2 = TYPE.integerColumn("id2");
}

interface Child {
  EntityType<Entity> TYPE = DOMAIN.entityType("child");

  Column<Integer> PARENT_ID_1 = TYPE.integerColumn("parent_id1");
  Column<Integer> PARENT_ID_2 = TYPE.integerColumn("parent_id2");

  ForeignKey PARENT_FK = TYPE.foreignKey("parent",
          PARENT_ID_1, Parent.ID_1,
          PARENT_ID_2, Parent.ID_2);
}
Domain constant definitions for the World demo application (simplified).
public interface World {

  DomainType DOMAIN = DomainType.domainType(World.class);

  interface City {
    EntityType TYPE = DOMAIN.entityType("world.city");

    Column<Integer> ID = TYPE.integerColumn("id");
    Column<String> NAME = TYPE.stringColumn("name");
    Column<String> COUNTRY_CODE = TYPE.stringColumn("countrycode");
    Column<String> DISTRICT = TYPE.stringColumn("district");
    Column<Integer> POPULATION = TYPE.integerColumn("population");

    ForeignKey COUNTRY_FK = TYPE.foreignKey("country_fk", COUNTRY_CODE, Country.CODE);
  }

  interface Country {
    EntityType TYPE = DOMAIN.entityType("world.country");

    Column<String> CODE = TYPE.stringColumn("code");
    Column<String> NAME = TYPE.stringColumn("name");
    Column<String> CONTINENT = TYPE.stringColumn("continent");
    Column<String> REGION = TYPE.stringColumn("region");
    Column<Double> SURFACEAREA = TYPE.doubleColumn("surfacearea");
    Column<Integer> INDEPYEAR = TYPE.integerColumn("indepyear");
    Column<Integer> POPULATION = TYPE.integerColumn("population");
    Column<Double> LIFE_EXPECTANCY = TYPE.doubleColumn("lifeexpectancy");
    Column<Double> GNP = TYPE.doubleColumn("gnp");
    Column<Double> GNPOLD = TYPE.doubleColumn("gnpold");
    Column<String> LOCALNAME = TYPE.stringColumn("localname");
    Column<String> GOVERNMENTFORM = TYPE.stringColumn("governmentform");
    Column<String> HEADOFSTATE = TYPE.stringColumn("headofstate");
    Column<Integer> CAPITAL = TYPE.integerColumn("capital");
    Column<String> CODE_2 = TYPE.stringColumn("code2");
    Column<Integer> CAPITAL_POPULATION = TYPE.integerColumn("capital_population");
    Column<Integer> NO_OF_CITIES = TYPE.integerColumn("no_of_cities");
    Column<Integer> NO_OF_LANGUAGES = TYPE.integerColumn("no_of_languages");
    Column<byte[]> FLAG = TYPE.byteArrayColumn("flag");

    ForeignKey CAPITAL_FK = TYPE.foreignKey("capital_fk", CAPITAL, City.ID);
  }

  interface CountryLanguage {
    EntityType TYPE = DOMAIN.entityType("world.countrylanguage");

    Column<String> COUNTRY_CODE = TYPE.stringColumn("countrycode");
    Column<String> LANGUAGE = TYPE.stringColumn("language");
    Column<Boolean> IS_OFFICIAL = TYPE.booleanColumn("isofficial");
    Column<Double> PERCENTAGE = TYPE.doubleColumn("percentage");
    Column<Integer> NO_OF_SPEAKERS = TYPE.integerColumn("noOfSpeakers");

    ForeignKey COUNTRY_FK = TYPE.foreignKey("country_fk", COUNTRY_CODE, Country.CODE);
  }

  interface Continent {
    EntityType TYPE = DOMAIN.entityType("continent");

    Column<String> NAME = TYPE.stringColumn("continent");
    Column<Integer> SURFACE_AREA = TYPE.integerColumn("sum(surfacearea)");
    Column<Long> POPULATION = TYPE.longColumn("sum(population)");
    Column<Double> MIN_LIFE_EXPECTANCY = TYPE.doubleColumn("min(lifeexpectancy)");
    Column<Double> MAX_LIFE_EXPECTANCY = TYPE.doubleColumn("max(lifeexpectancy)");
    Column<Integer> MIN_INDEPENDENCE_YEAR = TYPE.integerColumn("min(indepyear)");
    Column<Integer> MAX_INDEPENDENCE_YEAR = TYPE.integerColumn("max(indepyear)");
    Column<Double> GNP = TYPE.doubleColumn("sum(gnp)");
  }
}
Attributes
For the framework to know how to present and persist values, Attributes need further configuration. Each attribute is represented by the AttributeDefinition class or one of its subclasses, which encapsulates the required metadata.
The Attribute, Column and ForeignKey classes provide methods for creating AttributeDefinition.Builder instances, which can be used to configure the attributes.
An Attribute can be configured three ways, as transient, derived or denormalized.
Transient
Transient attributes are nullable by default and behave like regular fields, but do not map to any underlying column. Transient attributes are always initialized with a null value. Changing the value of a transient attribute renders the Entity instance modified by default, but can be configured to not do so.
Denormalized
An entity can include a read-only attribute value from an entity referenced via foreign key, by defining a denormalized attribute.
Country.CAPITAL_POPULATION.as()
        .denormalized()
        .from(Country.CAPITAL_FK)
        .using(City.POPULATION)
        .caption("Capital pop.")
        .numberGrouping(true),
Derived
A derived attribute is used to represent a value which is derived from one or more attributes in the same entity. The value of a derived attribute is provided via a DerivedValue implementation as shown below.
A derived attribute can serve as a source attribute for another derived attribute, but an exception is thrown during enitity definition if a cycle is detected.
CountryLanguage.NO_OF_SPEAKERS.as()
        .derived()
        .from(CountryLanguage.COUNTRY_FK, CountryLanguage.PERCENTAGE)
        .with(new NoOfSpeakers())
        .caption("No. of speakers")
        .numberGrouping(true),
final class NoOfSpeakers implements DerivedValue<Integer> {
@Serial
private static final long serialVersionUID = 1;
@Override
public Integer from(SourceValues values) {
Double percentage = values.get(CountryLanguage.PERCENTAGE);
Entity country = values.get(CountryLanguage.COUNTRY_FK);
if (percentage != null && country != null && country.present(Country.POPULATION)) {
return Double.valueOf(country.get(Country.POPULATION) * (percentage / 100)).intValue();
}
return null;
}
}Columns
Column
Column is used to represent attributes that are based on table columns.
Country.REGION.as()
        .column()
        .caption("Region")
        .nullable(false)
        .maximumLength(26),
Country.SURFACEAREA.as()
        .column()
        .caption("Surface area")
        .nullable(false)
        .numberGrouping(true)
        .fractionDigits(2),
Country.INDEPYEAR.as()
        .column()
        .caption("Indep. year")
        .range(-2000, 2500),
Country.INDEPYEAR_SEARCHABLE.as()
        .column()
        .expression("to_char(indepyear)")
        .searchable(true)
        .readOnly(true),
Country.POPULATION.as()
        .column()
        .caption("Population")
        .nullable(false)
        .numberGrouping(true),
Country.LIFE_EXPECTANCY.as()
        .column()
        .caption("Life expectancy")
        .fractionDigits(1)
.range(0, 99),Primary key
It is recommended that entities have a primary key defined, that is, one or more columns representing a unique combination.
The primary key defined in the domain model does not have to correspond to an actual table primary (or unique) key, although that is of course preferable.
If no primary key columns are specified, equals() will not work (since it is based on the primary key). You can still use the Entity.equalValues() method to check if all values are equal in two entities without primary keys.
Country.CODE.as()
        .primaryKey()
        .caption("Code")
        .updatable(true)
        .maximumLength(3),
In case of composite primary keys you simply specify the primary key index.
CountryLanguage.COUNTRY_CODE.as()
        .primaryKey(0)
        .updatable(true),
CountryLanguage.LANGUAGE.as()
        .primaryKey(1)
        .caption("Language")
        .updatable(true),
Subquery
A Column can represent a subquery returning a single value.
Country.NO_OF_CITIES.as()
        .subquery("""
                SELECT COUNT(*)
                FROM world.city
                WHERE city.countrycode = country.code""")
        .caption("No. of cities"),
Boolean
For databases supporting Types.BOOLEAN you simply specify a column.
CountryLanguage.IS_OFFICIAL.as()
        .column()
        .caption("Official")
        .withDefault(true)
        .nullable(false),
For databases lacking native boolean support we can define a boolean column and provide a converter.
Item.DISABLED.as()
        .column()
        .converter(Integer.class, new BooleanConverter())
        .caption(Item.DISABLED.name())
        .name("disabled")
        .defaultValue(false)
        .nullable(false)
private static final class BooleanConverter implements Converter<Boolean, Integer> {
@Override
public Integer toColumn(Boolean value, Statement statement) throws SQLException {
return value ? 1 : 0;
}
@Override
public Boolean fromColumn(Integer columnValue) throws SQLException {
return columnValue.intValue() == 1;
}
}Note that boolean attributes always use the boolean Java type, the framework handles translating to and from the actual column values.
entity.set(Customer.ACTIVE, true);

Boolean isActive = entity.get(Customer.ACTIVE);
Item
A column based on a list of valid items.
private static final List<Item<String>> CONTINENT_ITEMS = List.of(
        item("Africa"), item("Antarctica"), item("Asia"),
        item("Europe"), item("North America"), item("Oceania"),
item("South America"));Country.CONTINENT.as()
.column()
.items(CONTINENT_ITEMS)
.caption("Continent")
.nullable(false),Group by
Codion provides built-in support for grouped entities through column-level groupBy() and aggregate() configuration. This is the preferred approach for working with aggregated data, offering type-safe aggregate column handling and automatic HAVING clause generation in the model layer.
A grouped entity is defined by marking columns as either group-by columns or aggregate columns:
EntityDefinition continent() {
  return Continent.TYPE.as()
          .attributes(
                  Continent.NAME.as()
                          .column()
                          .caption("Continent")
                          .groupBy(true),
                  Continent.SURFACE_AREA.as()
                          .column()
                          .caption("Surface area")
                          .expression("sum(surfacearea)")
                          .aggregate(true)
                          .numberGrouping(true),
                  Continent.POPULATION.as()
                          .column()
                          .caption("Population")
                          .expression("sum(population)")
                          .aggregate(true)
                          .numberGrouping(true),
                  Continent.MIN_LIFE_EXPECTANCY.as()
                          .column()
                          .caption("Min. life expectancy")
                          .expression("min(lifeexpectancy)")
                          .aggregate(true),
                  Continent.MAX_LIFE_EXPECTANCY.as()
                          .column()
                          .caption("Max. life expectancy")
                          .expression("max(lifeexpectancy)")
                          .aggregate(true),
                  Continent.MIN_INDEPENDENCE_YEAR.as()
                          .column()
                          .caption("Min. ind. year")
                          .expression("min(indepyear)")
                          .aggregate(true),
                  Continent.MAX_INDEPENDENCE_YEAR.as()
                          .column()
                          .caption("Max. ind. year")
                          .expression("max(indepyear)")
                          .aggregate(true),
                  Continent.GNP.as()
                          .column()
                          .caption("GNP")
                          .expression("sum(gnp)")
                          .aggregate(true)
                          .numberGrouping(true))
          .table("world.country")
          .readOnly(true)
          .description("Continents of the World")
          .caption("Continent")
          .build();
}
Key points about grouped entities:
-
Group-by columns: Marked with
.groupBy(true)- these columns appear in the GROUP BY clause -
Aggregate columns: Marked with
.aggregate(true)and must specify an.expression()containing the aggregate function (e.g.,sum(surfacearea),min(lifeexpectancy)) -
All columns required: Every column must be either a group-by column or an aggregate column - the framework validates this at entity definition time
-
Read-only: Grouped entities are typically marked
.readOnly(true)since aggregated data cannot be updated -
Base table: Use
.table()to specify the underlying table (e.g.,.table("world.country")) in case theentityTypename is different.
When using grouped entities, the framework handles aggregate columns differently than regular columns:
In the connection layer (Select.Builder):
Conditions on aggregate columns must be explicitly added to the HAVING clause:
// Regular column condition - goes in WHERE clause automatically
connection.select(Select.where(Continent.NAME.equalTo("Europe")).build());

// Aggregate column condition - must use having() explicitly
connection.select(Select.having(Continent.POPULATION.greaterThan(100_000_000L)).build());
In the model layer (EntityConditionModel):
The framework model layer automatically handles aggregate columns - conditions on aggregate columns are automatically placed in the HAVING clause without explicit configuration:
SwingEntityTableModel continentModel = new SwingEntityTableModel(Continent.TYPE, connectionProvider);

// Condition on regular column (NAME) - automatically goes in WHERE
continentModel.query().condition().get(Continent.NAME).set().equalTo("Asia");

// Condition on aggregate column (POPULATION) - automatically goes in HAVING
continentModel.query().condition().get(Continent.POPULATION).set().greaterThan(1_000_000_000L);

// Both conditions work together correctly
continentModel.items().refresh();
This automatic HAVING clause handling makes grouped entities seamless to use in UI components.
Prefer grouped entities when:
-
Working with straightforward aggregations on a single table
-
Building interactive UIs where users filter aggregated data
-
You want automatic HAVING clause handling in table models
-
Type-safe access to aggregate columns is important
Use custom queries (EntitySelectQuery) when:
-
Aggregating across complex joins of multiple tables
-
The query requires custom SQL logic beyond standard GROUP BY
-
You need database-specific optimizations or hints
Prefer database views when:
-
The aggregation is complex and performance-critical
-
Multiple applications need the same aggregated data
-
DBAs need to optimize with indexes or materialized views
-
The aggregation logic is stable and rarely changes
Column templates
Column templates provide a way to define reusable column configurations that can be applied across multiple entities. This eliminates repetition and ensures consistency for common patterns like audit columns, required searchable fields, or domain-specific column types.
Templates are defined using the ColumnTemplate functional interface.
private static final ColumnTemplate<String> REQUIRED_SEARCHABLE =
        column -> column
                .nullable(false)
                .searchable(true);
private static final ColumnTemplate<LocalDateTime> INSERT_TIME =
        column -> column
                .readOnly(true)
                .captionResource(Chinook.class.getName(), "insert_time");
private static final ColumnTemplate<String> INSERT_USER =
        column -> column
                .readOnly(true)
                .captionResource(Chinook.class.getName(), "insert_user");
The templates above demonstrate common patterns:
-
REQUIRED_SEARCHABLE- Combines nullable(false) with searchable(true) for required fields that should be used in search fields. -
INSERT_TIMEandINSERT_USER- Audit columns that track when and by whom records were created, using shared resource bundle keys for consistent captions across entities
Templates are applied using the column(ColumnTemplate<T>) method:
Album.TITLE.as()
        .column(REQUIRED_SEARCHABLE)
.maximumLength(160),Album.INSERT_TIME.as()
.column(INSERT_TIME),
Album.INSERT_USER.as()
.column(INSERT_USER))Templates can be chained with additional configuration methods, allowing you to apply a base configuration and then customize specific aspects as needed.
Templates can be based on constants or static methods for more flexibility.
public static final class Store extends DomainModel {

  public static final DomainType DOMAIN = DomainType.domainType("store");

  private static final ColumnTemplate<String> NAME =
          column -> column
                  .maximumLength(50)
                  .searchable(true);

  private static final ColumnTemplate<String> REQUIRED =
          column -> column
                  .nullable(false);

  private static final ColumnTemplate<String> REQUIRED_NAME = NAME.and(REQUIRED);

  private static <T extends Number> ColumnTemplate<T> positiveNumber(double maximum) {
    return column -> column
            .nullable(false)
            .minimum(0)
            .maximum(maximum);
  }

  interface Customer {
    EntityType TYPE = DOMAIN.entityType("store.customer");

    Column<Integer> ID = TYPE.integerColumn("id");
    Column<String> FIRST_NAME = TYPE.stringColumn("first_name");
    Column<String> LAST_NAME = TYPE.stringColumn("last_name");
    Column<Integer> BIRTH_YEAR = TYPE.integerColumn("age");
    Column<Double> DISCOUNT = TYPE.doubleColumn("discount");
  }

  public Store() {
    super(DOMAIN);
    add(customer());
  }

  EntityDefinition customer() {
    return Customer.TYPE.as()
            .attributes(
                    Customer.ID.as()
                            .primaryKey()
                            .generator(identity()),
                    Customer.FIRST_NAME.as()
                            .column(REQUIRED_NAME)
                            .caption("First Name"),
                    Customer.LAST_NAME.as()
                            .column(NAME)
                            .caption("Last Name"),
                    Customer.BIRTH_YEAR.as()
                            .column(positiveNumber(2100))
                            .caption("Age"),
                    Customer.DISCOUNT.as()
                            .column(positiveNumber(8))
                            .defaultValue(0d)
                            .caption("Discount"))
            .build();
  }
}
This approach provides several benefits:
-
Parameterization - Templates can accept configuration parameters at usage time
-
Reusability - Common patterns can be shared across different domains with variations
-
Environment awareness - Templates can adapt based on runtime configuration
-
Type safety - The method signature ensures correct types for parameters
-
Documentation - Method parameters make the configuration options explicit
Column templates are particularly powerful when working with complex data types that require converters and custom formatting. Here’s an example from production applications using PostGIS geometries:
public final class GeospatialTemplates {

    // Template for Point geometries with custom formatting
    public static final ColumnTemplate<Point> POINT =
            column -> column
                    .converter(PGgeometry.class, new PGgeometryPointConverter(), new PGgeometryGetter())
                    .format(new PointFormat());

    // Template for LineString geometries
    public static final ColumnTemplate<LineString> LINE =
            column -> column
                    .converter(PGgeometry.class, new PGgeometryLineConverter(), new PGgeometryGetter());

    // Template for Polygon geometries
    public static final ColumnTemplate<Polygon> POLYGON =
            column -> column
                    .converter(PGgeometry.class, new PGgeometryPolygonConverter(), new PGgeometryGetter());

    // Template for MultiPolygon geometries
    public static final ColumnTemplate<MultiPolygon> MULTI_POLYGON =
            column -> column
                    .converter(PGgeometry.class, new PGgeometryMultiPolygonConverter(), new PGgeometryGetter());
}

// Usage in entity definitions:
EntityDefinition location() {
    return Location.TYPE.as(
        Location.ID.as()
            .primaryKey(),
        Location.NAME.as()
            .column()
            .nullable(false),
        Location.COORDINATES.as()
            .column(GeospatialTemplates.POINT),
        Location.BOUNDARY.as()
            .column(GeospatialTemplates.POLYGON),
        Location.ROUTE.as()
            .column(GeospatialTemplates.LINE))
    .build();
}
These templates demonstrate how column templates can:
-
Encapsulate complexity - The converter, getter, and formatter classes can remain private implementation details
-
Ensure consistency - All geometry columns of the same type use identical configuration
-
Reduce boilerplate - Complex type configuration is defined once and reused everywhere
-
Improve maintainability - Changes to geometry handling are centralized in the template definitions
Domain
Each entity is defined by creating a EntityDefinition.Builder instance via EntityType.as() and adding the resulting definition to the domain model, via the add(EntityDefinition) method in the DomainModel class. The framework assumes the entityType name is the underlying table name, but the table name can be specified via the EntityDefinition.Builder.table(String) method.
EntityDefinition city() {
  return City.TYPE.as()
          .attributes(
                  City.ID.as()
                          .primaryKey()
                          .generator(sequence("world.city_seq")),
                  City.NAME.as()
                          .column()
                          .caption("Name")
                          .searchable(true)
                          .nullable(false)
                          .maximumLength(35),
                  City.COUNTRY_CODE.as()
                          .column()
                          .nullable(false),
                  City.COUNTRY_FK.as()
                          .foreignKey()
                          .caption("Country"),
                  City.DISTRICT.as()
                          .column()
                          .caption("District")
                          .nullable(false)
                          .maximumLength(20),
                  City.POPULATION.as()
                          .column()
                          .caption("Population")
                          .nullable(false)
                          .numberGrouping(true),
                  City.LOCATION.as()
                          .column()
                          .caption("Location")
                          .converter(String.class, new LocationConverter())
                          .comparator(new LocationComparator())
                          .validator(new LocationValidator()))
          .validator(new CityValidator())
          .orderBy(ascending(City.NAME))
          .formatter(City.NAME)
          .description("Cities of the World")
          .caption("City")
          .build();
}Generator
The framework provides implementations for most commonly used primary key generation strategies, identity column, sequence (with or without trigger) and auto-increment columns. The Generator class serves as a factory for Generator implementations. Static imports are assumed in the below examples.
Automatic
This assumes the underlying column is either an auto-increment column or is populated from a sequence using a trigger during insert.
//Auto increment column in the 'store.customer' table
.generator(automatic("store.customer"));

//Trigger and a sequence named 'store.customer_seq'
.generator(automatic("store.customer_seq"));
Sequence
When sequences are used without triggers the framework can fetch the value from a sequence before insert.
.generator(sequence("world.city_seq")),Queried
The framework can select new primary key values from a query.
.generator(queried("""
        select next_id
        from store.id_values
        where table_name = 'store.customer'"""))
Custom
You can provide a custom key generator strategy by implementing a Generator.
private static final class UUIDGenerator implements Generator<String> {

  @Override
  public void beforeInsert(Entity entity, Column<String> column, Database database, Connection connection) {
    entity.set(column, UUID.randomUUID().toString());
  }
}
EntityFormatter
The EntityFormatter class provides a builder for a Function<Entity, String> instance, which is then used to provide the toString() implementations for entities. This value is used wherever entities are displayed, for example in a ComboBox or as foreign key values in table views.
Entity.toString() values are cached by default and invalidated each time an attribute value changes. This caching can be turned off via EntityDefinition.Builder.cacheToString(boolean)
return Address.TYPE.as()
        .attributes(
                Address.ID.as()
                        .primaryKey()
                        .generator(identity()),
                Address.STREET.as()
                        .column()
                        .caption("Street")
                        .nullable(false)
                        .maximumLength(120),
                Address.CITY.as()
                        .column()
                        .caption("City")
                        .nullable(false)
                        .maximumLength(50),
                Address.VALID.as()
                        .column()
                        .caption("Valid")
                        .withDefault(true)
                        .defaultValue(true)
                        .nullable(false))
        .formatter(EntityFormatter.builder()
                .value(Address.STREET)
                .text(", ")
                .value(Address.CITY)
                .build())
        .smallDataset(true)
        .caption("Address")
        .build();
For more complex toString() implementations you can implement a custom Function<Entity, String>.
.formatter(new CustomerFormatter())private static final class CustomerFormatter implements Function<Entity, String>, Serializable {
@Serial
private static final long serialVersionUID = 1;
@Override
public String apply(Entity customer) {
return new StringBuilder()
.append(customer.get(Customer.LAST_NAME))
.append(", ")
.append(customer.get(Customer.FIRST_NAME))
.append(customer.optional(Customer.EMAIL)
.map(email -> " <" + email + ">")
.orElse(""))
.toString();
}
}Validation
Custom validation of Entities is performed by implementing a EntityValidator or by adding a validator to an attribute via ValueAttributeDefinition.Builder.validator(AttributeValidator).
The EntityValidator interface provides range, string length and null validation and can be extended to provide further validations.
|
Warning
|
EntityValidator logic runs frequently — avoid expensive operations like database queries. Use edit model listeners (such as beforeInsert or beforeUpdate) for validations that require cross-entity or remote checks.
|
final class CityValidator implements EntityValidator, Serializable {

  @Serial
  private static final long serialVersionUID = 1;

  @Override
  public void validate(Entity city, Attribute<?> attribute) throws AttributeValidationException {
    EntityValidator.super.validate(city, attribute);
    if (attribute.equals(City.POPULATION)) {
      // population is guaranteed to be non-null after the call to super.validate()
      Integer cityPopulation = city.get(City.POPULATION);
      if (city.present(City.COUNTRY_FK)) {
        Entity country = city.get(City.COUNTRY_FK);
        Integer countryPopulation = country.get(Country.POPULATION);
        if (countryPopulation != null && cityPopulation > countryPopulation) {
          throw new AttributeValidationException(City.POPULATION,
                  cityPopulation, "City population can not exceed country population");
        }
      }
    }
  }
}.validator(new CityValidator())final class LocationValidator implements AttributeValidator<Location> {
@Serial
private static final long serialVersionUID = 1;
@Override
public void validate(Location value) {
if (value.latitude < -90 || value.latitude > 90 || value.longitude < -180 || value.longitude > 180) {
throw new IllegalArgumentException("Invalid location coordinate: " + value);
}
}
}.validator(new LocationValidator()))Custom data types
When using a custom data type you must specify the columnClass of a ColumnDefinition and provide a Converter implementation.
Column<Location> LOCATION = TYPE.column("location", Location.class);record Location(double latitude, double longitude) implements Serializable {
@Override
public String toString() {
return "[" + latitude + "," + longitude + "]";
}
}|
Note
|
The custom type must be serializable for use in an application using the RMI connection. |
City.LOCATION.as()
        .column()
        .caption("Location")
        .converter(String.class, new LocationConverter())
        .comparator(new LocationComparator())
        .validator(new LocationValidator()))
private static final class LocationConverter implements Converter<Location, String> {
@Override
public String toColumn(Location location, Statement statement) {
return "POINT (" + location.longitude() + " " + location.latitude() + ")";
}
@Override
public Location fromColumn(String columnValue) {
String[] latLon = columnValue
.replace("POINT (", "")
.replace(")", "")
.split(" ");
return new Location(parseDouble(latLon[1]), parseDouble(latLon[0]));
}
}When using the HTTP connection in an application using a custom data type, you must implement a EntityObjectMapperFactory, providing a EntityObjectMapper instance containing a serializer/deserializer for the custom types.
public final class WorldObjectMapperFactory extends AbstractEntityObjectMapperFactory {

  private static final String LATITUDE = "latitude";
  private static final String LONGITUDE = "longitude";

  public WorldObjectMapperFactory() {
    super(World.DOMAIN);
  }

  @Override
  public EntityObjectMapper entityObjectMapper(Entities entities) {
    EntityObjectMapper objectMapper = super.entityObjectMapper(entities);
    objectMapper.addSerializer(Location.class, new LocationSerializer());
    objectMapper.addDeserializer(Location.class, new LocationDeserializer());
    objectMapper.parameter(Country.AVERAGE_CITY_POPULATION).set(String.class);
    objectMapper.returnType(Country.AVERAGE_CITY_POPULATION).set(Double.class);

    return objectMapper;
  }

  private static final class LocationSerializer extends StdSerializer<Location> {

    private LocationSerializer() {
      super(Location.class);
    }

    @Override
    public void serialize(Location location, JsonGenerator generator, SerializerProvider provider) throws IOException {
      generator.writeStartObject();
      generator.writeNumberField(LATITUDE, location.latitude());
      generator.writeNumberField(LONGITUDE, location.longitude());
      generator.writeEndObject();
    }
  }

  private static final class LocationDeserializer extends StdDeserializer<Location> {

    private LocationDeserializer() {
      super(Location.class);
    }

    @Override
    public Location deserialize(JsonParser parser, DeserializationContext ctxt) throws IOException, JacksonException {
      JsonNode node = parser.getCodec().readTree(parser);

      return new Location(node.get(LATITUDE).asDouble(), node.get(LONGITUDE).asDouble());
    }
  }
}
This EntityObjectMapperFactory must be exposed to the ServiceLoader.
src/main/java/module-info.java
  provides is.codion.framework.json.domain.EntityObjectMapperFactory
with is.codion.demos.world.domain.WorldObjectMapperFactory;Custom select queries
When an entity’s data cannot be adequately represented by a single table, you may need to customize the SELECT query used to populate entities. The EntitySelectQuery class provides this capability through its builder API.
|
Important
|
Custom select queries should be used as an escape hatch when other approaches have been considered and rejected. In most cases, creating a database view is the preferred solution - views can be optimized by database administrators, tested independently, and changed without modifying application code. Use EntitySelectQuery when views are impractical due to deployment constraints (such as migration risks in production environments) or when the query logic needs to be version-controlled with the application code.
|
When to use custom select queries
Consider using EntitySelectQuery when:
-
Database views are impractical - Deployment environments where schema migrations carry significant risk (offline systems, mission-critical applications)
-
Application-specific logic - Query patterns that are tightly coupled to application features and likely to evolve with the code
-
Rapid iteration - During development when query logic is still being refined and database schema changes would slow progress
-
Multi-table joins - Denormalizing data from related tables without creating a view
Consider using database views instead when:
-
Stable, foundational queries - Well-established query patterns that rarely change
-
Cross-application usage - Queries needed by multiple applications or reporting tools
-
DBA optimization - Complex queries requiring database-specific hints, indexes, or performance tuning
-
Production stability - Mission-critical systems where application code changes are safer than schema migrations
Custom FROM clause
The most common use case is customizing the FROM clause to join additional tables, allowing you to include columns from related tables without using foreign key references.
  // Domain API
  interface Album {
    EntityType TYPE = DOMAIN.entityType("store.album");

    Column<Long> ID = TYPE.longColumn("id");
    Column<String> TITLE = TYPE.stringColumn("title");
    // Further attributes skipped for brevity
  }

  interface Track {
    EntityType TYPE = DOMAIN.entityType("store.track");

    Column<Long> ID = TYPE.longColumn("id");
    Column<String> NAME = TYPE.stringColumn("name");
    Column<Long> ALBUM_ID = TYPE.longColumn("album_id");
    Column<String> ALBUM_TITLE = TYPE.stringColumn("album_title");
    Column<String> ARTIST_NAME = TYPE.stringColumn("artist_name");

    ForeignKey ALBUM_FK = TYPE.foreignKey("album_fk", ALBUM_ID, Album.ID);
  }

  // Domain implementation
  static class StoreDomain extends DomainModel {
    StoreDomain() {
      super(DOMAIN);
      // add(Album.TYPE.as(....
      add(Track.TYPE.as()
              .attributes(
                      Track.ID.as()
                              .primaryKey(),
                      Track.NAME.as()
                              .column()
                              .caption("Name")
                              // set the expression since the column 'NAME' is ambiguous
                              .expression("track.name"),
                      Track.ALBUM_ID.as()
                              .column(),
                      Track.ALBUM_FK.as()
                              .foreignKey(),
                      // These columns come from the joined tables,
                      Track.ARTIST_NAME.as()
                              .column()
                              .caption("Artist")
                              // set the expression since the column 'NAME' is ambiguous
                              .expression("artist.name")
                              .readOnly(true), // always mark denormalized values as read-only
                      Track.ALBUM_TITLE.as()
                              .column()
                              .caption("Album")
                              // No need for an expression, since 'TITLE' is unambiguous
                              .readOnly(true)) // always mark denormalized values as read-only
              // Custom FROM clause to join album and artist tables
              .selectQuery(EntitySelectQuery.builder()
                      .from("store.track " +
                              "JOIN store.album ON track.album_id = album.id " +
                              "JOIN store.artist ON album.artist_id = artist.id")
                      .build())
              .build());
    }
}|
Note
|
Always mark denormalized values as readOnly(true).
|
In this example, the Track entity includes album_title and artist_name columns by joining the album and artist tables. The framework automatically generates the SELECT and WHERE clauses based on the column definitions.
|
Note
|
The columns() method is rarely needed - the framework constructs the SELECT clause from column definitions using their expression() values, which typically works correctly. Only specify columns() when you need non-standard column expressions or aliases.
|
GROUP BY and aggregation
|
Note
|
For aggregated data on a single table, use Codion’s built-in grouped entity support with .groupBy(true) and .aggregate(true) at the column level. This provides type-safe aggregate column handling and automatic HAVING clause generation. Use EntitySelectQuery with groupBy() only when aggregating across complex joins of multiple tables.
|
The framework includes aggregate expressions from column definitions in the SELECT clause. Entities representing aggregated data should be marked as read-only.
Static WHERE clause
Use the where() method to apply a static filter that applies to all queries for this entity:
  interface AvailableTrack {
    EntityType TYPE = DOMAIN.entityType("store.available_track");

    Column<Long> ID = TYPE.longColumn("id");
    Column<String> TITLE = TYPE.stringColumn("title");
  }

  static class AvailableTracksDomain extends DomainModel {
    AvailableTracksDomain() {
      super(DOMAIN);
      add(AvailableTrack.TYPE.as()
              .attributes(
                      AvailableTrack.ID.as()
                              .primaryKey(),
                      AvailableTrack.TITLE.as()
                              .column()
                              .caption("Title"))
              // Static WHERE clause filters to available tracks only
              .selectQuery(EntitySelectQuery.builder()
                      .from("store.track")
                      .where("available = true")
                      .build())
              .readOnly(true)
              .build());
    }
}|
Important
|
The WHERE clause specified in EntitySelectQuery is always included and automatically combined (using AND) with any dynamic conditions from the Condition framework. This allows static filtering (like active = 1) to coexist with dynamic user-driven filters.
|
Best practices
When using custom select queries:
-
Mark columns as read-only - Columns from joined tables cannot be updated:
.readOnly(true) -
Avoid specifying columns - Let the framework generate the SELECT columns clause from column definitions unless you need special expressions
-
Watch out for ambiguous column names - Use
.expression()when column names become ambiguous due to joins -
Use table aliases carefully - Ensure column expressions in attribute definitions match the aliases used in your FROM clause
-
Test thoroughly - Custom queries bypass some framework validations, so verify behavior with actual data
-
Document the rationale - Include comments explaining why a custom query is used instead of a view
This pattern is useful when you frequently need data from related tables and want to avoid the overhead of foreign key lookups, while maintaining the option to use a database view in the future if the query becomes performance-critical.
Domain composition
Domain models can be composed of other domain models, allowing you to build modular, reusable domain definitions. This composition can be complete (including all entity definitions) or selective (cherry-picking specific entities or functionality).
Complete composition
The simplest form of composition is to include an entire domain model within another. This is done by passing a domain instance to the add() method in the constructor.
  // Base domain with product catalog
  static class Products extends DomainModel {

    static final DomainType DOMAIN = domainType("products");

    interface Product {
      EntityType TYPE = DOMAIN.entityType("products.product");

      Column<Integer> ID = TYPE.integerColumn("id");
      Column<String> NAME = TYPE.stringColumn("name");

      ReportType<Map<String, Object>, JasperPrint> REPORT = reportType("product_report");
    }

    public Products() {
      super(DOMAIN);
      add(product());
      add(Product.REPORT, classPathReport(Products.class, "product_report.jasper"));
    }

    EntityDefinition product() {
      return Product.TYPE.as()
              .attributes(
                      Product.ID.as()
                              .primaryKey(),
                      Product.NAME.as()
                              .column())
              .build();
    }
  }

  // Orders domain composes Products and adds customer/order entities
  static class Orders extends DomainModel {

    static final DomainType DOMAIN = domainType("orders");

    interface Customer {
      EntityType TYPE = DOMAIN.entityType("orders.customer");

      Column<Integer> ID = TYPE.integerColumn("id");
      Column<String> NAME = TYPE.stringColumn("first_name");
    }

    interface Order {
      EntityType TYPE = DOMAIN.entityType("orders.order");

      Column<Integer> ID = TYPE.integerColumn("id");
      Column<Integer> CUSTOMER_ID = TYPE.integerColumn("customer_id");
      Column<Integer> PRODUCT_ID = TYPE.integerColumn("product_id");

      ForeignKey CUSTOMER_FK = TYPE.foreignKey("customer_fk", CUSTOMER_ID, Customer.ID);
      // Foreign key referencing composed Products domain
      ForeignKey PRODUCT_FK = TYPE.foreignKey("product_fk", PRODUCT_ID, Product.ID);
    }

    public Orders() {
      super(DOMAIN);
      // Include entire Products domain
      add(new Products());
      add(customer(), order());
    }

    EntityDefinition customer() {
      return Customer.TYPE.as()
              .attributes(
                      Customer.ID.as()
                              .primaryKey(),
                      Customer.NAME.as()
                              .column())
              .build();
    }

    EntityDefinition order() {
      return Order.TYPE.as()
              .attributes(
                      Order.ID.as()
                              .primaryKey(),
                      Order.CUSTOMER_ID.as()
                              .column(),
                      Order.CUSTOMER_FK.as()
                              .foreignKey(),
                      Order.PRODUCT_ID.as()
                              .column(),
                      Order.PRODUCT_FK.as()
                              .foreignKey())
              .build();
    }
  }

  // Store domain composes Orders (which transitively includes Products)
  static class Store extends DomainModel {

    static final DomainType DOMAIN = domainType("store");

    interface Employee {
      EntityType TYPE = DOMAIN.entityType("store.employee");

      Column<Integer> ID = TYPE.integerColumn("id");
      Column<String> NAME = TYPE.stringColumn("first_name");
    }

    public Store() {
      super(DOMAIN);
      // Includes Orders domain (and transitively Products)
      add(new Orders());
      add(employee());
    }

    EntityDefinition employee() {
      return Employee.TYPE.as()
              .attributes(
                      Employee.ID.as()
                              .primaryKey(),
                      Employee.NAME.as()
                              .column())
              .build();
    }
  }
In this example:
-
The
Productsdomain defines a singleProductentity -
The
Ordersdomain includes the entireProductsdomain viaadd(new Products())and adds its ownCustomerandOrderentities -
The
Storedomain includes the entireOrdersdomain (which transitively includesProducts) and adds anEmployeeentity -
The resulting
Storedomain contains all entities from all three domains:Product,Customer,Order, andEmployee -
Foreign key references can cross domain boundaries -
Order.PRODUCT_FKreferencesProduct.IDfrom the composedProductsdomain
This hierarchical composition allows you to:
-
Build complex domains from smaller, focused components
-
Reuse domain definitions across different applications
-
Maintain clear separation of concerns between different parts of your model
-
Establish cross-domain relationships through foreign keys
Selective composition
For more fine-grained control, you can selectively include specific entities or functionality from other domains:
  // Website domain selectively includes entities and functionality from other domains
  static class StoreWebSite extends DomainModel {

    static final DomainType DOMAIN = domainType("website");

    public StoreWebSite() {
      super(DOMAIN);
      Entities orderEntities = new Orders().entities();
      // Selectively add specific entities from Orders domain
      add(orderEntities.definition(Product.TYPE));
      add(orderEntities.definition(Customer.TYPE));
      // Include only reports from Products domain
      addReports(new Products());
      // Include only functions from Store domain
      addFunctions(new Store());
      // Include only procedures from Orders domain
      addProcedures(new Orders());
    }
  }
Selective composition provides several specialized methods:
-
addEntities(Domain)- Includes only the entity definitions from another domain -
addReports(Domain)- Includes only the reports from another domain -
addFunctions(Domain)- Includes only the functions from another domain -
addProcedures(Domain)- Includes only the procedures from another domain
This approach is useful when:
-
Building a subset of functionality for specific clients (e.g., a public website vs. internal admin application)
-
Sharing database functions/procedures across different domain models
-
Creating lightweight domain models that reference only the entities they actually use
-
Avoiding circular dependencies between domain modules
|
Note
|
When selectively adding entity definitions, ensure that any foreign key references are satisfied - if an entity references another via foreign key, both entities must be included in the domain. |
Idempotent composition behavior
IMPORTANT: All composition methods (add(Domain), addEntities(), addReports(), addFunctions(), addProcedures()) silently skip entries that already exist. This idempotent behavior means:
-
You can safely compose domains that may have already been composed
-
Only the first occurrence of each type is included
-
Types cannot be overridden or replaced through composition
-
Duplicate composition is safe and has no effect
public class MyDomain extends DomainModel {
    public MyDomain() {
        super(DOMAIN_TYPE);

        // These can be called in any order without issues
        add(new SharedDomain());
        add(new AnotherDomain());  // May also include SharedDomain

        // Even if both domains above include the same entities,
        // only the first occurrence is registered
    }
}
This behavior contrasts with surgical addition of individual items:
// Surgical addition via add(EntityDefinition), add(ReportType, Report), etc.
// throws IllegalArgumentException if the type already exists
add(SomeEntity.TYPE.as()...build());  // First time: OK
add(SomeEntity.TYPE.as()...build());  // Second time: throws exception

// To check before surgical addition:
if (!entities().contains(SomeEntity.TYPE)) {
    add(domain.entities().definition(SomeEntity.TYPE));
}
When to use each approach:
-
Composition methods (
add(Domain),addEntities(), etc.) - For building layered domains where duplicate inclusion is expected and should be silently ignored -
Surgical addition (
add(EntityDefinition),add(ReportType, Report), etc.) - For direct entity/report/function/procedure definition where duplicates indicate a configuration error that should fail fast
Entities in action
Using the Entity class is rather straight forward.
EntityConnectionProvider connectionProvider = EntityConnectionProvider.builder()
        .domain(Petstore.DOMAIN)
        .user(User.parse("scott:tiger"))
        .build();

Entities entities = connectionProvider.entities();

EntityConnection connection = connectionProvider.connection();

//populate a new category
Entity insects = entities.entity(Category.TYPE)
        .with(Category.NAME, "Insects")
        .with(Category.DESCRIPTION, "Creepy crawlies")
        .build();

insects = connection.insertSelect(insects);

//populate a new product for the insect category
Entity smallBeetles = entities.entity(Product.TYPE)
        .with(Product.CATEGORY_FK, insects)
        .with(Product.NAME, "Small Beetles")
        .with(Product.DESCRIPTION, "Beetles on the smaller side")
        .build();

connection.insert(smallBeetles);

//see what products are available for the Cats category
Entity categoryCats = connection.selectSingle(Category.NAME.equalTo("Cats"));

List<Entity> cats = connection.select(Product.CATEGORY_FK.equalTo(categoryCats));

cats.forEach(System.out::println);
Unit Testing
Introduction
To unit test the CRUD operations on the domain model extend DomainTest.
The unit tests are run within a single transaction which is rolled back after the test finishes, so these tests are pretty much guaranteed to leave no junk data behind.
DomainTest
The DomainTest uses a default EntityFactory implementation which provides test entities with randomly created values, based on the value constraints set in the domain model. Extend this class and pass to the super constructor, overriding the required methods.
-
entity(ForeignKey) should return an entity instance for the given foreign key to use for a foreign key reference required for inserting the entity being tested.
-
entity(EntityType) should return an entity to use as basis for the unit test, that is, the entity that should be inserted, selected, updated and finally deleted.
-
modify(Entity) should simply leave the entity in a modified state so that it can be used for update test, since the database layer throws an exception if an unmodified entity is updated. If modify returns an unmodified entity, the update test is skipped.
To run the full CRUD test for a domain entity you need to call the test(EntityType entityType) method with the entity type as parameter. You can either create a single testDomain() method and call the test method in turn for each entityType or create a entityName method for each domain entity, as we do in the example below.
public class StoreTest extends DomainTest {

  private static final Store DOMAIN = new Store();

  public StoreTest() {
    super(DOMAIN, StoreEntityFactory::new);
  }

  @Test
  public void customer() {
    test(Customer.TYPE);
  }

  @Test
  public void address() {
    test(Address.TYPE);
  }

  @Test
  public void customerAddress() {
    test(CustomerAddress.TYPE);
  }

  private static final class StoreEntityFactory extends DefaultEntityFactory {

    private StoreEntityFactory(EntityConnection connection) {
      super(connection);
    }

    @Override
    public Optional<Entity> entity(ForeignKey foreignKey) {
      // See if the currently running test requires an ADDRESS entity
      if (foreignKey.referencedType().equals(Address.TYPE)) {
        return Optional.of(connection().insertSelect(entities().entity(Address.TYPE)
                .with(Address.ID, 21L)
                .with(Address.STREET, "One Way")
                .with(Address.CITY, "Sin City")
                .build()));
      }

      return super.entity(foreignKey);
    }

    @Override
    public Entity entity(EntityType entityType) {
      if (entityType.equals(Address.TYPE)) {
        // Initialize an entity representing a record in the
        // STORE.ADDRESS table, to use for testing
        return entities().entity(Address.TYPE)
                .with(Address.ID, 42L)
                .with(Address.STREET, "Street")
                .with(Address.CITY, "City")
                .with(Address.VALID, true)
                .build();
      }
      else if (entityType.equals(Customer.TYPE)) {
        // Initialize an entity representing a record in the
        // STORE.CUSTOMER table, to use for testing
        return entities().entity(Customer.TYPE)
                .with(Customer.ID, UUID.randomUUID().toString())
                .with(Customer.FIRST_NAME, "Robert")
                .with(Customer.LAST_NAME, "Ford")
                .with(Customer.ACTIVE, true)
                .build();
      }
      else if (entityType.equals(CustomerAddress.TYPE)) {
        return entities().entity(CustomerAddress.TYPE)
                .with(CustomerAddress.CUSTOMER_FK, entity(CustomerAddress.CUSTOMER_FK).orElseThrow())
                .with(CustomerAddress.ADDRESS_FK, entity(CustomerAddress.ADDRESS_FK).orElseThrow())
                .build();
      }

      return super.entity(entityType);
    }

    @Override
    public void modify(Entity entity) {
      if (entity.type().equals(Address.TYPE)) {
        entity.set(Address.STREET, "New Street");
        entity.set(Address.CITY, "New City");
      }
      else if (entity.type().equals(Customer.TYPE)) {
        // It is sufficient to change the value of a
        // single attribute, but the more, the merrier
        entity.set(Customer.FIRST_NAME, "Jesse");
        entity.set(Customer.LAST_NAME, "James");
        entity.set(Customer.ACTIVE, false);
      }
    }
  }
}1.1.2. Procedures & Functions
|
Note
|
All examples are from the Chinook demo |
Overview
Codion’s procedure and function support provides a type-safe abstraction for executing database operations that go beyond simple CRUD. While you can implement procedures and functions by directly calling database stored procedures, Codion encourages implementing business logic in Java using the EntityConnection API.
- ProcedureType
-
A typed identifier for a procedure that performs an operation without returning a value.
- DatabaseProcedure
-
The implementation interface for procedures, taking a connection and optional argument.
- FunctionType
-
A typed identifier for a function that performs an operation and returns a result.
- DatabaseFunction
-
The implementation interface for functions, taking a connection and optional argument, returning a result.
Both procedures and functions are:
-
Registered with the domain model
-
Executed via EntityConnection
-
Type-safe with compile-time checking
|
Tip
|
Transaction control should be external to procedures and functions. Let the caller manage transactions rather than implementing transaction control within the procedure or function itself. |
API Definition
Procedures and functions are defined as constants within the domain API, typically in the same interface that defines the related entity. The type parameters specify:
-
C- The connection type (usuallyEntityConnection) -
P- The parameter type (can beVoidfor no parameter) -
R- The return type (functions only)
Function with Custom Parameter Object
The RAISE_PRICE function demonstrates a function with a custom parameter record and collection return type:
FunctionType<EntityConnection, RaisePriceParameters, Collection<Entity>> RAISE_PRICE = functionType("chinook.raise_price");Implementation
Procedure and function implementations are registered with the domain model in the DomainModel constructor using the add() method. Implementations can be:
-
Inline lambda expressions for simple operations
-
Named classes for complex logic
-
Calls to database stored procedures/functions
Registration
Procedures and functions are registered alongside entity definitions:
public ChinookImpl() {
  super(DOMAIN);
  add(artist(), artistTag(), album(), employee(), customer(), genre(), preferences(), mediaType(),
          track(), invoice(), invoiceLine(), playlist(), playlistTrack(), artistRevenue());
  add(Customer.REPORT, export(classPathReport(ChinookImpl.class, "customer_report.jasper"), JRExport.SERIALIZED));
  add(Invoice.REPORT, export(classPathReport(ChinookImpl.class, "invoice.jasper"), JRExport.SERIALIZED));
  add(Track.RAISE_PRICE, new RaisePrice());
  add(Invoice.UPDATE_TOTALS, new UpdateTotals());
  add(Playlist.RANDOM_PLAYLIST, new CreateRandomPlaylist(entities()));
}
Function Implementation
RaisePrice
private static final class RaisePrice implements DatabaseFunction<EntityConnection, RaisePriceParameters, Collection<Entity>> {

  @Override
  public Collection<Entity> execute(EntityConnection connection,
                                    RaisePriceParameters parameters) {
    List<Entity> tracks = connection.select(where(Track.ID.in(parameters.trackIds()))
                    .attributes(Track.UNITPRICE)
                    .forUpdate()).stream()
            .map(track -> raisePrice(track, parameters.priceIncrease()))
            .toList();

    return connection.updateSelect(tracks);
  }

  private static Entity raisePrice(Entity track, BigDecimal priceIncrease) {
    track.set(Track.UNITPRICE, track.get(Track.UNITPRICE).add(priceIncrease));

    return track;
  }
}
Procedure Implementation
UpdateTotals
private static final class UpdateTotals implements DatabaseProcedure<EntityConnection, Collection<Long>> {

  @Override
  public void execute(EntityConnection connection,
                      Collection<Long> invoiceIds) {
    Collection<Entity> invoices =
            connection.select(where(Invoice.ID.in(invoiceIds))
                    .attributes(Invoice.TOTAL, Invoice.CALCULATED_TOTAL)
                    .forUpdate());

    connection.update(invoices.stream()
            .map(UpdateTotals::updateTotal)
            .filter(Entity::modified)
            .toList());
  }

  private static Entity updateTotal(Entity invoice) {
    invoice.set(Invoice.TOTAL, invoice.optional(Invoice.CALCULATED_TOTAL).orElse(BigDecimal.ZERO));

    return invoice;
  }
}
Complex Function Implementation
CreateRandomPlaylist
private static final class CreateRandomPlaylist implements DatabaseFunction<EntityConnection, RandomPlaylistParameters, Entity> {

  private final Entities entities;

  private CreateRandomPlaylist(Entities entities) {
    this.entities = entities;
  }

  @Override
  public Entity execute(EntityConnection connection,
                        RandomPlaylistParameters parameters) {
    List<Long> trackIds = randomTrackIds(connection, parameters.noOfTracks(), parameters.genres());

    return insertPlaylist(connection, parameters.playlistName(), trackIds);
  }

  private Entity insertPlaylist(EntityConnection connection, String playlistName,
                                List<Long> trackIds) {
    Entity playlist = connection.insertSelect(createPlaylist(playlistName));

    connection.insert(createPlaylistTracks(playlist.primaryKey().value(), trackIds));

    return playlist;
  }

  private Entity createPlaylist(String playlistName) {
    return entities.entity(Playlist.TYPE)
            .with(Playlist.NAME, playlistName)
            .build();
  }

  private List<Entity> createPlaylistTracks(Long playlistId, List<Long> trackIds) {
    return trackIds.stream()
            .map(trackId -> createPlaylistTrack(playlistId, trackId))
            .toList();
  }

  private Entity createPlaylistTrack(Long playlistId, Long trackId) {
    return entities.entity(PlaylistTrack.TYPE)
            .with(PlaylistTrack.PLAYLIST_ID, playlistId)
            .with(PlaylistTrack.TRACK_ID, trackId)
            .build();
  }

  private static List<Long> randomTrackIds(EntityConnection connection, int noOfTracks,
                                           Collection<Entity> genres) {
    return connection.select(Track.ID,
            where(Track.GENRE_FK.in(genres))
                    .orderBy(ascending(Track.RANDOM))
                    .limit(noOfTracks));
  }
}
Usage
Procedures and functions are executed via EntityConnection.execute(). The connection is passed to the implementation, which can use it for database operations.
Executing a Function
public final class RaisePriceTask implements ResultTaskHandler<Collection<Entity>> {

  private final BigDecimal increase;

  private RaisePriceTask(BigDecimal increase) {
    this.increase = increase;
  }

  @Override
  public Collection<Entity> execute() throws Exception {
    Collection<Long> trackIds = Entity.values(Track.ID, selection().items().get());

    return connection().execute(Track.RAISE_PRICE, new RaisePriceParameters(trackIds, increase));
  }

  @Override
  public void onResult(Collection<Entity> result) {
    replace(result);
  }
}
Executing a Procedure
private static Collection<Entity> updateTotals(Collection<Entity> invoiceLines, EntityConnection connection) {
  // Get the IDs of the invoices that need their totals updated
  Collection<Long> invoiceIds = distinct(InvoiceLine.INVOICE_ID, invoiceLines);
  // Execute the UPDATE_TOTALS procedure
  connection.execute(Invoice.UPDATE_TOTALS, invoiceIds);

  return invoiceLines;
}
Transactional Execution
Use EntityConnection.transaction() to execute procedures or functions, when multiple operations must succeed or fail together:
public Entity createRandomPlaylist(RandomPlaylistParameters parameters) {
  EntityConnection connection = connection();

  return transaction(connection, () -> connection.execute(Playlist.RANDOM_PLAYLIST, parameters));
}
HTTP/JSON Serialization
When using HTTP-based connections with JSON serialization enabled (via HttpEntityConnection), procedures and functions are executed by serializing arguments and return values as JSON. This requires registering the argument and return types with the EntityObjectMapper.
Why Type Registration is Needed
Jackson’s ObjectMapper requires target types to deserialize JSON. While FunctionType and ProcedureType carry generic type parameters, these are erased at runtime. The type registry provides this information to the JSON serialization layer.
A function called over a JSON connection therefore requires a registered return type, and fails with a message naming the function and the registration if it has none. Register a generic type via a TypeReference, new TypeReference<List<Track>>() {}, whose type arguments, unlike those of a Class, survive to the deserialization site.
EntityObjectMapperFactory
Create an EntityObjectMapperFactory implementation and define your procedure and function types:
public final class ChinookObjectMapperFactory extends AbstractEntityObjectMapperFactory {

  public ChinookObjectMapperFactory() {
    super(Chinook.DOMAIN);
  }

  @Override
  public EntityObjectMapper entityObjectMapper(Entities entities) {
    EntityObjectMapper objectMapper = super.entityObjectMapper(entities);
    objectMapper.parameter(Invoice.UPDATE_TOTALS).set(new TypeReference<>() {});
    objectMapper.parameter(Track.RAISE_PRICE).set(RaisePriceParameters.class);
    objectMapper.parameter(Playlist.RANDOM_PLAYLIST).set(RandomPlaylistParameters.class);
    objectMapper.parameter(Customer.REPORT).set(new TypeReference<>() {});
    objectMapper.returnType(Customer.REPORT).set(new TypeReference<>() {});
    objectMapper.returnType(Track.RAISE_PRICE).set(new TypeReference<>() {});
    objectMapper.returnType(Playlist.RANDOM_PLAYLIST).set(Entity.class);

    return objectMapper;
  }
}
Service Registration
Register your factory implementation using Java’s ServiceLoader mechanism in src/main/java/module-info.java:
provides is.codion.framework.json.domain.EntityObjectMapperFactory
        with is.codion.demos.chinook.domain.ChinookObjectMapperFactory;
or by creating a file at
src/main/resources/META-INF/services/is.codion.framework.json.domain.EntityObjectMapperFactory
Containing the fully qualified class name:
is.codion.demos.chinook.domain.ChinookObjectMapperFactory
HTTP Connection Protocol
When a procedure or function is executed via HTTP:
-
Client serializes the argument to JSON
-
HTTP POST sends the request to the server
-
Server deserializes using the registered argument type
-
Server executes the procedure/function
-
Server serializes the result (functions only)
-
Client deserializes using the registered return type
|
Note
|
Only HTTP connections with JSON serialization enabled require type registration. |
1.1.3. Conditions
Conditions in Codion are composable, strongly-typed query filters used to construct WHERE or HAVING clauses for select, update, and count operations. They are typically created via domain attributes (like Column or ForeignKey), and can be freely combined using logical operators like AND and OR.
The Chinook domain model is used in the examples below.
Condition
- Condition
-
Represents a query condition and contains factory methods for creating
Conditioninstances. - ColumnCondition
-
Represents a column based
Condition.
|
Note
|
Column and ForeignKey implement their respective condition factory interfaces (ColumnConditions and ForeignKeyConditions), so you can create Condition instances directly from them using fluent methods like .equalTo(), .isNull(), .in(), etc.
|
Condition allArtistsCondition =
        Condition.all(Artist.TYPE);

List<Entity> artists =
        connection.select(allArtistsCondition);
Condition liveAlbums =
Album.TITLE.likeIgnoreCase("%Live%");
List<Entity> albums =
connection.select(liveAlbums);Entity metallica =
connection.selectSingle(
Artist.NAME.equalTo("Metallica"));
Condition albums =
Album.ARTIST_FK.equalTo(metallica);- CustomCondition
-
A CustomCondition can be used when your logic can’t be expressed through column-based or foreign-key-based conditions — for example, when writing native SQL fragments or using DB-specific syntax.
List<Long> classicalPlaylistIds =
        List.of(42L, 43L);

Condition noneClassical =
        Track.NOT_IN_PLAYLIST.get(
                Playlist.ID, classicalPlaylistIds);

List<Entity> tracks =
connection.select(noneClassical);- Condition.Combination
-
Allows you to combine multiple conditions using logical
AND/ORoperators. Conditions can be nested to build expressive and complex query logic.
Condition liveMetallicaAlbums =
        Condition.and(liveAlbums, metallicaAlbums);

List<Entity> albums =
        connection.select(liveMetallicaAlbums);
Select, Update, Count
The EntityConnection.Select, EntityConnection.Update, and EntityConnection.Count classes each provide a .where(Condition) factory method returning a builder object for further configuration.
Select.where returns a Select.Builder.
Update.where returns a Update.Builder.
Count.where returns a Count.Builder
Select
- EntityConnection.Select
-
Represents a
WHEREcondition as well as extended configuration specifically for selecting, such as orderBy, limit, offset and referenceDepth.
List<Entity> albums =
        connection.select(Select.where(liveMetallicaAlbums)
                .orderBy(OrderBy.descending(Album.NUMBER_OF_TRACKS)));
Update
- EntityConnection.Update
-
Represents a
WHEREcondition as well as the columns and values for updating one or more entities.
int updateCount =
        connection.update(Update.where(liveMetallicaAlbums)
                .set(Album.COVER, null));
Count
- EntityConnection.Count
-
Represents a
WHEREcondition specifically for counting records.
Count countAlbumsWithCover =
        Count.where(Album.COVER.isNotNull());

int count = connection.count(countAlbumsWithCover);
1.1.4. EntityConnection
Codion’s EntityConnection is the primary interface for executing database operations — including querying, modifying, transaction control, calling procedures and functions and filling reports. It exposes a small, explicit API for working with Entity instances and makes no assumptions about your database engine or schema design.
Codion’s database layer is intentionally minimal. It does not perform SQL joins, nor does it rely on DB-specific features — except where needed for primary key generation via Generator strategies.
Instead, it gives you predictable, queryable access to individual Entity objects and their associated foreign keys — controlled through a feature called reference depth.
The Chinook domain model is used in the examples below.
Selecting
By default, when you select a row using EntityConnection you receive an Entity instance along with a single level of foreign key references, that is a so-called reference depth of one. This means that selecting a track you get all the entities referenced via foreign keys as well.
The reference depth can be configured on a foreign key basis when defining entities. A reference depth of zero means that no foreign key references are fetched, and a value larger than one means that not only is the foreign key reference fetched but also its foreign key references, until the defined depth has been reached. A negative reference depth means no limit with the whole dependency graph fetched. This limiting of foreign key reference depth can be turned off, meaning the full reference graph is always fetched, via a system property:
codion.db.limitReferenceDepth=falseor the LocalEntityConnection.LIMIT_REFERENCE_DEPTH configuration value:
LocalEntityConnection.LIMIT_REFERENCE_DEPTH.set(false);or on a connection instance via limitReferenceDepth(boolean limitReferenceDepth)
connection.limitForeignKeyReferenceDepth(false);You can specify that the foreign key should not be populated by default by using a reference depth of 0.
InvoiceLine.INVOICE_FK.as()
        .foreignKey()
        .referenceDepth(0)
        .hidden(true),
Or you can specify that the foreign key should be populated along with one more level by using a reference depth of 2.
Track.ALBUM_FK.as()
        .foreignKey()
        .referenceDepth(2)
        .include(Album.ARTIST_FK, Album.TITLE),
EntityConnection connection = connectionProvider.connection();
List<Entity> tracks = connection.select(Track.NAME.like("Bad%"));
Entity track = tracks.get(0);
Entity genre = track.get(Track.GENRE_FK);
Entity mediaType = track.get(Track.MEDIATYPE_FK);
Entity album = track.get(Track.ALBUM_FK);
// reference depth for Track.ALBUM_FK is 2, which means two levels of
// references are fetched, so we have the artist here as well
Entity artist = album.get(Album.ARTIST_FK);The reference depth can also be configured on a query basis, either for the whole query or one or more foreign keys.
EntityConnection connection = connectionProvider.connection();

List<Entity> tracks = connection.select(
        Select.where(Track.NAME.like("Bad%"))
                .referenceDepth(0));

Entity track = tracks.get(0);

// reference depth is 0, so this 'genre' instance is null
Entity genre = track.get(Track.GENRE_FK);

// using track.entity(Track.GENRE_FK) you get a 'genre'
// instance containing only the primary key, since the condition
// reference depth limit prevented it from being selected
genre = track.entity(Track.GENRE_FK);
EntityConnection connection = connectionProvider.connection();
List<Entity> tracks = connection.select(
Select.where(Track.NAME.like("Bad%"))
.referenceDepth(Track.ALBUM_FK, 0));
Entity track = tracks.get(0);
Entity genre = track.get(Track.GENRE_FK);
Entity mediaType = track.get(Track.MEDIATYPE_FK);
// this 'album' instance is null, since the condition
// reference depth limit prevented it from being selected
Entity album = track.get(Track.ALBUM_FK);
// using track.entity(Track.ALBUM_FK) you get an 'album'
// instance containing only the primary key, since the condition
// reference depth limit prevented it from being selected
album = track.entity(Track.ALBUM_FK);Reference Depth Values
-
0 – Do not fetch foreign key references
-
1 (default) – Fetch directly referenced foreign key entities
-
N – Fetch up to N levels deep
-
-1 – Fetch entire reference graph (no limit)
The N+1 problem
Selecting tracks performs four queries (track + album, mediatype and genre), but that number of queries is the same whether you select one or a thousand tracks.
Selecting entities
EntityConnection connection = connectionProvider.connection();

List<Entity> artists = connection.select(
        Artist.NAME.like("The %"));

List<Entity> nonLiveAlbums = connection.select(and(
        Album.ARTIST_FK.in(artists),
        Album.TITLE.notLikeIgnoreCase("%live%")));

Entity aliceInChains = connection.selectSingle(
        Artist.NAME.equalTo("Alice In Chains"));

List<Entity> aliceInChainsAlbums = connection.select(
        Album.ARTIST_FK.equalTo(aliceInChains));

Entity metal = connection.selectSingle(
        Genre.NAME.equalToIgnoreCase("metal"));

List<Entity> metalTracks = connection.select(
        Select.where(Track.GENRE_FK.equalTo(metal))
                .orderBy(descending(Track.NAME)));

Entity metallica = connection.selectSingle(
        Select.where(Artist.NAME.equalTo("Metallica"))
                .exclude(Artist.NUMBER_OF_ALBUMS, Artist.NUMBER_OF_TRACKS));

Long classicalPlaylistId = connection.select(
        Playlist.ID, Playlist.NAME.equalTo("Classical")).get(0);

List<Entity> nonClassicalTracks = connection.select(
Track.NOT_IN_PLAYLIST.get(Playlist.ID, classicalPlaylistId));EntityConnection connection = connectionProvider.connection();
Entities entities = connection.entities();
Entity.Key key = entities.primaryKey(Artist.TYPE, 42L);
Entity artist = connection.select(key);EntityConnection connection = connectionProvider.connection();
Entities entities = connection.entities();
Entity.Key key42 = entities.primaryKey(Artist.TYPE, 42L);
Entity.Key key43 = entities.primaryKey(Artist.TYPE, 43L);
Collection<Entity> artists = connection.select(List.of(key42, key43));Selecting values
For selecting the values of a single column.
EntityConnection connection = connectionProvider.connection();

List<String> customerUsStates =
        connection.select(Customer.STATE,
                Customer.COUNTRY.equalTo("USA"));
iterator
For iterating over a result set instead of loading it entirely into memory. This is useful when processing large result sets or when memory is constrained.
|
Important
|
When using remote connections, each call to hasNext() and next() involves a network round-trip. For large result sets, consider using select() instead to load entities in a single batch. Iterators over remote connections that remain idle for longer than the configured timeout (codion.db.remote.iteratorTimeout, default 5 minutes) are automatically closed server-side.
|
|
Note
|
iterator() is not supported on HTTP based connections, and throws UnsupportedOperationException.
|
EntityConnection connection = connectionProvider.connection();

try (EntityResultIterator iterator =
             connection.iterator(Customer.EMAIL.isNotNull())) {
  while (iterator.hasNext()) {
    System.out.println(iterator.next().get(Customer.EMAIL));
  }
}
dependencies
For selecting entities that depend on a set of entities via foreign keys.
EntityConnection connection = connectionProvider.connection();

List<Entity> employees = connection.select(all(Employee.TYPE));

Map<EntityType, Collection<Entity>> dependencies = connection.dependencies(employees);

Collection<Entity> customersDependingOnEmployees = dependencies.get(Customer.TYPE);Modifying
insert
For inserting rows.
EntityConnection connection = connectionProvider.connection();

Entities entities = connection.entities();

Entity myBand = entities.entity(Artist.TYPE)
        .with(Artist.NAME, "My Band")
        .build();

myBand = connection.insertSelect(myBand);

Entity firstAlbum = entities.entity(Album.TYPE)
        .with(Album.ARTIST_FK, myBand)
        .with(Album.TITLE, "First album")
        .build();
Entity secondAlbum = entities.entity(Album.TYPE)
        .with(Album.ARTIST_FK, myBand)
        .with(Album.TITLE, "Second album")
        .build();

Collection<Entity.Key> albumKeys =
        connection.insert(List.of(firstAlbum, secondAlbum));
update
For updating one or more entity instances.
|
Important
|
These methods throw an exception if any of the entities is unmodified. |
EntityConnection connection = connectionProvider.connection();

Entity myBand = connection.selectSingle(
        Artist.NAME.equalTo("My Band"));

myBand.set(Artist.NAME, "Proper Name");

myBand = connection.updateSelect(myBand);

List<Entity> customersWithoutPhoneNo =
        connection.select(Customer.PHONE.isNull());

customersWithoutPhoneNo.forEach(customer ->
        customer.set(Customer.PHONE, "<none>"));

connection.update(customersWithoutPhoneNo);The framework performs optimistic locking during updates using the methods above. This is done by selecting the entities being updated FOR UPDATE (when supported by the underlying database) and comparing all original values to the current row values, throwing an exception if one or more values differ or the row is missing. Optimistic locking is field-based: any difference between original and current values causes an update to fail.
entity.set(Album.TITLE, "New Title");
connection.update(entity); // fails if the row has been changed by someone else|
Note
|
Excluding attributes when selecting entities results in those attributes (lazy loaded ones for example) not being included when optimistic locking is performed on subsequent updates, since optimistic locking relies on the original attribute value being available for making a comparison. |
Optimistic locking can be turned off system-wide using a system property:
codion.db.optimisticLocking=falseor by using the LocalEntityConnection.OPTIMISTIC_LOCKING configuration value:
LocalEntityConnection.OPTIMISTIC_LOCKING.set(false);or on a connection instance via optimisticLocking():
connection.optimisticLocking(false);or on a per-entity basis via EntityDefinition.Builder.optimisticLocking(false).
For updating by condition.
EntityConnection connection = connectionProvider.connection();

connection.update(
        Update.where(Artist.NAME.equalTo("Azymuth"))
                .set(Artist.NAME, "Azymouth"));

int updateCount = connection.update(
        Update.where(Customer.EMAIL.isNull())
                .set(Customer.EMAIL, "<none>"));
delete
For deleting existing rows.
EntityConnection connection = connectionProvider.connection();

Entity aquaman = connection.selectSingle(
        Artist.NAME.equalTo("Aquaman"));

List<Long> aquamanAlbumIds = connection.select(Album.ID,
        Album.ARTIST_FK.equalTo(aquaman));

List<Long> aquamanTrackIds = connection.select(Track.ID,
        Track.ALBUM_ID.in(aquamanAlbumIds));

int playlistTracksDeleted = connection.delete(
        PlaylistTrack.TRACK_ID.in(aquamanTrackIds));

int tracksDeleted = connection.delete(
        Track.ALBUM_ID.in(aquamanAlbumIds));

int albumsDeleted = connection.delete(
Album.ARTIST_FK.equalTo(aquaman));EntityConnection connection = connectionProvider.connection();
Entity audioslave = connection.selectSingle(
Artist.NAME.equalTo("Audioslave"));
List<Entity> albums = connection.select(
Album.ARTIST_FK.equalTo(audioslave));
List<Entity> tracks = connection.select(
Track.ALBUM_FK.in(albums));
List<Entity> playlistTracks = connection.select(
PlaylistTrack.TRACK_FK.in(tracks));
List<Entity> invoiceLines = connection.select(
InvoiceLine.TRACK_FK.in(tracks));
List<Entity> toDelete = new ArrayList<>();
toDelete.addAll(invoiceLines);
toDelete.addAll(playlistTracks);
toDelete.addAll(tracks);
toDelete.addAll(albums);
toDelete.add(audioslave);
connection.delete(Entity.primaryKeys(toDelete));Procedures & Functions
-
Functions return a single value.
-
Procedures perform logic with no return value.
-
Both are executed through the same API:
EntityConnection.execute(…).
Function
EntityConnection connection = connectionProvider.connection();

List<Long> trackIds = List.of(123L, 1234L);
BigDecimal priceIncrease = BigDecimal.valueOf(0.1);

Collection<Entity> modifiedTracks =
        connection.execute(Track.RAISE_PRICE,
                new RaisePriceParameters(trackIds, priceIncrease));

String playlistName = "Random playlist";
int numberOfTracks = 100;
Collection<Entity> playlistGenres = connection.select(
        Genre.NAME.in("Classical", "Soundtrack"));

Entity playlist = connection.execute(Playlist.RANDOM_PLAYLIST,
new RandomPlaylistParameters(playlistName, numberOfTracks, playlistGenres));Reporting
Transaction control
Transactional
Codion encourages declarative transaction boundaries using lambdas or anonymous classes. This ensures transaction safety (commit/rollback) with minimal boilerplate.
Most use cases are covered by:
-
EntityConnection.transaction(EntityConnection, Transactional transactional) – no return value
-
EntityConnection.transaction(EntityConnection, TransactionalResult transactional) – with return value
These methods perform a commit on success and rollback on failure.
|
Note
|
If a transaction is already open on the connection, the code is executed within the existing transaction without starting a new one. The outermost caller controls the transaction boundary. |
EntityConnection connection = connectionProvider.connection();

EntityConnection.transaction(connection, () -> {
  Entities entities = connection.entities();

  Entity artist = entities.entity(Artist.TYPE)
          .with(Artist.NAME, "The Band")
          .build();
  artist = connection.insertSelect(artist);

  Entity album = entities.entity(Album.TYPE)
          .with(Album.ARTIST_FK, artist)
          .with(Album.TITLE, "The Album")
          .build();

  connection.insert(album);
});
Same example using an anonymous class
EntityConnection connection = connectionProvider.connection();

Transactional transactional = new Transactional() {

  @Override
  public void execute() {
    Entities entities = connection.entities();

    Entity artist = entities.entity(Artist.TYPE)
            .with(Artist.NAME, "The Band")
            .build();
    artist = connection.insertSelect(artist);

    Entity album = entities.entity(Album.TYPE)
            .with(Album.ARTIST_FK, artist)
            .with(Album.TITLE, "The Album")
            .build();

    connection.insert(album);
  }
};

EntityConnection.transaction(connection, transactional);EntityConnection connection = connectionProvider.connection();
Entity.Key albumKey = EntityConnection.transaction(connection, () -> {
Entities entities = connection.entities();
Entity artist = entities.entity(Artist.TYPE)
.with(Artist.NAME, "The Band")
.build();
artist = connection.insertSelect(artist);
Entity album = entities.entity(Album.TYPE)
.with(Album.ARTIST_FK, artist)
.with(Album.TITLE, "The Album")
.build();
return connection.insert(album);
});Same example using an anonymous class
EntityConnection connection = connectionProvider.connection();

TransactionalResult<Entity.Key> transactional = new TransactionalResult<Entity.Key>() {

  @Override
  public Entity.Key execute() {
    Entities entities = connection.entities();

    Entity artist = entities.entity(Artist.TYPE)
            .with(Artist.NAME, "The Band")
            .build();
    artist = connection.insertSelect(artist);

    Entity album = entities.entity(Album.TYPE)
            .with(Album.ARTIST_FK, artist)
            .with(Album.TITLE, "The Album")
            .build();

    return connection.insert(album);
  }
};

Entity.Key albumKey = EntityConnection.transaction(connection, transactional);
Transaction
For a more fine-grained transaction control and the ability to rollback, transactions can be started and ended manually, note that this is more complex and thereby error-prone and should not be used unless the method described above does not work for your use-case.
// This example demonstrates full manual transaction control, including rollback safety
// and protection against leaving transactions open in the presence of unexpected failures.
EntityConnection connection = connectionProvider.connection();

Entities entities = connection.entities();

// It is very important to start the transaction here, outside the try/catch block,
// otherwise, trying to start a transaction on a connection already with an open transaction
// (which is a bug in itself), would cause the current transaction to be rolled back
// in the Exception catch block, which is probably not what you want.
connection.startTransaction();
try {
  Entity artist = entities.entity(Artist.TYPE)
          .with(Artist.NAME, "The Band")
          .build();
  connection.insert(artist);

  Entity album = entities.entity(Album.TYPE)
          .with(Album.ARTIST_FK, artist)
          .with(Album.TITLE, "The Album")
          .build();
  connection.insert(album);

  connection.commitTransaction();
}
catch (DatabaseException e) {
  connection.rollbackTransaction();
  throw e;
}
catch (RuntimeException e) {
  // It is a good practice, but not necessary, to catch RuntimeException,
  // in order to not wrap a RuntimeException in another RuntimeException.
  connection.rollbackTransaction();
  throw e;
}
catch (Exception e) {
  // Always include a catch for the top level Exception, otherwise unexpected
  // exceptions may cause a transaction to remain open, which is a very serious bug.
  connection.rollbackTransaction();
  throw new RuntimeException(e);
}
catch (Throwable e) {
  // It's rare, but including a catch for Throwable ensures rollback safety
  // even in the face of serious errors (e.g., OutOfMemoryError, LinkageError).
  connection.rollbackTransaction();
  throw e;
}
Query cache
cacheQueries() enables query result caching on the connection until the returned QueryCache is closed. While active, identical selects return the cached result, which is intended for short-lived, read-only scopes, such as application or model initialization, where the same lookup entities would otherwise be selected repeatedly.
EntityConnection connection = connectionProvider.connection();

try (QueryCache cache = connection.cacheQueries()) {
  // Each of these selects hits the database once, the repeated
  // ones are served from the cache, as would the identical selects
  // performed while initializing a set of combo box models.
  connection.select(Genre.NAME.equalTo("Metal"));
  connection.select(Genre.NAME.equalTo("Metal"));

  connection.select(MediaType.NAME.equalTo("MPEG audio file"));
  connection.select(MediaType.NAME.equalTo("MPEG audio file"));
}
// The cache is cleared and caching disabled here, also in case of an exception
A cached result is shared by every cache hit, so it is handed out as an unmodifiable list of immutable entities, along with their foreign key references, preventing one caller from modifying what the next one receives.
Use entity.copy().mutable() to obtain a modifiable copy.
Note that the cache is not invalidated by inserts, updates, deletes or transaction rollback, that selects for update always bypass the cache and return mutable entities, and that these scopes do not nest.
LocalEntityConnection
An EntityConnection implementation based on a direct connection to the database, provides access to the underlying JDBC connection.
1.1.5. EntityConnectionProvider
An EntityConnectionProvider is a factory and lifecycle manager for EntityConnection instances — ensuring reliable access to the database regardless of protocol (JDBC, RMI, HTTP).
In most cases EntityConnections are retrieved from a EntityConnectionProvider, which is responsible for establishing a connection to the underlying database. The EntityConnectionProvider class is central to the framework and is a common constructor parameter in classes requiring database access.
Each call to connection() returns the current active connection. If the existing connection is invalid (e.g., due to network failure or server restart), a new one is transparently established. If the EntityConnectionProvider is unable to connect to the underlying database or server, connection() throws an exception.
|
Important
|
Do NOT cache the EntityConnection instance. The instance returned by connection() should only be kept for a short time, such as a local variable or method parameter since it can become invalid and thereby unusable. Always use connection() to make sure you have a healthy EntityConnection. |
LocalEntityConnectionProvider
Provides a connection based on a local JDBC connection.
Database.URL.set("jdbc:h2:mem:h2db");
Database.INIT_SCRIPTS.set("src/main/sql/create_schema.sql");

Database database = Database.instance();

LocalEntityConnectionProvider connectionProvider =
        LocalEntityConnectionProvider.builder()
                .database(database)
                .domain(new ChinookImpl())
                .user(User.parse("scott:tiger"))
                .build();

LocalEntityConnection entityConnection =
        connectionProvider.connection();

// the underlying JDBC connection is available in a local connection
Connection connection = entityConnection.connection();

connectionProvider.close();
RemoteEntityConnectionProvider
Provides a connection based on a remote RMI connection.
RemoteEntityConnectionProvider connectionProvider =
        RemoteEntityConnectionProvider.builder()
                .domain(Chinook.DOMAIN)
                .user(User.parse("scott:tiger"))
                .hostname("localhost")
                .registryPort(1099)
                .build();

EntityConnection entityConnection =
        connectionProvider.connection();

Entities entities = entityConnection.entities();

Entity track = entityConnection.select(entities.primaryKey(Track.TYPE, 42L));

connectionProvider.close();
HttpEntityConnectionProvider
Provides a connection based on a remote HTTP connection.
HttpEntityConnectionProvider connectionProvider =
        HttpEntityConnectionProvider.builder()
                .domain(Chinook.DOMAIN)
                .user(User.parse("scott:tiger"))
                .hostname("localhost")
                .port(8080)
                .https(false)
                .build();

EntityConnection entityConnection = connectionProvider.connection();

Entities entities = entityConnection.entities();

entityConnection.select(entities.primaryKey(Track.TYPE, 42L));

connectionProvider.close();
For more information see HTTP Connections in the technical docs.
Customizing the Description
The connection provider description is displayed in the application frame title (e.g., "Chinook - SCOTT@SERVER@HOST") and can be retrieved via EntityConnectionProvider.description().
Default Descriptions
Each connection provider type has its own default description:
-
LocalEntityConnectionProvider - Database name in uppercase (e.g., "H2DB")
-
RemoteEntityConnectionProvider - Server name and hostname (e.g., "SERVER@HOST")
-
HttpEntityConnectionProvider - Hostname or URL (e.g., "example.com")
Overriding the Description
You can override the default description using the configuration property:
-Dis.codion.framework.db.EntityConnectionProvider.description=MyDescriptionThis is particularly useful when:
-
Using HTTP connections with long URLs
-
Hiding production server details from the frame title
-
Providing a more user-friendly connection identifier
java -Dis.codion.framework.db.EntityConnectionProvider.description=production \
     -jar myapp-client.jar
Result: MyApp - SCOTT@PRODUCTION instead of MyApp - SCOTT@SERVER@PROD-DB-01.COMPANY.COM
1.1.6. HTTP & JSON clients
A client connecting over HTTP (see HttpEntityConnectionProvider) uses one of two wire formats: JSON, the default, or Java serialization. The serialization format requires the exchanged classes on both ends and a deserialization filter; the JSON format exchanges typed JSON documents — entities, conditions, error envelopes — and is the format for clients outside the trusted network, such as mobile clients. This chapter covers what a JSON client must provide: its domain, and JSON type registrations for the database operations it calls.
The format is selected via the connection provider builder or the codion.client.http.json configuration value (default true):
HttpEntityConnectionProvider.builder()
        .json(true)
        ...
Supplying the domain
A client provides its domain model to the connection builder via HttpEntityConnectionProvider.Builder.domain(Domain). Without it, the client fetches the entity definitions from the server on connect — that reply is the one JSON-mode response carrying a Java-serialized object. A client with an injected domain skips the round trip and, if it avoids Java-serialized report results (see below), performs no Java deserialization at all.
The choice carries a trade-off in the other direction as well. The domain implementation contains the database-level details — physical table and column names (the domain API constants may well be aliases), column expressions, custom select and subquery SQL — and injecting it packages all of that inside the client, where it can be read out of the distributed application. The entity definitions served by the entities route deliberately omit these: the database-level fields are transient, so a client that fetches its definitions sees only the domain API surface.
-
A client you distribute within your own walls — the typical desktop deployment — injects the domain; the implementation details were never secret from those users.
-
For a client distributed beyond them, injecting means treating your schema and query SQL as public. If that is unacceptable, have the client fetch its definitions and accept the single Java-deserialized response, from the server it authenticated to, over TLS.
Registering operation types
Entities, keys and conditions serialize out of the box. The parameter and return values of database procedures, functions and reports are domain-specific types, so the domain registers how they travel, in an EntityObjectMapperFactory:
public final class ChinookObjectMapperFactory extends AbstractEntityObjectMapperFactory {

  public ChinookObjectMapperFactory() {
    super(Chinook.DOMAIN);
  }

  @Override
  public EntityObjectMapper entityObjectMapper(Entities entities) {
    EntityObjectMapper objectMapper = super.entityObjectMapper(entities);
    objectMapper.parameter(Invoice.UPDATE_TOTALS).set(new TypeReference<>() {});
    objectMapper.parameter(Track.RAISE_PRICE).set(RaisePriceParameters.class);
    objectMapper.parameter(Playlist.RANDOM_PLAYLIST).set(RandomPlaylistParameters.class);
    objectMapper.parameter(Customer.REPORT).set(new TypeReference<>() {});
    objectMapper.returnType(Customer.REPORT).set(new TypeReference<>() {});
    objectMapper.returnType(Track.RAISE_PRICE).set(new TypeReference<>() {});
    objectMapper.returnType(Playlist.RANDOM_PLAYLIST).set(Entity.class);

    return objectMapper;
  }
}
Registration is mandatory for the operations a JSON client calls — a function with an unregistered return type fails at the first call, with a message naming the function and the registration site. Both client and server resolve these registrations from the same factory, so there is one source of truth and no type name ever crosses the wire.
The factory is discovered via the ServiceLoader, so it must be registered as a service provider — in module-info.java for the module path, and in META-INF/services for clients running on the classpath, Android included, where JPMS provides clauses are inert.
|
Tip
|
Keeping the mapper factory in its own module, depending only on the domain API, lets clients that need it (HTTP/JSON) include it while others (local, RMI) skip it — and keeps Jackson off the classpaths that don’t need it. |
Errors
Over JSON, an error response is a typed envelope, never a serialized exception. The client reconstructs the exception from a closed set of error kinds — nothing on the wire names a class — so the exceptions application code catches are the same as over any other connection type: ReferentialIntegrityException, EntityModifiedException with the conflicting entity, UniqueConstraintException, ReportException and so on, with their messages intact. An error the server does not recognize yields a generic message and a correlation id identifying the server log entry.
Reports
A report result travels as JSON like a function result, using a registered return type — a report exported to PDF on the server simply arrives as byte[]. A client displaying reports with the JasperReports viewer can keep working with JasperPrint over a JSON connection via JRExport.SERIALIZED and JasperReports.loadPrint() — see Reporting with JasperReports.
Deployment
Exposing the HTTP service outside a trusted network is a deployment decision with security consequences — authentication, authorization, rate limiting, TLS. See Internet deployment before opening the port.
1.2. Framework Model
1.2.1. Framework Model Architecture
The model layer is a complete, UI-independent application: data retrieval, editing, validation, selection, master-detail coordination and all associated state live here, exposed through the framework’s reactive classes. The UI layer renders models — it does not extend them with logic. Nothing in the model layer depends on a UI toolkit, which has two practical consequences: application logic is unit-testable without showing a window, and the same models can drive different client technologies.
The pieces
An EntityModel is the composition root for a single entity type: an edit model (wrapping the editor — the write path), usually a table model (with its query model — the read path), and any detail models.
    SwingEntityModel customerModel = new SwingEntityModel(Customer.TYPE, connectionProvider);
    SwingEntityModel invoiceModel = new SwingEntityModel(Invoice.TYPE, connectionProvider);

    // Establish master-detail relationship
    customerModel.detail().add(invoiceModel);
Master-detail relationships are expressed by linking models, to arbitrary depth — a detail model’s query condition tracks its master’s selection automatically:
    // Three-level hierarchy
    SwingEntityModel customerModel = new SwingEntityModel(Customer.TYPE, connectionProvider);
    SwingEntityModel invoiceModel = new SwingEntityModel(Invoice.TYPE, connectionProvider);
    SwingEntityModel invoiceLineModel = new SwingEntityModel(InvoiceLine.TYPE, connectionProvider);

    customerModel.detail().add(invoiceModel);
    invoiceModel.detail().add(invoiceLineModel);

    // Selection cascades down the hierarchy
    Entity customer = getCustomer(connectionProvider);
    customerModel.tableModel().selection().item().set(customer);
    // Invoices for selected customer are loaded
    Entity invoice = invoiceModel.tableModel().items().included().get(0);
    invoiceModel.tableModel().selection().item().set(invoice);
    // Invoice lines for selected invoice are loaded
See Model linking for the linking configuration — what happens on selection, insert, update and delete.
The reactive fabric
Everything a model knows is exposed as an observable Value, State or Event — which is all a UI needs to render it, and all application logic needs to react to it:
    SwingEntityModel customerModel = new SwingEntityModel(Customer.TYPE, connectionProvider);
    SwingEntityEditModel editModel = customerModel.editModel();
    SwingEntityTableModel tableModel = customerModel.tableModel();

    // Edit model states
    State updateEnabled = editModel.editor().settings().updateEnabled();
    State updateMultipleEnabled = editModel.editor().settings().updateMultipleEnabled();
    ObservableState modified = editModel.editor().entity().modified();

    // Table model states
    ObservableState refreshing = tableModel.items().refresher().active();
    ObservableState hasSelection = tableModel.selection().empty().not();

    // Combine states
    ObservableState canDelete = State.and(hasSelection, refreshing.not());
Entity values are observable per attribute, so values can be bound — to input components, or across models:
    SwingEntityModel trackModel = new SwingEntityModel(Track.TYPE, connectionProvider);
    SwingEntityEditModel editModel = trackModel.editModel();

    // Bind edit model value to UI state
    EditorValue<BigDecimal> priceValue = editModel.editor().value(Track.UNITPRICE);
    ObservableState priceValid = editModel.editor().value(Track.UNITPRICE).valid();

    // React to value changes
    priceValue.addConsumer(this::updateTotalPrice);

    // React to value edits
    priceValue.edited().addConsumer(newPrice -> System.out.println("Price: " + newPrice));
    priceValid.when(false)
            .addListener(() -> System.out.println("Invalid price: " + priceValue.get()));
Where application logic belongs
Logic belongs in the models — reacting to edits, persistence events and selection there means it works the same regardless of which UI (or test) drives it:
    SwingEntityModel invoiceLineModel = new SwingEntityModel(InvoiceLine.TYPE, connectionProvider);

    // Update summary when details change
    PersistEvents events = invoiceLineModel.editor().events();
    events.after().insert().addConsumer(entities -> updateInvoiceTotal());
    events.after().update().addConsumer(entities -> updateInvoiceTotal());
    events.after().delete().addConsumer(entities -> updateInvoiceTotal());
The chinook demo’s models are the reference examples: value dependencies and custom persistence in InvoiceLineEditModel, value propagation in InvoiceEditModel, selection-scoped operations in TrackTableModel — each documented in the chapters that follow.
|
Note
|
Since models are UI-free, they are constructed and exercised directly in unit tests — create the model with a test connection provider, edit, insert, assert. |
1.2.2. EntityModel
The application model layer consists of the EntityModel class and its associates; the EntityTableModel, which provides a table representation of entities and the EntityEditModel which provides the CRUD operations.
An EntityModel always contains an EntityEditModel instance and usually contains a EntityTableModel as well. A default edit model implementation is created automatically by the EntityTableModel if one is not supplied via a constructor argument.
public class AddressModel extends SwingEntityModel {

  public AddressModel(EntityConnectionProvider connectionProvider) {
    super(Address.TYPE, connectionProvider);
  }
}
public class CustomerAddressModel extends SwingEntityModel {
public CustomerAddressModel(EntityConnectionProvider connectionProvider) {
super(new CustomerAddressTableModel(connectionProvider));
}
}Detail models
An EntityModel can contain one or more detail models, usually based on foreign key relationships.
public class StoreApplicationModel extends SwingEntityApplicationModel {

  public StoreApplicationModel(EntityConnectionProvider connectionProvider) {
    super(connectionProvider, List.of(createCustomerModel(connectionProvider)));
  }

  private static SwingEntityModel createCustomerModel(EntityConnectionProvider connectionProvider) {
    CustomerModel customerModel =
            new CustomerModel(connectionProvider);
    CustomerAddressModel customerAddressModel =
            new CustomerAddressModel(connectionProvider);

    customerModel.detail().add(customerAddressModel);

    //populate the model with rows from the database
    customerModel.tableModel().items().refresh();

    return customerModel;
  }
}
Event binding
The model layer classes expose a number of Event, State and Value observers.
private void bindEvents() {
  CustomerTableModel tableModel = (CustomerTableModel) tableModel();

  tableModel.selection().items()
          .addConsumer(selected ->
                  System.out.println("Items selected: " + selected));

  tableModel.items().refresher().result()
          .addListener(() -> System.out.println("Refresh successful"));

  CustomerEditModel editModel = (CustomerEditModel) editModel();

  editModel.editor().events().after().insert()
          .addConsumer(inserted ->
                  System.out.println("Entities inserted" + inserted));

  editModel.editor().value(Customer.FIRST_NAME).edited()
          .addConsumer(firstName ->
                  System.out.println("First name changed to " + firstName));
}1.2.3. EntityEditModel
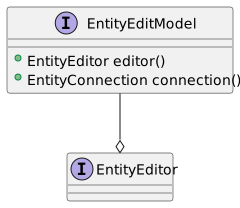
The EntityEditModel binds an EntityEditor to a connection, and is the model an EntityEditPanel is based on. The editing itself — values, validation, dirty state, insert, update and delete — is the EntityEditor's job, accessed via editor().
The simplest edit model requires nothing but a constructor:
public class CustomerEditModel extends SwingEntityEditModel {

  public CustomerEditModel(EntityConnectionProvider connectionProvider) {
    super(Customer.TYPE, connectionProvider);
  }
}
Application logic belongs in the edit model (or its editor), not in the UI: default values, value dependencies and custom persistence configured here work identically whether the entity is edited through an edit panel, a table or a dialog.
public final class InvoiceEditModel extends SwingEntityEditModel {

  public InvoiceEditModel(EntityConnectionProvider connectionProvider) {
    super(Invoice.TYPE, connectionProvider);
    EditorValue<Entity> customer = editor().value(Invoice.CUSTOMER_FK);
    // By default, foreign key values persist when the model
    // is cleared, here we disable that for CUSTOMER_FK
    customer.persist().set(false);
    // We populate the invoice address fields with
    // the customer address when the customer is edited
    customer.propagate(Invoice.BILLINGADDRESS, cust -> valueOrNull(cust, Customer.ADDRESS));
    customer.propagate(Invoice.BILLINGCITY, cust -> valueOrNull(cust, Customer.CITY));
    customer.propagate(Invoice.BILLINGPOSTALCODE, cust -> valueOrNull(cust, Customer.POSTALCODE));
    customer.propagate(Invoice.BILLINGSTATE, cust -> valueOrNull(cust, Customer.STATE));
    customer.propagate(Invoice.BILLINGCOUNTRY, cust -> valueOrNull(cust, Customer.COUNTRY));
  }

  private static @Nullable <T> T valueOrNull(Entity customer, Attribute<T> attribute) {
    return customer == null ? null : customer.get(attribute);
  }
}
See EntityEditor for the editor API this builds on: editing values, default values, value propagation, custom persistence and detail editors.
Combo box models
The Swing implementation, SwingEntityEditModel, provides combo box models for foreign keys and column values, shared by the input components bound to them. A combo box model can be initialized eagerly in the constructor — otherwise it is created and refreshed on first use, by the component requesting it.
public final class TrackEditModel extends SwingEntityEditModel {

  public TrackEditModel(EntityConnectionProvider connectionProvider) {
    super(Track.TYPE, connectionProvider);
    // Creates and populates the combo box models for the given foreign keys, otherwise this
    // would happen when the associated combo boxes are created, as the UI is initialized.
    editor().comboBoxModels().initialize(Track.MEDIATYPE_FK, Track.GENRE_FK);
  }
}
Combo box models based on entities stay consistent automatically: entities inserted, updated or deleted elsewhere in the application are added to, replaced in or removed from the combo box model, via the editor’s insert, update and delete events.
1.2.4. EntityEditor
The EntityEditor is the framework’s write path: it manages a single entity instance being edited — its values, their validity, dirty state and default values — and performs the insert, update and delete operations. An editor is available from every edit model via editor(), and everything an EntityEditPanel does — component enabling, validation indicators, dirty warnings — it does by observing the editor.
The editor exposes two things: the entity being edited, via entity(), and an observable value for each attribute, via value(attribute).
The entity
EditorEntity represents the entity being edited: set() populates the editor, defaults() initializes a new entity with default values, clear() empties it, revert() reverts all modifications. Its exists(), modified() and valid() observable states drive the UI — an insert control is enabled while the entity does not exist, an update control while it exists and is modified and valid.
The example below shows the full life cycle: defaults, setting values, insert, modify, update and delete.
EntityConnectionProvider connectionProvider =
        EntityConnectionProvider.builder()
                .domain(Store.DOMAIN)
                .user(User.parse("scott:tiger"))
                .clientType("StoreMisc")
                .build();

CustomerEditModel editModel = new CustomerEditModel(connectionProvider);

SwingEntityEditor editor = editModel.editor();
editor.value(Customer.ID).defaultValue()
        .set(() -> UUID.randomUUID().toString());

//sets the defaults
editor.entity().defaults();
//set the values
editor.value(Customer.FIRST_NAME).set("Björn");
editor.value(Customer.LAST_NAME).set("Sigurðsson");
editor.value(Customer.ACTIVE).set(true);

//inserts and returns the inserted entity
Entity customer = editor.insert();

//modify some values
editor.value(Customer.FIRST_NAME).set("John");
editor.value(Customer.LAST_NAME).set("Doe");

//updates and returns the updated entity
customer = editor.update();

//deletes the active entity
editor.delete();
Editing values
EditorValue is a full Value implementation for a single attribute, so anything that can be linked to a Value — an input component, another value — can be linked to an attribute of the entity being edited. Each editor value also exposes the state the UI needs: valid() and modified() observable states, a validation message(), the original() value and revert().
Two observers notify of changes, with an important distinction:
-
Value.observer() — notified whenever the value changes, whether by the user or by the framework populating the editor.
-
edited() — notified only when the value is changed through this EditorValue, that is, by an actual edit, not when the entity is set or cleared.
Use edited() to react to user edits without also reacting every time an entity is selected into the editor:
// We populate the unit price when the track is edited
Observer<Entity> trackEdited = editor().value(InvoiceLine.TRACK_FK).edited();
trackEdited.when(Objects::nonNull)
        .addConsumer(this::setUnitPrice);
trackEdited.when(Objects::isNull)
        .addListener(this::clearUnitPrice);
Default values and persistent values
Each editor value has a defaultValue() supplier, used by entity().defaults() when initializing a new entity. A default value can be configured in the domain model, via the attribute definition, or set on the editor value directly, as in the UUID example in the previous section.
The persist() state controls whether a value survives defaults() — whether it carries over from one entity to the next. Foreign key values persist by default, since when entering a batch of records the reference typically stays the same, while the other values change.
Foreign key values: persist and propagate
The example below disables persistence for a foreign key and uses propagate() to populate the invoice billing address from the customer, each time the customer is edited. A propagated value is applied only when the source value actually changes and remains editable by the user afterwards.
public final class InvoiceEditModel extends SwingEntityEditModel {

  public InvoiceEditModel(EntityConnectionProvider connectionProvider) {
    super(Invoice.TYPE, connectionProvider);
    EditorValue<Entity> customer = editor().value(Invoice.CUSTOMER_FK);
    // By default, foreign key values persist when the model
    // is cleared, here we disable that for CUSTOMER_FK
    customer.persist().set(false);
    // We populate the invoice address fields with
    // the customer address when the customer is edited
    customer.propagate(Invoice.BILLINGADDRESS, cust -> valueOrNull(cust, Customer.ADDRESS));
    customer.propagate(Invoice.BILLINGCITY, cust -> valueOrNull(cust, Customer.CITY));
    customer.propagate(Invoice.BILLINGPOSTALCODE, cust -> valueOrNull(cust, Customer.POSTALCODE));
    customer.propagate(Invoice.BILLINGSTATE, cust -> valueOrNull(cust, Customer.STATE));
    customer.propagate(Invoice.BILLINGCOUNTRY, cust -> valueOrNull(cust, Customer.COUNTRY));
  }

  private static @Nullable <T> T valueOrNull(Entity customer, Attribute<T> attribute) {
    return customer == null ? null : customer.get(attribute);
  }
}
Inserting, updating and deleting
insert(), update() and delete() operate on the entity being edited and return the resulting entity (or entities, for the collection variants). The entity is validated before insert and update, using the validator(), and an invalid entity fails with an EntityValidationException — the same validation continuously reflected by the valid() states and message() of each editor value.
|
Note
|
These methods perform the operation on the calling thread. UI code, such as EntityEditPanel, uses tasks() to prepare an operation for background execution, keeping the UI responsive. |
Custom persistence
EntityPersistence, set via persistence(), replaces how the editor performs its insert, update and delete — without changing anything else about it. Here invoice line operations run in a transaction which also updates the totals of the affected invoices, via a database procedure:
private static final class InvoiceLinePersistence implements EntityPersistence {

  @Override
  public Collection<Entity> insert(Collection<Entity> invoiceLines, EntityConnection connection) {
    // Use a transaction to update the invoice totals when an invoice line is inserted
    return transaction(connection, () -> updateTotals(connection.insertSelect(invoiceLines), connection));
  }

  @Override
  public Collection<Entity> update(Collection<Entity> invoiceLines, EntityConnection connection) {
    // Use a transaction to update the invoice totals when an invoice line is updated
    return transaction(connection, () -> updateTotals(connection.updateSelect(invoiceLines), connection));
  }

  @Override
  public void delete(Collection<Entity> invoiceLines, EntityConnection connection) {
    // Use a transaction to update the invoice totals when an invoice line is deleted
    transaction(connection, () -> {
      connection.delete(primaryKeys(invoiceLines));
      updateTotals(invoiceLines, connection);
    });
  }

  private static Collection<Entity> updateTotals(Collection<Entity> invoiceLines, EntityConnection connection) {
    // Get the IDs of the invoices that need their totals updated
    Collection<Long> invoiceIds = distinct(InvoiceLine.INVOICE_ID, invoiceLines);
    // Execute the UPDATE_TOTALS procedure
    connection.execute(Invoice.UPDATE_TOTALS, invoiceIds);

    return invoiceLines;
  }
}
Detail editors
An editor can edit related entities alongside its own, via detail() and EditorLink. A detail editor is populated when the master entity is set, and its entity is inserted, updated or deleted along with the master, in the same transaction. The link’s present predicate decides whether the detail entity should exist at all — a detail entity failing the predicate is deleted rather than saved.
Here customer preferences are edited alongside the customer:
public final class CustomerEditModel extends SwingEntityEditModel {

  public CustomerEditModel(EntityConnectionProvider connectionProvider) {
    super(Customer.TYPE, connectionProvider);
    editor().comboBoxModels().initialize(Customer.SUPPORTREP_FK);
    // Set a detail editor, in order to edit customer preferences alongside the customer
    SwingEntityEditor preferences = new SwingEntityEditor(Preferences.TYPE, connectionProvider);
    preferences.value(Preferences.PREFERRED_GENRE_FK).persist().set(false);
    preferences.comboBoxModels().initialize(Preferences.PREFERRED_GENRE_FK);
    editor().detail().add(EditorLink.builder()
            .editor(preferences)
            .foreignKey(Preferences.CUSTOMER_FK)
            .select(customer -> where(Preferences.CUSTOMER_FK.equalTo(customer))
                    .referenceDepth(Preferences.CUSTOMER_FK, 0)
                    .build())
            .present(new PreferencesPresent())
            .build());
  }

  private static final class PreferencesPresent implements Predicate<Entity> {

    @Override
    public boolean test(Entity preferences) {
      // Preferences without both preferred genre and newsletter are deleted
      return preferences.present(Preferences.PREFERRED_GENRE_FK) ||
              preferences.present(Preferences.NEWSLETTER);
    }
  }
}
The link’s select provides the query fetching the detail entity for a given master, which the artist editor below uses to edit a fixed number of tag entities, one link per tag slot:
public final class ArtistEditModel extends SwingEntityEditModel {

  public static final int TAG_SLOTS = 6;
  public static final String TAG_PREFIX = "tag";

  public ArtistEditModel(EntityConnectionProvider connectionProvider) {
    super(Artist.TYPE, connectionProvider);
    TagPresent present = new TagPresent();
    for (int i = 0; i < TAG_SLOTS; i++) {
      editor().detail().add(EditorLink.builder()
              .editor(new SwingEntityEditor(ArtistTag.TYPE, connectionProvider))
              .foreignKey(ArtistTag.ARTIST_FK)
              .select(new TagSelect(i))
              .present(present)
              .name(TAG_PREFIX + i)
              .caption(String.valueOf(i + 1))
              .build());
    }
  }

  private static final class TagSelect implements DetailSelect {

    private final int index;

    private TagSelect(int index) {
      this.index = index;
    }

    @Override
    public Select get(Entity artist) {
      return Select.where(ArtistTag.ARTIST_FK.equalTo(artist))
              .orderBy(ascending(ArtistTag.TAG))
              .referenceDepth(0)
              .offset(index)
              .limit(1)
              .build();
    }
  }

  private static final class TagPresent implements Predicate<Entity> {

    @Override
    public boolean test(Entity tag) {
      return tag.present(ArtistTag.TAG);
    }
  }
}
Events
events() provides application-wide insert, update and delete notifications for the edited entity type. These are what keep the rest of a running application consistent without any wiring: combo box models refresh or reconcile, search model selections receive updated instances, table models react to insert and delete, and foreign key values in other editors are replaced when the entity they reference is updated or deleted elsewhere. Reach for these events when application logic must react to persistence outcomes regardless of which editor performed the operation.
1.2.5. EntityTableModel
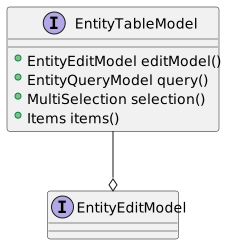
The EntityTableModel provides a table representation of entities: the items fetched by its EntityQueryModel, a selection and an editModel for editing them.
Every EntityTableModel contains an EntityEditModel instance — a default one is created automatically unless one is supplied via a constructor argument.
public class CustomerTableModel extends SwingEntityTableModel {

  public CustomerTableModel(EntityConnectionProvider connectionProvider) {
    super(new CustomerEditModel(connectionProvider));
  }
}
public class CustomerAddressTableModel extends SwingEntityTableModel {
public CustomerAddressTableModel(EntityConnectionProvider connectionProvider) {
super(CustomerAddress.TYPE, connectionProvider);
}
}Items, selection and query
items().refresh() populates the table by running the query model's query — the condition, attributes, order by and limit it is configured with. selection() provides the selected items and indexes as observable values, which is what selection-scoped controls bind their enabled state to, and what master models propagate to their detail models.
When entities of the table’s type are inserted, updated or deleted anywhere in the application, the table model reacts: updated rows are replaced in place, deleted rows removed, and inserted entities added according to the onInsert() strategy — prepended by default, appended, or ignored.
Application logic
Operations on the selected rows belong in the table model, keeping the UI layer free of business logic. Here a database function raises the price of the selected tracks, and the updated entities are reconciled back into the table with replace():
public final class RaisePriceTask implements ResultTaskHandler<Collection<Entity>> {

  private final BigDecimal increase;

  private RaisePriceTask(BigDecimal increase) {
    this.increase = increase;
  }

  @Override
  public Collection<Entity> execute() throws Exception {
    Collection<Long> trackIds = Entity.values(Track.ID, selection().items().get());

    return connection().execute(Track.RAISE_PRICE, new RaisePriceParameters(trackIds, increase));
  }

  @Override
  public void onResult(Collection<Entity> result) {
    replace(result);
  }
}
The task above is a ResultTaskHandler, prepared by the model and executed by the UI on a background thread, with the result applied on the UI thread.
Functions returning new entities follow the same pattern — here wrapped in a transaction:
public Entity createRandomPlaylist(RandomPlaylistParameters parameters) {
  EntityConnection connection = connection();

  return transaction(connection, () -> connection.execute(Playlist.RANDOM_PLAYLIST, parameters));
}
1.2.6. EntityQueryModel
The EntityQueryModel manages how entities are fetched from the database for table models. It provides fine-grained control over query conditions, result limits, ordering, and custom data sources.
Overview
EntityQueryModel acts as the data retrieval engine for EntityTableModel, encapsulating:
-
Query conditions (WHERE and HAVING clauses)
-
Result limits to prevent excessive data loading
-
Custom ordering specifications
-
Attribute selection for optimization
-
Custom data sources for specialized queries
    SwingEntityModel customerModel = new SwingEntityModel(Customer.TYPE, connectionProvider);
    SwingEntityTableModel tableModel = customerModel.tableModel();
    EntityQueryModel query = tableModel.query();

    // Configure query behavior
    query.limit().set(200);
    query.conditionRequired().set(true);
    query.orderBy().set(OrderBy.ascending(Customer.LASTNAME));
Condition Management
Entity Condition Model
The primary condition mechanism is the EntityConditionModel, which provides a flexible way to build complex queries:
    SwingEntityModel customerModel = new SwingEntityModel(Customer.TYPE, connectionProvider);
    EntityConditionModel condition = customerModel.tableModel().query().condition();

    // Set condition values
    condition.get(Customer.EMAIL).set().isNotNull();
    condition.get(Customer.COUNTRY).set().equalTo("Iceland");

    // The resulting query will include:
    // WHERE email is not null AND country = 'Iceland'
Additional Conditions
Beyond the table condition model, you can add custom WHERE and/or HAVING conditions:
    SwingEntityModel customerModel = new SwingEntityModel(Customer.TYPE, connectionProvider);
    AdditionalConditions additional = customerModel.tableModel().query().condition().additional();

    // Single additional condition
    additional.where().set(() -> Customer.COUNTRY.equalTo("Iceland"));

    // Multiple conditions with custom conjunction
    additional.where().set(() -> Condition.or(
            Customer.CITY.equalTo("Reykjavik"),
            Customer.CITY.equalTo("Akureyri")
    ));
Query Limits
Prevent loading excessive data by setting query limits:
    SwingEntityModel customerModel = new SwingEntityModel(Customer.TYPE, connectionProvider);
    EntityQueryModel query = customerModel.tableModel().query();

    // Set a specific limit
    query.limit().set(500);

    // Resets to the default limit specified by the
    // EntityQueryModel.LIMIT configuration setting,
    // if one is specified, otherwise clears the
    // limit and allows fetching of all matching rows
    query.limit().clear();

    // Add a max limit validator
    query.limit().addValidator(newLimit -> {
      if (newLimit > 10.000) {
        throw new IllegalArgumentException("Limit may not exceed 10.000");
      }
    });

    // Listen for limit changes
    query.limit().addConsumer(newLimit ->
            System.out.println("Query limit changed to: " + newLimit));
Result Ordering
Specify how results should be ordered:
    SwingEntityModel invoiceModel = new SwingEntityModel(Invoice.TYPE, connectionProvider);
    EntityQueryModel query = invoiceModel.tableModel().query();

    // Single column ordering
    query.orderBy().set(OrderBy.descending(Invoice.DATE));

    // Multiple columns
    query.orderBy().set(OrderBy.builder()
            .ascending(Invoice.BILLINGCOUNTRY)
            .descending(Invoice.DATE)
            .build()
    );
Custom Data Sources
For complex queries that can’t be expressed through conditions, provide a custom data source:
    SwingEntityModel customerModel = new SwingEntityModel(Customer.TYPE, connectionProvider);

    customerModel.tableModel().query().dataSource().set(query -> {
      EntityConnection connection = query.connectionProvider().connection();

      // Custom query with complex joins or database-specific features
      return connection.select(Select.where(customComplexCondition())
              .attributes(Customer.ADDRESS, Customer.CITY, Customer.COUNTRY));
    });
Condition Required
Prevent accidental full table scans:
    SwingEntityModel customerModel = new SwingEntityModel(Customer.TYPE, connectionProvider);
    EntityQueryModel query = customerModel.tableModel().query();

    // Require at least one condition
    query.conditionRequired().set(true);

    // Specify that a certain condition must be enabled
    query.conditionEnabled().set(query.condition().get(Customer.SUPPORTREP_FK).enabled());
Attribute Management
Optimize queries by selecting only needed attributes:
    SwingEntityModel albumModel = new SwingEntityModel(Album.TYPE, connectionProvider);
    EntityQueryModel query = albumModel.tableModel().query();

    // Exclude large columns by default
    query.attributes().exclude().add(Album.COVER);

    // Include them only when needed
    State detailView = State.state();
    detailView.addConsumer(showDetails -> {
      if (showDetails) {
        query.attributes().exclude().remove(Album.COVER);
      }
      else {
        query.attributes().exclude().add(Album.COVER);
      }
    });
1.2.7. EntitySearchModel
The EntitySearchModel is the model component underlying the EntitySearchField UI component. It provides entity search functionality with support for multi-column text searching and entity selection.
Overview
EntitySearchModel provides:
-
Multi-column text searching with configurable wildcards
-
Single or multi-entity selection management
-
Result limiting to prevent excessive data retrieval
-
Case-sensitive or insensitive search options
-
The model component for
EntitySearchFieldUI component -
Automatic updates when entities are modified
    EntitySearchModel searchModel = EntitySearchModel.builder()
            .entityType(Customer.TYPE)
            .connectionProvider(connectionProvider)
            .search(Customer.FIRSTNAME, Customer.LASTNAME, Customer.EMAIL)
            .limit(50)
            .build();

    // Perform search
    searchModel.condition().set(() -> Customer.FIRSTNAME.equalTo("john"));

    // Get search result
    List<Entity> result = searchModel.search().perform();
Search Configuration
Search Settings
Configure search behavior per column:
    EntitySearchModel searchModel = EntitySearchModel.builder()
            .entityType(Customer.TYPE)
            .connectionProvider(connectionProvider)
            .search(Customer.FIRSTNAME, Customer.LASTNAME)
            .build();

    // Get settings for a specific column
    EntitySearchModel.Settings settings = searchModel.settings().get(Customer.LASTNAME);

    // Add wildcards automatically
    settings.wildcardPrefix().set(true);   // Adds % before search text
    settings.wildcardPostfix().set(true);  // Adds % after search text

    // Replace spaces with wildcards
    settings.spaceAsWildcard().set(true);  // "john smith" → "john%smith"

    // Case sensitivity
    settings.caseSensitive().set(false);   // Case-insensitive search
Wildcard Strategies
The search model supports different wildcard configurations:
-
Prefix search (autocomplete style):
wildcardPrefix(false),wildcardPostfix(true)- "joh" → "joh%" -
Contains search:
wildcardPrefix(true),wildcardPostfix(true)- "ohn" → "%ohn%" -
Exact search:
wildcardPrefix(false),wildcardPostfix(false)- "john" → "john" -
Multi-word search:
spaceAsWildcard(true)- "john reyk" → "%john%reyk%"
Selection Management
Single Selection Mode
For selecting one entity at a time:
    EntitySearchModel searchModel = EntitySearchModel.builder()
            .entityType(Album.TYPE)
            .connectionProvider(connectionProvider)
            .search(Album.TITLE)
            .build();

    // Set selection programmatically
    Entity album = getAlbum(connectionProvider);
    searchModel.selection().entity().set(album);

    // React to selection changes
    searchModel.selection().entity().addConsumer(selectedAlbum -> {
      if (selectedAlbum != null) {
        displayAlbumDetails(selectedAlbum);
      }
    });

    // Clear selection
    searchModel.selection().clear();
Multi-Selection Mode
For selecting multiple entities:
    EntitySearchModel searchModel = EntitySearchModel.builder()
            .entityType(Track.TYPE)
            .connectionProvider(connectionProvider)
            .search(Track.NAME)
            .build();

    // Get all selected entities
    Collection<Entity> selectedTracks = searchModel.selection().entities().get();

    // Add to selection
    Entity track = getTrack(connectionProvider);
    searchModel.selection().entities().add(track);

    // Remove from selection
    searchModel.selection().entities().remove(track);

    // Replace entire selection
    searchModel.selection().entities().set(List.of(track));
Configuration Properties
| Property | Default | Description |
|---|---|---|
|
true |
Whether search models react to entity persistence events |
|
100 |
Default result limit for search models |
|
false |
Default wildcard prefix setting |
|
true |
Default wildcard postfix setting |
|
false |
Default space replacement setting |
|
false |
Default case sensitivity setting |
1.2.8. Model Linking
Model linking provides the mechanism for establishing master-detail relationships between entity models. The framework automatically synchronizes detail models based on master model selection and data changes.
Overview
The ModelLink API enables automatic detail model filtering based on master selection and propagation of data changes.
    // Invoice -> InvoiceLines
    SwingEntityModel invoiceModel = new SwingEntityModel(Invoice.TYPE, connectionProvider);
    SwingEntityModel invoiceLineModel = new SwingEntityModel(InvoiceLine.TYPE, connectionProvider);

    invoiceModel.detail().add(invoiceLineModel);

    // Configure detail model for optimal performance
    invoiceLineModel.tableModel().query().conditionRequired().set(true); // Don't load all lines
    invoiceLineModel.tableModel().query().limit().set(1000); // Reasonable limit
Building Custom Links
Create links with specific behavior:
    SwingEntityModel customerModel = new SwingEntityModel(Customer.TYPE, connectionProvider);
    SwingEntityModel invoiceModel = new SwingEntityModel(Invoice.TYPE, connectionProvider);

    ModelLink customLink =
            ForeignKeyModelLink.builder()
                    .model(invoiceModel)
                    .foreignKey(Invoice.CUSTOMER_FK)
                    .active(true)
                    .onSelection(selectedCustomers -> {
                      // Custom selection logic
                      if (selectedCustomers.size() > 1) {
                        // Handle multi-selection differently
                        invoiceModel.tableModel().query().condition().clear();
                        invoiceModel.tableModel().query().condition().additional().where().set(() ->
                                Invoice.CUSTOMER_FK.in(selectedCustomers)
                        );
                      }
                    })
                    .build();

    customerModel.detail().add(customLink);
Automatic Foreign Key Management
The ForeignKeyModelLink specializes ModelLink for foreign key relationships:
    SwingEntityModel customerModel = new SwingEntityModel(Customer.TYPE, connectionProvider);
    SwingEntityModel invoiceModel = new SwingEntityModel(Invoice.TYPE, connectionProvider);

    // ForeignKeyModelLink is created automatically when foreign key is detected
    customerModel.detail().add(invoiceModel);

    // Or configure explicitly
    customerModel.detail().add(ForeignKeyModelLink.builder()
            .model(invoiceModel)
            .foreignKey(Invoice.CUSTOMER_FK)
            // Clear foreign key value when master has no selection
            .clearValueOnEmptySelection(true)
            // Set foreign key value automatically on insert
            .setValueOnInsert(true)
            // Control when to refresh detail data
            .refreshOnSelection(true)
            // Set search condition based on master insert
            .setConditionOnInsert(true)
            .build());
Simple One-to-Many
Classic master-detail relationship:
    // Invoice -> InvoiceLines
    SwingEntityModel invoiceModel = new SwingEntityModel(Invoice.TYPE, connectionProvider);
    SwingEntityModel invoiceLineModel = new SwingEntityModel(InvoiceLine.TYPE, connectionProvider);

    invoiceModel.detail().add(invoiceLineModel);

    // Configure detail model for optimal performance
    invoiceLineModel.tableModel().query().conditionRequired().set(true); // Don't load all lines
    invoiceLineModel.tableModel().query().limit().set(1000); // Reasonable limit
Multi-Level Hierarchy
Deep master-detail chains:
    // Customer -> Invoice -> InvoiceLine
    SwingEntityModel customerModel = new SwingEntityModel(Customer.TYPE, connectionProvider);
    SwingEntityModel invoiceModel = new SwingEntityModel(Invoice.TYPE, connectionProvider);
    SwingEntityModel invoiceLineModel = new SwingEntityModel(InvoiceLine.TYPE, connectionProvider);

    // Build hierarchy
    customerModel.detail().add(invoiceModel);
    invoiceModel.detail().add(invoiceLineModel);

    // Configure each level
    invoiceModel.tableModel().query().conditionRequired().set(true);
    invoiceLineModel.tableModel().query().conditionRequired().set(true);

    // Selection cascades down the hierarchy automatically
    Entity customer = getCustomer(connectionProvider);
    customerModel.tableModel().selection().item().set(customer);
    // Invoices for customer are loaded
    // When an invoice is selected, its lines are loaded
    invoiceModel.tableModel().selection().indexes().increment();// selects first
1.2.9. EntityApplicationModel
The EntityApplicationModel class serves as the base for the application. Its main purpose is to hold references to the root EntityModel instances used by the application.
When extending this class you must provide a constructor with a single EntityConnectionProvider parameter, as seen below.
public class StoreApplicationModel extends SwingEntityApplicationModel {

  public StoreApplicationModel(EntityConnectionProvider connectionProvider) {
    super(connectionProvider, List.of(createCustomerModel(connectionProvider)));
  }

  private static SwingEntityModel createCustomerModel(EntityConnectionProvider connectionProvider) {
    CustomerModel customerModel =
            new CustomerModel(connectionProvider);
    CustomerAddressModel customerAddressModel =
            new CustomerAddressModel(connectionProvider);

    customerModel.detail().add(customerAddressModel);

    //populate the model with rows from the database
    customerModel.tableModel().items().refresh();

    return customerModel;
  }
}
1.2.10. Application load testing
The application load testing harness is used to see how your application, server and database handle multiple concurrent users.
This is done by using the LoadTestModel and LoadTestPanel classes as shown below.
public class StoreLoadTest {

  private static final class StoreApplicationModelFactory
          implements Function<User, StoreApplicationModel> {

    @Override
    public StoreApplicationModel apply(User user) {
      EntityConnectionProvider connectionProvider =
              RemoteEntityConnectionProvider.builder()
                      .user(user)
                      .domain(Store.DOMAIN)
                      .build();

      return new StoreApplicationModel(connectionProvider);
    }
  }

  private static class StoreScenarioPerformer
          implements Performer<StoreApplicationModel> {

    private static final Random RANDOM = new Random();

    @Override
    public void perform(StoreApplicationModel application) {
      SwingEntityModel customerModel = application.models().get(Customer.TYPE);
      customerModel.tableModel().items().refresh();
      selectRandomRow(customerModel.tableModel());
    }

    private static void selectRandomRow(SwingEntityTableModel tableModel) {
      if (tableModel.items().included().size() > 0) {
        tableModel.selection().index().set(RANDOM.nextInt(tableModel.items().included().size()));
      }
    }
  }

  public static void main(String[] args) {
    LoadTest<StoreApplicationModel> loadTest =
            LoadTest.builder()
                    .createApplication(new StoreApplicationModelFactory())
                    .closeApplication(application -> application.connectionProvider().close())
                    .user(User.parse("scott:tiger"))
                    .scenarios(List.of(scenario(new StoreScenarioPerformer())))
                    .name("Store LoadTest - " + EntityConnectionProvider.CLIENT_CONNECTION_TYPE.get())
                    .build();
    loadTestPanel(loadTestModel(loadTest)).run();
  }
}1.3. Framework UI
1.3.1. EntityPanel
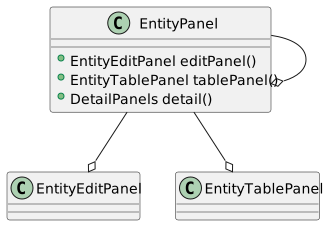
The EntityPanel is the base UI class for working with entity instances. It usually consists of an EntityTablePanel, an EntityEditPanel, and a set of detail panels representing the entities having a master/detail relationship with the underlying entity.
Basics
You can either extend the EntityPanel class or instantiate one directly, depending on your needs.
public class AddressPanel extends EntityPanel {

  public AddressPanel(SwingEntityModel addressModel) {
    super(addressModel, new AddressEditPanel(addressModel.editModel()));
  }
}
SwingEntityModel addressModel =
new SwingEntityModel(Address.TYPE, connectionProvider);
EntityPanel addressPanel =
new EntityPanel(addressModel,
new AddressEditPanel(addressModel.editModel()));Detail panels
Adding a detail panel is done with a single method call, but note that the underlying EntityModel must contain the corresponding detail model, see detail models. The detail panel hierarchy typically mirrors the model hierarchy — here the customer panel adds an invoice panel, whose model is the customer model’s detail model:
public final class CustomerPanel extends EntityPanel {

  public CustomerPanel(CustomerModel customerModel) {
    super(customerModel,
            new CustomerEditPanel(customerModel.editModel()),
            new CustomerTablePanel(customerModel.tableModel()));

    detail().add(new InvoicePanel(customerModel.detail().get(Invoice.TYPE)));
  }
}
A detail panel is just an EntityPanel — extended or instantiated directly:
public final class AlbumPanel extends EntityPanel {

  public AlbumPanel(AlbumModel albumModel) {
    super(albumModel,
            new AlbumEditPanel(albumModel.editModel()),
            new AlbumTablePanel(albumModel.tableModel()));
    SwingEntityModel trackModel = albumModel.detail().get(Track.TYPE);
    EntityPanel trackPanel = new EntityPanel(trackModel,
            new TrackEditPanel((TrackEditModel) trackModel.editModel(), trackModel.tableModel().selection()),
            new TrackTablePanel((TrackTableModel) trackModel.tableModel()));

    detail().add(trackPanel);
  }
}
Detail panel layout
By default, detail panels are laid out by a TabbedDetailLayout: the master panel and its detail panels share a split pane, with the detail panels in a tabbed pane on the right. A detail panel can be expanded, collapsed or torn out into a separate window, with both the mouse and the keyboard (see navigation below).
The layout is configurable per panel — the invoice panel below opts out entirely, since its invoice line panel is embedded in the edit panel itself, while still registering the panel for keyboard navigation:
public final class InvoicePanel extends EntityPanel {

  public InvoicePanel(SwingEntityModel invoiceModel) {
    super(invoiceModel,
            new InvoiceEditPanel(invoiceModel.editModel(),
                    invoiceModel.detail().get(InvoiceLine.TYPE)),
            new InvoiceTablePanel(invoiceModel.tableModel()),
            // The InvoiceLine panel is embedded in InvoiceEditPanel,
            // so this panel doesn't need a detail panel layout.
            config -> config.detailLayout(DetailLayout.NONE));
    InvoiceEditPanel editPanel = (InvoiceEditPanel) editPanel();
    // We still add the InvoiceLine panel as a detail panel for keyboard navigation
    detail().add(editPanel.invoiceLinePanel());
  }
}
Edit panel state
The edit panel can be embedded (the default, above the table), displayed in a separate window, or hidden, toggled via the toolbar or CTRL-ALT-E. The available states — and whether the toggle uses a frame or a dialog — are configurable via the panel’s Config.
Navigation and resizing
Entity panels form a keyboard-navigable hierarchy: CTRL-ALT-UP/DOWN moves between master and detail panels, CTRL-ALT-LEFT/RIGHT between sibling panels — with focus following, so the active panel is always the one under the keyboard. SHIFT-ALT-LEFT/RIGHT resizes a master/detail split, and CTRL-SHIFT-ALT-LEFT/RIGHT expands or collapses it. Within a panel, CTRL-E transfers focus to the edit panel, CTRL-T to the table, CTRL-I to the initial input field, CTRL-F to the table search field.
The complete, current shortcut reference is available in any running application via the Help menu (Keyboard shortcuts).
1.3.2. EntityEditPanel
The EntityEditPanel manages the input components (text fields, combo boxes and such) for editing an entity instance.
When extending an EntityEditPanel you must implement the initializeUI() method, which initializes the edit panel UI. The EntityEditPanel class exposes methods for creating input components and linking them to the underlying EntityEditModel instance.
public class CustomerEditPanel extends EntityEditPanel {

  public CustomerEditPanel(SwingEntityEditModel editModel) {
    super(editModel);
  }

  @Override
  protected void initializeUI() {
    //methods creating an input field also create a label by default,
    //which is accessible via component(Customer.FIRST_NAME).label()
    create().textField(Customer.FIRST_NAME);
    create().textField(Customer.LAST_NAME);
    create().textField(Customer.EMAIL);
    create().checkBox(Customer.ACTIVE);

    setLayout(gridLayout(4, 1));
    //the addInputPanel method creates and adds a panel containing the
    //component associated with the attribute as well as a JLabel with the
    //property caption as defined in the domain model
    addInputPanel(Customer.FIRST_NAME);
    addInputPanel(Customer.LAST_NAME);
    addInputPanel(Customer.EMAIL);
    addInputPanel(Customer.ACTIVE);
  }
}
public class AddressEditPanel extends EntityEditPanel {
public AddressEditPanel(SwingEntityEditModel editModel) {
super(editModel);
}
@Override
protected void initializeUI() {
create().textField(Address.STREET)
.columns(25);
create().textField(Address.CITY)
.columns(25);
create().checkBox(Address.VALID);
setLayout(gridLayout(3, 1));
addInputPanel(Address.STREET);
addInputPanel(Address.CITY);
addInputPanel(Address.VALID);
}
}public class CustomerAddressEditPanel extends EntityEditPanel {
public CustomerAddressEditPanel(SwingEntityEditModel editModel) {
super(editModel);
}
@Override
protected void initializeUI() {
create().comboBoxPanel(CustomerAddress.ADDRESS_FK, this::createAddressEditPanel)
.preferredWidth(280)
.includeAddButton(true);
setLayout(borderLayout());
addInputPanel(CustomerAddress.ADDRESS_FK);
}
private AddressEditPanel createAddressEditPanel() {
return new AddressEditPanel(new SwingEntityEditModel(Address.TYPE, editModel().connectionProvider()));
}
}Detailed example
Here’s how a text field is created and added to the edit panel.
create().textField(Customer.FIRST_NAME)
        .columns(12);

setLayout(gridLayout(1, 1));
addInputPanel(Customer.FIRST_NAME);
And here’s the equivilent code, showing what’s going on behind the scenes.
ColumnDefinition<String> firstNameDefinition =
        editModel().entityDefinition().columns().definition(Customer.FIRST_NAME);

//create the text field
JTextField firstNameField = new JTextField();
firstNameField.setColumns(12);
firstNameDefinition.description()
        .ifPresent(firstNameField::setToolTipText);
//associate the text field with the first name attribute
component(Customer.FIRST_NAME).set(firstNameField);

//wrap the text field in a ComponentValue
ComponentValue<JTextField, String> firstNameFieldValue =
        new AbstractTextComponentValue<JTextField, String>(firstNameField) {
          @Override
          protected String getComponentValue() {
            return component().getText();
          }

          @Override
          protected void setComponentValue(String text) {
            component().setText(text);
          }
        };

//link the component value to the attribute value in the editor
firstNameFieldValue.link(editor().value(Customer.FIRST_NAME));

//create the first name label
JLabel firstNameLabel = new JLabel(firstNameDefinition.caption());
//associate the label with the text field
firstNameLabel.setLabelFor(firstNameField);

//create an input panel, with the label and text field
JPanel firstNamePanel = new JPanel(borderLayout());
firstNamePanel.add(firstNameLabel, BorderLayout.NORTH);
firstNamePanel.add(firstNameField, BorderLayout.CENTER);

setLayout(gridLayout(1, 1));
add(firstNamePanel);
Input controls
Boolean
JCheckBox checkBox = create()
        .checkBox(Demo.BOOLEAN)
        .build();

NullableCheckBox nullableCheckBox = create()
        .nullableCheckBox(Demo.BOOLEAN_NULLABLE)
        .build();

JComboBox<Item<Boolean>> comboBox = create()
        .booleanComboBox(Demo.BOOLEAN_NULLABLE)
        .build();
Foreign key
EntityComboBox comboBox = create()
        .comboBox(Demo.FOREIGN_KEY)
        .build();

// Include add/edit buttons
EntityComboBoxPanel comboBoxPanel = create()
        .comboBoxPanel(Demo.FOREIGN_KEY, this::createEditPanel)
        .includeAddButton(true)
        .includeEditButton(true)
        .build();

EntitySearchField searchField = create()
        .searchField(Demo.FOREIGN_KEY)
        .build();

// Include add/edit buttons
EntitySearchFieldPanel searchFieldPanel = create()
        .searchFieldPanel(Demo.FOREIGN_KEY, this::createEditPanel)
        .includeAddButton(true)
        .includeEditButton(true)
        .build();

//readOnly
JTextField textField = create()
        .textField(Demo.FOREIGN_KEY)
        .build();
Temporal
TemporalField<LocalDateTime> textField =
        (TemporalField<LocalDateTime>) create()
                .textField(Demo.LOCAL_DATE)
                .build();

TemporalField<LocalDate> localDateField = create()
        .temporalField(Demo.LOCAL_DATE)
        .build();

TemporalFieldPanel<LocalDate> temporalPanel = create()
        .temporalFieldPanel(Demo.LOCAL_DATE)
                .build();
Numerical
NumberField<Integer> integerField =
        (NumberField<Integer>) create()
                .textField(Demo.INTEGER)
                .build();

integerField = create()
        .integerField(Demo.INTEGER)
        .build();

NumberField<Long> longField =
        (NumberField<Long>) create()
                .textField(Demo.LONG)
                .build();

longField =
        create()
                .longField(Demo.LONG)
                .build();

NumberField<Double> doubleField =
        (NumberField<Double>) create()
                .textField(Demo.DOUBLE)
                .build();

doubleField = create()
        .doubleField(Demo.DOUBLE)
        .build();

NumberField<BigDecimal> bigDecimalField =
        (NumberField<BigDecimal>) create()
                .textField(Demo.BIG_DECIMAL)
                .build();

bigDecimalField = create()
        .bigDecimalField(Demo.BIG_DECIMAL)
        .build();

NumberField<BigInteger> bigIntegerField =
        (NumberField<BigInteger>) create()
                .textField(Demo.BIG_DECIMAL)
                .build();

bigIntegerField = create()
        .bigIntegerField(Demo.BIG_INTEGER)
        .build();
Text
JTextField textField = create()
        .textField(Demo.TEXT)
        .build();

JFormattedTextField maskedField = create()
        .maskedTextField(Demo.FORMATTED_TEXT)
        .mask("###:###")
        .valueContainsLiteralCharacters(true)
        .build();

JTextArea textArea = create()
        .textArea(Demo.LONG_TEXT)
        .rowsColumns(5, 20)
        .build();

TextFieldPanel inputPanel = create()
        .textFieldPanel(Demo.LONG_TEXT)
        .build();
Selection
DefaultComboBoxModel<String> comboBoxModel =
        new DefaultComboBoxModel<>(new String[] {"One", "Two"});

JComboBox<String> comboBox = create()
        .comboBox(Demo.TEXT, comboBoxModel)
        .editable(true)
.build();Panels & labels
JLabel label = create()
        .label(Demo.TEXT)
        .build();

JPanel inputPanel = create()
        .inputPanel(Demo.TEXT)
        .label(new JLabel("Label"))
        .build();
Advanced Patterns
Configuration Options
EntityEditPanel supports configuration via a lambda in the constructor:
    class InvoiceEditPanel extends EntityEditPanel {
      public InvoiceEditPanel(SwingEntityEditModel editModel) {
        super(editModel, config ->
                // Keep displaying newly inserted invoice since we'll continue
                // working with it by adding invoice lines
                config.clearAfterInsert(false));
      }

      @Override
      protected void initializeUI() {
        // UI setup
      }
    }
Focus Management
Configure the focus behaviour:
    class CustomerEditPanel extends EntityEditPanel {
      public CustomerEditPanel(SwingEntityEditModel editModel) {
        super(editModel);
      }

      @Override
      protected void initializeUI() {
        focus().initial().set(Customer.FIRSTNAME);
        focus().afterInsert().set(Customer.ADDRESS);

        // Create your input components...
      }
    }
Inline Edit Panels with ComboBoxPanel
Create combo boxes with inline add/edit capabilities:
    class TrackEditPanel extends EntityEditPanel {
      public TrackEditPanel(SwingEntityEditModel editModel) {
        super(editModel);
      }

      @Override
      protected void initializeUI() {
        create().comboBoxPanel(Track.MEDIATYPE_FK, this::createMediaTypeEditPanel)
                .preferredWidth(160)
                .includeAddButton(true)
                .includeEditButton(true);

        create().searchFieldPanel(Track.MEDIATYPE_FK, this::createMediaTypeEditPanel)
                .preferredWidth(160)
                .includeAddButton(true)
                .includeEditButton(true);
      }

      private EntityEditPanel createMediaTypeEditPanel() {
        return new MediaTypeEditPanel(new SwingEntityEditModel(MediaType.TYPE, editModel().connectionProvider()));
      }
    }
Custom Component Integration
Using custom components:
    class TrackEditPanel extends EntityEditPanel {
      public TrackEditPanel(SwingEntityEditModel editModel) {
        super(editModel);
      }

      @Override
      protected void initializeUI() {
        // Create a custom component and set it as the attribute
        // component, it is automatically linked to the editor value
        component(Track.MILLISECONDS).set(new DurationComponentValue());
      }
    }
Keyboard Shortcuts and Actions
Add custom keyboard shortcuts for enhanced productivity:
    class CustomerEditPanel extends EntityEditPanel {
      public CustomerEditPanel(SwingEntityEditModel editModel) {
        super(editModel);
      }

      @Override
      protected void initializeUI() {
        create().textField(Customer.STATE)
                .keyEvent(KeyEvents.builder()
                        .keyCode(VK_SPACE)
                        .modifiers(MENU_SHORTCUT_MASK)
                        .action(Control.action(this::selectStateFromExistingValues)));
      }

      private void selectStateFromExistingValues(ActionEvent event) {
        JTextField stateField = (JTextField) event.getSource();

        Dialogs.select()
                .list(editModel().connection().select(Customer.STATE))
                .owner(stateField)
                .select()
                .single()
                .ifPresent(stateField::setText);
      }
    }
Detail Panel Integration
EntityEditPanel can include detail panels for master-detail relationships:
    class InvoiceEditPanel extends EntityEditPanel {
      private final EntityPanel invoiceLinePanel;

      public InvoiceEditPanel(SwingEntityEditModel editModel, SwingEntityModel invoiceLineModel) {
        super(editModel, config -> config.clearAfterInsert(false));
        this.invoiceLinePanel = createInvoiceLinePanel(invoiceLineModel);
      }

      @Override
      protected void initializeUI() {
        // Initialize main edit controls...

        // Add detail panel
        add(invoiceLinePanel, BorderLayout.SOUTH);
      }

      private EntityPanel createInvoiceLinePanel(SwingEntityModel invoiceLineModel) {
        // Create and return invoice line panel
        return new EntityPanel(invoiceLineModel);
      }
}Query Inspector
An Editor Inspector can be enabled globally via the EntityEditPanel.Config.INCLUDE_INSPECTOR configuration value or for a single panel via the panel configuration.
The inspector displays the editor state — values, modified/valid flags, validation messages — along with the INSERT and UPDATE queries the current state would produce, dynamically updated. See Development tools.
EntityEditPanel.Config.INCLUDE_INSPECTOR.set(true);The inspector can be opened using the CTRL-ALT-R keyboard shortcut, when the edit panel is focused.
1.3.3. EntityTablePanel
The EntityTablePanel provides a table view of entities: a searchable, filterable, sortable grid with a toolbar, a popup menu, in-table editing, a summary panel and a status bar — all driven by an underlying EntityTableModel.
Configuration
Each panel is configured via a Config instance, supplied to the constructor. Most configuration values also exist as system properties, configuring the default for all table panels in an application — Config.INCLUDE_FILTERS, Config.INCLUDE_EXPORT and company — with the per-panel configuration overriding the default.
public InvoiceTablePanel(SwingEntityTableModel tableModel) {
  super(tableModel, config -> config
          // The TOTAL column is updated automatically when invoice lines are updated,
          // see InvoiceLineEditModel, so we don't want it to be editable via the popup menu.
          .editable(attributes -> attributes.remove(Invoice.TOTAL))
          // The factory providing our custom condition panel.
          .conditionPanel(new InvoiceConditionPanelFactory(tableModel))
          // Start with the SIMPLE condition panel view.
          .conditionView(SIMPLE));
}
Editing
The table supports editing the selected rows directly, in two ways:
-
Edit value — the Edit popup menu (and SHIFT-INSERT) edits a single attribute for all selected rows, in a dialog. Which attributes are editable this way is controlled via Config.editable(), and Config.editComponent() provides a custom input component for a given attribute.
-
In-cell editing — standard table cell editing, using components provided by Config.cellEditor().
The track panel below configures both, along with custom cell renderers, and starts cell editing on INSERT rather than on typing:
public TrackTablePanel(TrackTableModel tableModel) {
  super(tableModel, config -> config
          // Custom component for editing track ratings
          .editComponent(Track.RATING, new RatingEditComponent())
          // Custom component for editing track durations
          .editComponent(Track.MILLISECONDS, new DurationEditComponent())
          // Custom cell renderer for ratings
          .cellRenderer(Track.RATING, TrackTablePanel::ratingRenderer)
          // Custom cell renderer for track duration (min:sec)
          .cellRenderer(Track.MILLISECONDS, TrackTablePanel::durationRenderer)
          // Custom cell editor for track ratings
          .cellEditor(Track.RATING, ratingEditor(tableModel.entityDefinition()))
          // Custom cell editor for track durations (min:sec:ms)
          .cellEditor(Track.MILLISECONDS, durationEditor())
          // Start editing when the INSERT key is pressed
          .table(table -> table
                  .autoStartsEdit(false)
                  .startEditing(keyStroke(VK_INSERT)))
          .includeLimitMenu(true));
A custom edit component for a foreign key, here a track selector used when editing the track of the selected invoice lines:
.editComponent(InvoiceLine.TRACK_FK, new TrackEditComponent(InvoiceLine.TRACK_FK)));Custom controls
The panel’s controls — refresh, add, edit, delete, print and the rest — are identified by ControlKeys. Overriding setupControls() is the idiomatic place to assign custom controls to standard keys; a control assigned to a standard key appears wherever that key is used — popup menu, toolbar, keyboard shortcut.
@Override
protected void setupControls() {
  // Assign a custom report action to the standard PRINT control,
  // which is then made available in the popup menu and on the toolbar
  control(PRINT).set(Control.builder()
          .command(this::viewCustomerReport)
          .caption(BUNDLE.getString("customer_report"))
          .icon(FrameworkIcons.instance().print())
          .enabled(tableModel().selection().empty().not())
          .build());
}
The popup menu layout itself is configurable via configurePopupMenu() — here a custom control is placed at the top, above the default menu:
  // Add a custom control to the top of the table popup menu.
  // Start by clearing the popup menu layout
  configurePopupMenu(layout -> layout.clear()
          // add our custom control
          .control(Control.builder()
                  .command(this::raisePriceOfSelected)
                  .caption(BUNDLE.getString("raise_price") + "...")
                  .enabled(tableModel().selection().empty().not()))
          // and a separator
          .separator()
          // and add all the default controls
          .defaults());
}
Adding a print action
The most common custom control is an action for printing reports or acting on the selected rows. For the simplest case, where a single print action is required, a custom control can be associated with the PRINT ControlKey, appearing in the Print submenu in the table popup menu as well as on the table toolbar. For more complex cases, where multiple print controls are required, custom controls can be associated with the PRINT_CONTROLS ControlKey.
public class CustomerTablePanel extends EntityTablePanel {

  public CustomerTablePanel(SwingEntityTableModel tableModel) {
    super(tableModel);
    // associate a custom Control with the PRINT control key,
    // which calls the viewCustomerReport method in this class,
    // enabled only when the selection is not empty
    control(PRINT).set(Control.builder()
            .command(this::viewCustomerReport)
            .caption("Customer report")
            .icon(FrameworkIcons.instance().print())
            .enabled(tableModel().selection().empty().not())
            .build());
  }

  private void viewCustomerReport() {
    List<Entity> selectedCustomers = tableModel().selection().items().get();
    if (selectedCustomers.isEmpty()) {
      return;
    }

    Collection<String> customerIds = Entity.values(Customer.ID, selectedCustomers);
    Map<String, Object> reportParameters = new HashMap<>();
    reportParameters.put("CUSTOMER_IDS", customerIds);

    JasperPrint customerReport = tableModel().connection()
            .report(Customer.REPORT, reportParameters);

    Dialogs.builder()
            .component(new JRViewer(customerReport))
            .owner(this)
            .modal(false)
            .title("Customer Report")
            .size(new Dimension(800, 600))
            .show();
  }
}
Condition and filter panels
The panel above the table provides query conditions — what is fetched from the database — while filters narrow down what is shown, without a round trip. The condition panel has three views: HIDDEN, SIMPLE (a single row of fields) and ADVANCED (operators and bounds per column), toggled via the toolbar or CTRL-ALT-S, with CTRL-S moving focus to a condition field. The initial view and a custom condition panel implementation are configurable — see the conditionPanel() and conditionView() calls in the invoice panel configuration above, where a custom condition panel provides invoice-specific search fields.
Filter panels are excluded by default and included via Config.INCLUDE_FILTERS (globally) or includeFilters() (per panel).
Exporting data
A configurable denormalized data export tool — including attributes of referenced entities via foreign key traversal — can be included in the EntityTablePanel Copy table popup submenu, via the EntityTablePanel.Config.INCLUDE_EXPORT configuration value or the panel configuration. See Exporting data.
Query Inspector
A Query Inspector can be enabled globally via the EntityTablePanel.Config.INCLUDE_INSPECTOR configuration value or for a single panel via the panel configuration.
The Query Inspector displays the SELECT query, dynamically updated according to the underlying query conditions.
EntityTablePanel.Config.INCLUDE_INSPECTOR.set(true);The Query Inspector can be opened using the CTRL-ALT-Q keyboard shortcut, when the table panel is focused.
Keyboard shortcuts
Each ControlKey carries its default keystroke — INSERT adds a new row, CTRL-INSERT edits the selected row, SHIFT-INSERT edits a single value for the selection, DELETE deletes the selection. A default keystroke can be modified before the panels are created, typically during application startup — here a CTRL modifier is added to the DELETE shortcut, application-wide:
// Add a CTRL modifier to the DELETE key shortcut for table panels
EntityTablePanel.ControlKeys.DELETE.defaultKeystroke().update(keyStroke ->
        keyStroke(keyStroke.getKeyCode(), MENU_SHORTCUT_MASK));
1.3.4. Exporting data
The table export tool produces denormalized, tab-separated output from the rows of an EntityTablePanel — to the clipboard or to a file — and is available in the table popup menu’s Export… submenu.
What sets it apart from a plain copy is foreign key traversal: the export dialog presents the entity’s attributes as a tree, where each foreign key expands into the attributes of the referenced entity, recursively. Including Track → Album → Artist → Name exports the artist name as a column alongside the track’s own attributes — denormalized flat output from normalized data, without writing a query.
Using it
-
The attribute tree is navigated with the keyboard; SPACE toggles whether an attribute is included.
-
Foreign key nodes expand on demand, so cyclic references are a non-issue — expansion goes as deep as you take it.
-
The export covers the selected rows or all rows.
-
Output goes to the clipboard or a .tsv file, ready for a spreadsheet.
Configurations
An export configuration — the included attributes, their order and the target — can be named, saved and opened later, and reappears in the export dialog as long as the configuration file exists. The active configuration is saved in user preferences on application exit, so a routinely used export is a two-keystroke affair.
Enabling
The export tool is excluded by default, and enabled globally via the EntityTablePanel.Config.INCLUDE_EXPORT configuration value or per panel:
EntityTablePanel.Config.INCLUDE_EXPORT.set(true);The underlying model, EntityExport, is UI-independent and can be used to produce the same output programmatically.
1.3.5. EntityPanel.Builder
Use the EntityPanel.Builder class to specify a EntityPanel class configuration, for panels that should not be initialized until used, such the lookup table panels.
  private static List<EntityPanel.Builder> createLookupPanelBuilders() {
    EntityPanel.Builder addressPanelBuilder = EntityPanel.builder()
            .entityType(Address.TYPE)
            .panel(connectionProvider -> {
              SwingEntityModel addressModel =
                      new SwingEntityModel(Address.TYPE, connectionProvider);

              return new EntityPanel(addressModel,
                      new AddressEditPanel(addressModel.editModel()));
            });

    return List.of(addressPanelBuilder);
  }
1.3.6. EntityApplicationPanel
The EntityApplicationPanel class serves as the main application UI. When extending this class you must provide a constructor with a single application model parameter, as seen below.
The constructor takes the application’s root entity panels, and optionally a set of lookup panel builders: panels for supporting entities — lookup and reference data — which appear in the application’s View menu and open on demand, in their own windows, rather than occupying a tab.
public class StoreApplicationPanel extends EntityApplicationPanel<StoreApplicationModel> {

  public StoreApplicationPanel(StoreApplicationModel applicationModel) {
    super(applicationModel, createPanels(applicationModel), createLookupPanelBuilders());
  }

  private static List<EntityPanel> createPanels(StoreApplicationModel applicationModel) {
    CustomerModel customerModel = (CustomerModel)
            applicationModel.models().get(Customer.TYPE);
    CustomerAddressModel customerAddressModel = (CustomerAddressModel)
            customerModel.detail().get(CustomerAddress.TYPE);

    EntityPanel customerPanel = new EntityPanel(customerModel,
            new CustomerEditPanel(customerModel.editModel()),
            new CustomerTablePanel(customerModel.tableModel()));
    EntityPanel customerAddressPanel = new EntityPanel(customerAddressModel,
            new CustomerAddressEditPanel(customerAddressModel.editModel()));

    customerPanel.detail().add(customerAddressPanel);

    return List.of(customerPanel);
  }

  private static List<EntityPanel.Builder> createLookupPanelBuilders() {
    EntityPanel.Builder addressPanelBuilder = EntityPanel.builder()
            .entityType(Address.TYPE)
            .panel(connectionProvider -> {
              SwingEntityModel addressModel =
                      new SwingEntityModel(Address.TYPE, connectionProvider);

              return new EntityPanel(addressModel,
                      new AddressEditPanel(addressModel.editModel()));
            });

    return List.of(addressPanelBuilder);
  }

  public static void main(String[] args) {
    Locale.setDefault(new Locale("en", "EN"));
    EntityPanel.Config.TOOLBAR_CONTROLS.set(true);
    ReferentialIntegrityErrorHandling.REFERENTIAL_INTEGRITY_ERROR_HANDLING
            .set(ReferentialIntegrityErrorHandling.DISPLAY_DEPENDENCIES);
    EntityApplication.builder(StoreApplicationModel.class, StoreApplicationPanel.class)
            .domain(Store.DOMAIN)
            .defaultUser(User.parse("scott:tiger"))
            .start();
  }
}
Starting the application
An application is assembled and started with the EntityApplication builder, which handles the startup sequence: look and feel, login (unless a user is provided), connection, application model and panel construction, and the main frame. The main method is also the natural place to configure framework defaults — configuration values apply to every panel created after them. The Chinook demo exercises a good portion of the configuration surface:
public static void main(String[] args) throws CancelException {
  String language = UserPreferences.get(LANGUAGE_PREFERENCES_KEY, Locale.getDefault().getLanguage());
  Locale.setDefault(LANGUAGE_IS.equals(language) ? LOCALE_IS : LOCALE_EN);
  UIManager.put("PasswordField.showRevealButton", true);
  FrameworkIcons icons = FrameworkIcons.instance();
  icons.put("plus", ChinookAppPanel.class.getResource("plus.svg"));
  icons.put("minus", ChinookAppPanel.class.getResource("minus.svg"));
  icons.put("graph-pie", ChinookAppPanel.class.getResource("graph-pie.svg"));
  Completion.COMPLETION_MODE.set(Completion.Mode.AUTOCOMPLETE);
  EntityApplicationPanel.CACHE_ENTITY_PANELS.set(true);
  EntityApplicationPanel.SQL_TRACING.set(true);
  EntityPanel.Config.TOOLBAR_CONTROLS.set(true);
  EntityPanel.Config.WINDOW_TYPE.set(WindowType.FRAME);
  EntityEditPanel.Config.MODIFIED_WARNING.set(true);
  EntityEditPanel.Config.INCLUDE_INSPECTOR.set(true);
  // Add a CTRL modifier to the DELETE key shortcut for table panels
  EntityTablePanel.ControlKeys.DELETE.defaultKeystroke().update(keyStroke ->
          keyStroke(keyStroke.getKeyCode(), MENU_SHORTCUT_MASK));
  EntityTablePanel.Config.COLUMN_SELECTION.set(SelectionMode.MENU);
  EntityTablePanel.Config.AUTO_RESIZE_MODE_SELECTION.set(SelectionMode.MENU);
  EntityTablePanel.Config.INCLUDE_FILTERS.set(true);
  EntityTablePanel.Config.INCLUDE_INSPECTOR.set(true);
  EntityTablePanel.Config.INCLUDE_EXPORT.set(true);
  FilterTable.AUTO_RESIZE_MODE.set(JTable.AUTO_RESIZE_ALL_COLUMNS);
  FilterTable.ROWS_FILL_VIEWPORT.set(true);
  FilterTable.STOP_EDIT_ON_FOCUS_LOST.set(false);
  FilterTableCellRenderer.NUMERICAL_HORIZONTAL_ALIGNMENT.set(SwingConstants.CENTER);
  FilterTableCellRenderer.TEMPORAL_HORIZONTAL_ALIGNMENT.set(SwingConstants.CENTER);
  FilterTableHeaderRenderer.FOCUSED_COLUMN_INDICATOR.set(true);
  ValidIndicator.INDICATOR_CLASS.set("is.codion.plugin.flatlaf.indicator.FlatLafValidIndicator");
  CalendarPanel.WEEK_NUMBERS.set(true);
  ReferentialIntegrityErrorHandling.REFERENTIAL_INTEGRITY_ERROR_HANDLING
          .set(ReferentialIntegrityErrorHandling.DISPLAY_DEPENDENCIES);
  EntityApplication.builder(ChinookAppModel.class, ChinookAppPanel.class)
          .domain(Chinook.DOMAIN)
          .version(ChinookAppModel.VERSION)
          .defaultLookAndFeel(MaterialTheme.class)
          .defaultUser(User.parse("scott:tiger"))
          .start();
}
Layout
The root entity panels are laid out by an ApplicationLayout — by default a TabbedApplicationLayout, one tab per root panel, initialized lazily as they are first displayed. Supply a custom layout via the EntityApplicationPanel constructor to arrange the root panels differently.
SQL Tracing
|
Note
|
SQL Tracing is only available when using a local EntityConnection. |
Application SQL Tracing can be enabled via the EntityApplicationPanel.SQL_TRACING configuration value.
This configures the underlying EntityConnection to trace its queries and adds a SQL Trace item under Help → Log main menu, with actions to enable tracing and view the trace log.
Disabling SQL Tracing clears the trace log.
EntityApplicationPanel.SQL_TRACING.set(true);1.3.7. EntitySearchField
The EntitySearchField is a powerful UI component for entity selection through text-based searching.
It extends HintTextField and provides a search interface that triggers on ENTER key, displaying results based on the configured search criteria.
Overview
EntitySearchField provides:
-
Text-based entity searching with automatic result handling
-
Single or multi-entity selection
-
Customizable result selection UI (list, table, or custom)
-
Optional add/edit functionality for creating or modifying entities
-
Search progress indication (wait cursor or progress bar)
-
Automatic search on focus loss (optional)
-
Keyboard shortcuts for add/edit operations
Basic Usage
    EntitySearchModel searchModel = EntitySearchModel.builder()
            .entityType(Customer.TYPE)
            .connectionProvider(connectionProvider)
            .search(Customer.FIRSTNAME, Customer.EMAIL)
            .build();

    EntitySearchField searchField = EntitySearchField.builder()
            .model(searchModel)
            .multiSelection()
            .columns(20)
            .build();
Search Behavior
The search field operates as follows:
-
User types search text and presses ENTER
-
If the search returns:
-
No results: A message dialog is shown
-
Single result: That entity is automatically selected
-
Multiple results: A selection dialog appears
-
Customization Options
Custom Selectors
The default selector uses a list for result selection. You can provide custom selectors:
EntitySearchField searchField = EntitySearchField.builder()
.model(searchModel)
.multiSelection()
.selector(new CustomerSelector())
.build();Add and Edit Controls
Enable inline entity creation and editing:
SwingEntityEditModel editModel = new SwingEntityEditModel(Customer.TYPE, connectionProvider);
EntitySearchField searchField = EntitySearchField.builder()
.model(searchModel)
.singleSelection()
.editPanel(() -> new CustomerEditPanel(editModel))
.confirmAdd(true) // Confirm before adding
.confirmEdit(true) // Confirm before editing
.build();
// Access controls
searchField.addControl(); // INSERT key by default
searchField.editControl(); // CTRL+INSERT by defaultSearch Indicators
Configure how search progress is displayed:
EntitySearchField searchField = EntitySearchField.builder()
.model(searchModel)
.multiSelection()
.searchIndicator(SearchIndicator.PROGRESS_BAR)
.build();Field Configuration
EntitySearchField searchField = EntitySearchField.builder()
.model(searchModel)
.singleSelection()
.columns(20) // Field width
.upperCase(true) // Force uppercase
.searchHintEnabled(true) // Show "Search..." hint
.searchOnFocusLost(true) // Auto-search when focus lost
.selectionToolTip(true) // Show selection as tooltip
.editable(false) // Make read-only
.formatter(entity -> // Custom display text
entity.get(Customer.LASTNAME) + " - " + entity.get(Customer.CITY))
.separator(" | ") // Multi-selection separator
.build();Search Control
You can trigger searches programmatically:
    EntitySearchField searchField = EntitySearchField.builder()
            .model(searchModel)
            .multiSelection()
            .build();
// Get search control
Control searchControl = searchField.searchControl();
// Use in toolbar or menu
Controls.builder()
.control(searchControl)
.build();Advanced Features
Component Value Integration
A EntitySearchField based ComponentValue can be created via buildValue():
    SwingEntityEditModel editModel = new SwingEntityEditModel(Invoice.TYPE, connectionProvider);

    ComponentValue<EntitySearchField, Entity> searchFieldValue =
            EntitySearchField.builder()
                    .model(searchModel)
                    .singleSelection()
                    .buildValue();

    EntitySearchField searchField = searchFieldValue.component();
    // React to selection changes
    searchField.model().selection().entities().addConsumer(selectedEntities ->
            System.out.println("Selected: " + selectedEntities));

    // Link to edit model
    editModel.editor().value(Invoice.CUSTOMER_FK).link(searchFieldValue);
Custom Edit Component
Use custom search fields in edit panels:
final class TrackEditComponent extends DefaultEditComponent<EntitySearchField, Entity> {

  TrackEditComponent(ForeignKey trackForeignKey) {
    super(trackForeignKey);
  }

  @Override
  protected SingleSelectionBuilder searchField(ForeignKey foreignKey, SwingEntityEditor editor) {
    return super.searchField(foreignKey, editor)
            .selector(new TrackSelector());
  }
} .editComponent(InvoiceLine.TRACK_FK, new TrackEditComponent(InvoiceLine.TRACK_FK)));Configuration Properties
| Property | Default | Description |
|---|---|---|
|
WAIT_CURSOR |
How to indicate ongoing searches (WAIT_CURSOR or PROGRESS_BAR) |
Best Practices
-
Provide Clear Search Columns: Configure the search model with appropriate searchable columns
-
Consider Performance: Use result limits in the search model for large datasets
-
Keyboard Support: Leverage the built-in keyboard shortcuts (INSERT for add, CTRL+INSERT for edit)
-
Custom Selectors: Create custom selectors for complex selection scenarios
1.3.8. Reporting with JasperReports
Codion uses a plugin oriented approach to report viewing and provides an implementation for JasperReports.
With the Codion JasperReports plugin you can either design your report based on an SQL query in which case you use the JRReport class, which facilitates the report being filled using the active database connection, or you can design your report around the JRDataSource implementation provided by the JasperReportsDataSource class, which is constructed around an iterator.
JDBC Reports
Using a report based on an SQL query is the simplest way of viewing a report using Codion, just add a method similar to the one below to a EntityTablePanel subclass. You can then create an action calling that method and put it in for example the table popup menu as described in the adding a print action section.
public class CustomerTablePanel extends EntityTablePanel {

  public CustomerTablePanel(SwingEntityTableModel tableModel) {
    super(tableModel);
    // associate a custom Control with the PRINT control key,
    // which calls the viewCustomerReport method in this class,
    // enabled only when the selection is not empty
    control(PRINT).set(Control.builder()
            .command(this::viewCustomerReport)
            .caption("Customer report")
            .icon(FrameworkIcons.instance().print())
            .enabled(tableModel().selection().empty().not())
            .build());
  }

  private void viewCustomerReport() {
    List<Entity> selectedCustomers = tableModel().selection().items().get();
    if (selectedCustomers.isEmpty()) {
      return;
    }

    Collection<String> customerIds = Entity.values(Customer.ID, selectedCustomers);
    Map<String, Object> reportParameters = new HashMap<>();
    reportParameters.put("CUSTOMER_IDS", customerIds);

    JasperPrint customerReport = tableModel().connection()
            .report(Customer.REPORT, reportParameters);

    Dialogs.builder()
            .component(new JRViewer(customerReport))
            .owner(this)
            .modal(false)
            .title("Customer Report")
            .size(new Dimension(800, 600))
            .show();
  }
}
Export
A report fills to a JasperPrint by default, which the receiver needs JasperReports on its classpath to read. Wrapping the report in an export via JasperReports.export() changes what filling it produces, a PDF for example, in which case nothing of JasperReports reaches the receiver.
The export runs wherever the report is filled, which for a remote connection is on the server, so only the exported document crosses the wire. This is what makes reports available to a client which can not host the reporting engine, an Android or a web client for example.
The export is bound where the report is registered, so the report type carries the result type and the caller need not ask for a format:
// Fills to a JasperPrint, which the receiver needs JasperReports to read
ReportType<Map<String, Object>, JasperPrint> REPORT =
        reportType("customer_report");

// Fills to a PDF, which the receiver needs nothing at all to read
ReportType<Map<String, Object>, byte[]> PDF_REPORT =
reportType("customer_pdf_report");JRReport<JasperPrint> customerReport =
classPathReport(Reports.class, "customer_report.jasper");
add(Customer.REPORT, customerReport);
// The export runs where the report is filled, on the server for a remote
// connection, so only the PDF crosses the wire. Both report types share
// the one loaded report and its cache
add(Customer.PDF_REPORT, export(customerReport, PDF));JasperPrint print = connection.report(Customer.REPORT, reportParameters);
byte[] pdf = connection.report(Customer.PDF_REPORT, reportParameters);JRExport provides PRINT, PDF and XML, any other JasperReports exporter being a lambda.
|
Note
|
JRExport.PDF requires the net.sf.jasperreports:jasperreports-pdf artifact, which is not a dependency of the plugin.
It registers itself through a jasperreports_extension.properties resource scanned off the classpath, so nothing requires its module, and it is neither resolved on the module path nor included in a jlink image unless named explicitly, via --add-modules net.sf.jasperreports.pdf.
|
JRDataSource Reports
The JRDataSource implementation provided by the JasperReportsDataSource simply iterates through the iterator received via the constructor and retrieves the field values from the underlying entities. The easiest way to make this work is to design the report using field names that correspond to the attribute names, so using the Store domain example from above the fields in a report showing the available items would have to be named 'name', 'active', 'category_code' etc.
EntityConnection connection = connectionProvider.connection();

EntityDefinition customerDefinition =
        connection.entities().definition(Customer.TYPE);

Iterator<Entity> customerIterator =
        connection.select(all(Customer.TYPE)).iterator();

JasperReportsDataSource<Entity> dataSource =
        new JasperReportsDataSource<>(customerIterator,
                (entity, reportField) ->
                        entity.get(customerDefinition.attributes().getOrThrow(reportField.getName())));

JRReport<JasperPrint> customerReport = fileReport("reports/customer.jasper");

JasperPrint jasperPrint = JasperReports.fillReport(customerReport, dataSource);1.3.9. Keyboard shortcuts
Codion applications are keyboard-first: every panel, control and navigation action is reachable without the mouse, and every shortcut is discoverable and configurable. The complete, always-current reference for a running application is available via its Help menu (Keyboard shortcuts).
ControlKeys
Each UI class declares its controls in a ControlKeys class — EntityTablePanel.ControlKeys, EntityEditPanel.ControlKeys, EntityPanel.ControlKeys — where each key identifies a control and carries its default keystroke. The javadoc of each ControlKeys class is the authoritative shortcut listing for that component.
Keystrokes are configurable at two levels:
Application-wide — modify a default keystroke before the panels are created, typically in main():
// Add a CTRL modifier to the DELETE key shortcut for table panels
EntityTablePanel.ControlKeys.DELETE.defaultKeystroke().update(keyStroke ->
        keyStroke(keyStroke.getKeyCode(), MENU_SHORTCUT_MASK));
Per panel — via the panel configuration:
new EntityTablePanel(tableModel, config ->
        config.keyStroke(EntityTablePanel.ControlKeys.REFRESH, keyStroke ->
                keyStroke.set(KeyStroke.getKeyStroke(VK_F5, 0))));
Custom key bindings
For key bindings beyond the built-in controls, the KeyEvents builder associates keystrokes with actions on any component — see the KeyBinding tutorial for a complete example.
The essentials
A few defaults worth knowing from the start, since they shape how applications feel:
-
Navigation: CTRL-ALT-UP/DOWN between master and detail panels, CTRL-ALT-LEFT/RIGHT between siblings — focus follows.
-
Focus: CTRL-E edit panel, CTRL-T table, CTRL-I initial input field, CTRL-F table search field.
-
Table: INSERT adds, CTRL-INSERT edits the selected row, SHIFT-INSERT edits one value for the whole selection, DELETE deletes.
-
Transfer focus on enter: ENTER moves to the next input component in edit panels, so data entry never touches the mouse.
|
Note
|
CTRL above refers to the platform menu shortcut key — CTRL on Windows/Linux, ⌘ on macOS. |
1.3.10. Development tools
The framework ships a set of inspection tools for looking into a running application — the live query, the editor state, an entity’s data graph. The inspectors are excluded by default and enabled via configuration values, typically during development.
Entity viewer
Displays the selected entity as a navigable tree: every attribute with its type and value, original values for modified attributes, and foreign key references expandable into the referenced entity’s tree — the fastest way to answer "what is actually in this row".
Included by default in every table panel, on CTRL-ALT-V; excluded via EntityTablePanel.Config.INCLUDE_ENTITY_VIEWER.
Query inspector
Displays the SELECT statement the table’s query model will run, updated live as conditions change — see Query Inspector. Enabled via EntityTablePanel.Config.INCLUDE_INSPECTOR, opened with CTRL-ALT-Q.
|
Note
|
The query inspector requires the codion-framework-db-local module on the classpath, since it renders SQL — on a purely remote client it is unavailable. |
Editor inspector
Displays the state of an edit panel’s editor: each attribute’s value, original value, modified/valid/present flags and validation message, along with the INSERT and UPDATE statements the current state would produce. Detail editors appear as nested inspectors.
Enabled via EntityEditPanel.Config.INCLUDE_INSPECTOR, opened with CTRL-ALT-R when the edit panel is focused.
EntityTablePanel.Config.INCLUDE_INSPECTOR.set(true);
EntityEditPanel.Config.INCLUDE_INSPECTOR.set(true);
Dependencies viewer
Displays the entities depending on the selected rows — the incoming foreign key references — as a tabbed pane of table panels, one per dependent entity type, navigable with CTRL-ALT-LEFT/RIGHT. Available from the table popup menu, and shown automatically when a delete fails on a referential integrity constraint, if ReferentialIntegrityErrorHandling is set to DISPLAY_DEPENDENCIES.
SQL tracing
Traces the queries a local connection runs — see EntityApplicationPanel.
1.4. Framework Utilities
1.4.1. Domain Model Generator
The Domain Model Generator is a desktop application that automatically generates Codion domain model source code from existing database schemas. Instead of manually writing entity definitions, columns, foreign keys, and attribute configurations, you connect to a database, select a schema, and generate fully-formed Codion domain code. This tool accelerates development, ensures consistency across entities, and serves as a starting point for new projects or when integrating with legacy databases.
Overview
The generator transforms database metadata into type-safe Codion domain models, supporting:
-
API/Implementation separation - Generates separate interface and implementation files for cleaner client dependencies
-
Combined mode - Single-file output for simpler project structures
-
DTO generation - Optional Java records for data transfer without Entity framework overhead
-
Internationalization - Optional resource bundle generation for captions and descriptions
-
Test generation - Optional JUnit test class for domain model validation
-
Schema customization - Configurable naming conventions, audit columns, and identifier casing
The generated code uses the same patterns as hand-written Codion domain models, including proper primary key generators, foreign key relationships, nullability constraints, and column metadata.
Architecture
The generator consists of three layered modules:
- codion-tools-generator-domain
-
Code generation engine that uses Palantir JavaPoet to produce syntactically correct Java source code, coordinates generation of API interfaces, implementation classes, DTO records, and i18n properties. Uses codion-framework-domain-db for schema instrospection
- codion-tools-generator-model
-
MVC model layer providing which coordinates schema discovery, entity selection, and real-time code preview. Contains FilterTableModels for schema and entity selection with observable state management.
- codion-tools-generator-ui
-
Swing desktop interface providing schema browser, entity selection, configuration dialogs, and code preview with search.
Project Setup
To use the generator in your project, create a Gradle (or the Maven equivalent) build configuration similar to the included demo:
plugins {
    application
}

dependencies {
    runtimeOnly("is.codion:codion-tools-generator-ui:{codion-version}")

    // Add your database JDBC driver
    runtimeOnly("is.codion:codion-dbms-h2:{codion-version}")
    runtimeOnly("com.h2database:h2:{h2-version}")

    // Or PostgreSQL:
    //runtimeOnly("is.codion:codion-dbms-postgresql:{codion-version}")
    // runtimeOnly("org.postgresql:postgresql:{postgresql-driver-version")

    // Or Oracle:
    //runtimeOnly("is.codion:codion-dbms-oracle:{codion-version}")
    // runtimeOnly("com.oracle.database.jdbc:ojdbc:{oracle-driver-version}") { isTransitive = false }
}

application {
    mainModule = "is.codion.tools.generator.ui"
    mainClass = "is.codion.tools.generator.ui.DomainGeneratorPanel"

    applicationDefaultJvmArgs = listOf(
        "-Xmx256m",
        "-Dcodion.db.url=jdbc:h2:mem:h2db",
        "-Dcodion.tools.generator.domainPackage=com.example.domain",
        // Output directories (relative or absolute paths)
        "-Dcodion.tools.generator.combinedSourceDirectory=combined",
        "-Dcodion.tools.generator.apiSourceDirectory=api",
        "-Dcodion.tools.generator.implSourceDirectory=impl"
    )
}
Run with: ./gradlew :your-generator-module:run
|
Note
|
See Chinook demo for a complete example. |
Configuration
The generator is configured through system properties set via JVM arguments:
Runtime Configuration
| Property | Description | Default |
|---|---|---|
|
JDBC connection URL |
Required |
|
Base package for generated code |
|
|
Output directory for combined mode (relative or absolute path) |
Current directory |
|
Output directory for API sources when using API/Impl mode (relative or absolute path) |
Current directory |
|
Output directory for implementation sources when using API/Impl mode (relative or absolute path) |
Current directory |
|
Specifies whether the database requires a login |
true |
|
Database user including password |
None |
|
Default database credentials to display in the login dialog |
None |
|
Comma-separated paths to SQL initialization scripts (H2 only) |
None |
-Dcodion.db.url=jdbc:postgresql://localhost:5432/mydb
-Dcodion.tools.generator.domainPackage=com.example.domain
-Dcodion.tools.generator.combinedSourceDirectory=generated
-Dcodion.tools.generator.apiSourceDirectory=api
-Dcodion.tools.generator.implSourceDirectory=impl|
Tip
|
Use relative paths like "api", "impl", or "../domain-api" for convenience. When using the directory selector in the UI, paths are automatically converted to relative paths from the current working directory.
|
|
Important
|
H2 database does not allow path traversal in init scripts. Use absolute paths as shown the Chinook demo. |
Schema Settings
Schema settings control how database metadata is interpreted and transformed into domain model code. Access via right-click → Settings… on a schema row.
| Setting | Description | Default |
|---|---|---|
Primary Key Column Suffix |
Suffix removed from foreign key column names when creating FK identifiers |
|
View Suffix |
Suffix removed from view names when creating entity type names |
|
View Prefix |
Prefix removed from view names when creating entity type names |
|
Audit Column Names |
Comma-separated list of audit column names to mark as read-only |
|
Hide Audit Columns |
Hide audit columns from UI components |
|
Lowercase Identifiers |
Use lowercase for entity type and attribute names |
|
When database foreign key columns follow a naming convention like CUSTOMER_ID (referencing CUSTOMER.ID), the generator creates a foreign key constant like CUSTOMER_ID_FK. Setting a suffix of "ID" or "_ID" strips this from the FK name, resulting in the cleaner CUSTOMER_FK.
Column<Integer> CUSTOMER_ID = TYPE.integerColumn("customer_id");

ForeignKey CUSTOMER_ID_FK = TYPE.foreignKey("customer_id_fk", CUSTOMER_ID, Customer.ID);Column<Integer> CUSTOMER_ID = TYPE.integerColumn("customer_id");
ForeignKey CUSTOMER_FK = TYPE.foreignKey("customer_fk", CUSTOMER_ID, Customer.ID);Databases often suffix view names with _VW, _VIEW, or similar. Setting this suffix removes it from the caption before "View" is appended to the interface name.
|
Important
|
The EntityType identifier always matches the actual database view name. "View" is ALWAYS appended to view interface names to avoid collisions with table names. The suffix configuration only affects whether the suffix is removed from the caption first. |
CREATE VIEW ORDERS_V AS SELECT ...- Without suffix configured
-
-
EntityType:
DOMAIN.entityType("orders_v") -
Interface:
interface OrdersVView("Orders v" → PascalCase + "View") -
Caption:
"Orders v"
-
- With suffix "_v" configured
-
-
EntityType:
DOMAIN.entityType("orders_v")(unchanged - always matches database) -
Interface:
interface OrdersView(suffix removed → "Orders" → PascalCase + "View") -
Caption:
"Orders"(clean caption without suffix)
-
Databases sometimes prefix view names with VW_, V_, or similar. Setting this prefix removes it from the caption before "View" is appended to the interface name.
|
Important
|
The EntityType identifier always matches the actual database view name. "View" is ALWAYS appended to view interface names to avoid collisions with table names. The prefix configuration only affects whether the prefix is removed from the caption first. |
CREATE VIEW VW_ORDERS AS SELECT ...- Without prefix configured
-
-
EntityType:
DOMAIN.entityType("vw_orders") -
Interface:
interface VwOrdersView("Vw orders" → PascalCase + "View") -
Caption:
"Vw orders"
-
- With prefix "vw_" configured
-
-
EntityType:
DOMAIN.entityType("vw_orders")(unchanged - always matches database) -
Interface:
interface OrdersView(prefix removed → "Orders" → PascalCase + "View") -
Caption:
"Orders"(clean caption without prefix)
-
|
Note
|
Both view prefix and view suffix can be used simultaneously. The prefix is removed first, then the suffix. This prevents collisions when both a table and view exist with similar names (e.g., orders table and orders_v view).
|
Many schemas include audit columns like INSERT_USER, INSERT_TIME, UPDATE_USER, UPDATE_TIME. Specifying these column names (comma-separated, case-insensitive) marks them as read-only in generated definitions.
Customer.INSERT_USER.as()
.column()
.readOnly(true)
.hidden(true) // If "Hide Audit Columns" enabledUser Workflow
-
Launch the application
./gradlew :your-generator-module:run -
Authenticate (if required)
Enter database credentials in the login dialog. Set
codion.tools.generator.userto pre-fill the username field. -
Select a schema
The schema table lists all available database schemas with their catalog names. Click to select.
-
Populate the schema
Double-click the schema row or press Cmd+Enter (macOS) / Ctrl+Enter (other) to load entity definitions. This introspects database metadata and populates the entity table.
-
Configure schema settings (optional)
Right-click the schema row and select Settings… to customize naming conventions and audit column handling. Settings are persisted in user preferences.
-
Review entities
The entity table shows all tables and views discovered in the schema, including their type (TABLE/VIEW) and metadata.
-
Select entities for DTO generation (optional)
Check the DTO column for entities that should generate DTO record classes. Foreign key attributes are only included in the DTO if the referenced entity also has a DTO.
-
Enable generation options
-
DTOs checkbox - Generate DTO records for selected entities
-
i18n checkbox - Generate resource bundle properties files
-
Test checkbox - Generate a JUnit test class for domain validation
-
-
Preview generated code
Select a tab to view generated code:
-
API / Impl - Split view showing separate API interface and implementation files
-
API Source Directory - Where to write the API interface (default: current directory)
-
Implementation Source Directory - Where to write the implementation class (default: current directory)
-
-
Combined - Single-file domain model
-
Combined Source Directory - Where to write the combined file (default: current directory)
-
-
i18n - Resource bundle properties (if enabled)
Use the search field to highlight occurrences of text in the code view. Click the … button next to any directory field to select a different output directory.
-
-
Configure output directories (optional)
Each tab has directory fields showing where files will be written. Click … to select a directory. The generator automatically converts absolute paths to relative paths from your working directory for portability.
-
Save to filesystem
Click Save on the appropriate tab to write files. Existing files trigger an overwrite confirmation dialog. Generated files can be copied to actual module directories as needed.
|
Tip
|
Use keyboard shortcuts Alt+1 through Alt+5 to navigate between major UI sections (schema table, entity table, tabs, etc.). |
Generated Output
File Structure
The generator writes files to the configured output directories. By default, files are written to simple directories in your working directory (e.g., api/, impl/, combined/), which can later be copied to actual module source directories as needed.
Generates separate API and implementation files. When configured with directories "api" and "impl":
api/src/main/java/<domain-package>/api/
└── <DomainName>.java # Public API interface
api/src/main/resources/<domain-package>/api/
└── <DomainName>$<EntityName>.properties # i18n resources (if enabled)
impl/src/main/java/<domain-package>/
└── <DomainName>Impl.java # Implementation class
impl/src/test/java/<domain-package>/
└── <DomainName>Test.java # JUnit test (if enabled)|
Note
|
These files can be copied to separate Gradle/Maven modules (e.g., domain-api and domain-impl) for applications using RMI or HTTP connections where clients only need the API on their classpath.
|
package is.codion.manual.generator.apiimpl.api;
import is.codion.framework.domain.DomainType;
import is.codion.framework.domain.entity.EntityType;
import is.codion.framework.domain.entity.attribute.Column;
import is.codion.framework.domain.entity.attribute.ForeignKey;
import static is.codion.framework.domain.DomainType.domainType;
public interface Store {
DomainType DOMAIN = domainType(Store.class);
interface Customer {
EntityType TYPE = DOMAIN.entityType("customer");
Column<Integer> ID = TYPE.integerColumn("id");
Column<String> NAME = TYPE.stringColumn("name");
Column<String> EMAIL = TYPE.stringColumn("email");
}
interface Order {
EntityType TYPE = DOMAIN.entityType("order");
Column<Integer> ID = TYPE.integerColumn("id");
Column<Integer> CUSTOMER_ID = TYPE.integerColumn("customer_id");

ForeignKey CUSTOMER_FK = TYPE.foreignKey("customer_fk", CUSTOMER_ID, Customer.ID);
}
}package is.codion.manual.generator.apiimpl;
import is.codion.framework.domain.DomainModel;
import is.codion.framework.domain.entity.EntityDefinition;
import is.codion.manual.generator.apiimpl.api.Store.Customer;
import is.codion.manual.generator.apiimpl.api.Store.Order;
import static is.codion.framework.domain.entity.attribute.Column.Generator.identity;
import static is.codion.manual.generator.apiimpl.api.Store.DOMAIN;
public final class StoreImpl extends DomainModel {
public StoreImpl() {
super(DOMAIN);
add(customer(), order());
}
static EntityDefinition customer() {
return Customer.TYPE.as()
.attributes(
Customer.ID.as()
.primaryKey()
.generator(identity()),
Customer.NAME.as()
.column()
.caption("Name")
.nullable(false)
.maximumLength(100),
Customer.EMAIL.as()
.column()
.caption("Email")
.maximumLength(255))
.caption("Customer")
.build();
}
static EntityDefinition order() {
return Order.TYPE.as()
.attributes(
Order.ID.as()
.primaryKey()
.generator(identity()),
Order.CUSTOMER_ID.as()
.column(),
Order.CUSTOMER_FK.as()
.foreignKey()
.caption("Customer"))
.caption("Order")
.build();
}
}Generates a single class containing both API and implementation. When configured with directory "combined":
combined/src/main/java/<domain-package>/
└── <DomainName>.java                      # Combined API + implementation

combined/src/main/resources/<domain-package>/
└── <DomainName>$<EntityName>.properties   # i18n resources (if enabled)

combined/src/test/java/<domain-package>/
└── <DomainName>Test.java # JUnit test (if enabled)|
Note
|
This mode is suitable for simpler projects using only local JDBC connections. The generated directory can be copied directly to your application’s source tree. |
package is.codion.manual.generator;
import is.codion.framework.domain.DomainModel;
import is.codion.framework.domain.DomainType;
import is.codion.framework.domain.entity.EntityDefinition;
import is.codion.framework.domain.entity.EntityType;
import is.codion.framework.domain.entity.attribute.Column;
import is.codion.framework.domain.entity.attribute.ForeignKey;
import static is.codion.framework.domain.DomainType.domainType;
import static java.util.Collections.emptyList;
public final class Store extends DomainModel {
public static final DomainType DOMAIN = domainType(Store.class);
public Store() {
super(DOMAIN);
add(customer(), order());
}
public interface Customer {
EntityType TYPE = DOMAIN.entityType("customer");
Column<Integer> ID = TYPE.integerColumn("id");
Column<String> NAME = TYPE.stringColumn("name");
// ...
}
public interface Order {
EntityType TYPE = DOMAIN.entityType("order");
Column<Integer> ID = TYPE.integerColumn("id");
Column<Integer> CUSTOMER_ID = TYPE.integerColumn("customer_id");
ForeignKey CUSTOMER_FK = TYPE.foreignKey("customer_fk", CUSTOMER_ID, Customer.ID);
// ...
}
static EntityDefinition customer() {
return Customer.TYPE.as().attributes(emptyList()).build();
}
static EntityDefinition order() {
return Order.TYPE.as().attributes(emptyList()).build();
}
}Schema Introspection
The codion-framework-domain-db module deals with introspecting database metadata using JDBC DatabaseMetaData and applies schema settings to generate appropriate domain model configurations.
Column Mapping
Database column metadata is transformed into Codion column definitions:
| Database Metadata | Generated Configuration |
|---|---|
Primary key column |
|
Auto-increment column |
|
NOT NULL constraint |
|
VARCHAR(n) size |
|
DECIMAL(p,s) scale |
|
Column default value |
|
Column comment |
|
Foreign Key Detection
Foreign key constraints in the database schema are automatically detected and transformed into ForeignKey constants and definitions:
CREATE TABLE orders (
id INTEGER PRIMARY KEY,
customer_id INTEGER REFERENCES customers(id)
);interface Order {
EntityType TYPE = DOMAIN.entityType("orders");
Column<Integer> ID = TYPE.integerColumn("id");
Column<Integer> CUSTOMER_ID = TYPE.integerColumn("customer_id");
ForeignKey CUSTOMER_FK = TYPE.foreignKey("customer_fk", CUSTOMER_ID, Customer.ID);
}
Order.CUSTOMER_FK.as()
.foreignKey()
.caption("Customer")Composite foreign keys are supported - the generator detects multi-column foreign key constraints and generates appropriate multi-reference ForeignKey definitions.
View Handling
Database views are automatically marked as read-only entities:
EntityDefinition customerSummary() {
return CustomerSummary.TYPE.as(/* ... */)
.caption("Customer summary")
.readOnly(true) // Automatically added for views
.build();
}Naming Conventions
The generator applies consistent naming transformations:
| Database Name | Generated Name |
|---|---|
Table: |
EntityType: |
Column: |
Column constant: |
Column: |
ForeignKey constant: |
View: |
EntityType: |
DTO Generation
Data Transfer Object (DTO) generation creates Java record classes for entities, providing a lightweight alternative to the full Entity framework for data transfer scenarios.
When to Generate DTOs
Enable DTO generation for entities that:
-
Need to be serialized for REST APIs or messaging systems
-
Represent simple data structures without complex Entity behaviors
-
Are frequently transferred between application layers
See Chinook demo
DTO Structure
For each entity with DTO generation enabled, the generator creates a nested Dto record within the entity interface:
interface Customer {
EntityType TYPE = DOMAIN.entityType("customer");
Column<Integer> ID = TYPE.integerColumn("id");
Column<String> NAME = TYPE.stringColumn("name");
Column<String> EMAIL = TYPE.stringColumn("email");
// Generated DTO record
public static record Dto(
Integer id,
String name,
String email) {
public Entity entity(Entities entities) {
return entities.entity(TYPE)
.with(ID, id)
.with(NAME, name)
.with(EMAIL, email)
.build();
}
}
// Conversion method
public static Dto dto(Customer customer) {
return customer == null ? null :
new Dto(
customer.get(ID),
customer.get(NAME),
customer.get(EMAIL));
}
}Foreign Key DTOs
When an entity with a DTO references another entity via foreign key, the foreign key attribute is included in the DTO only if the referenced entity also has DTO generation enabled. The generator creates nested DTOs for included foreign keys:
interface Order {
Column<Integer> CUSTOMER_ID = TYPE.integerColumn("customer_id");
ForeignKey CUSTOMER_FK = TYPE.foreignKey("customer_fk",
CUSTOMER_ID, Customer.ID);
public static record Dto(
Integer id,
Customer.Dto customer) { // Nested DTO reference (only if Customer has DTO)
public Entity entity(Entities entities) {
return entities.entity(TYPE)
.with(ID, id)
.with(CUSTOMER_FK, customer.entity(entities))
.build();
}
}
}|
Note
|
Foreign keys are selectively included - if Order references Customer and Customer is marked for DTO generation, Order’s DTO will include Customer.Dto. If Customer is not marked for DTOs, the CUSTOMER_FK attribute is simply excluded from Order’s DTO.
|
Internationalization
When i18n generation is enabled, the generator creates resource bundle property files for entity and attribute captions and descriptions.
Generated Properties Format
customer=Customer
customer.description=Customer master data
id=Id
name=Name
email=Email
email.description=Customer email addressThe generator creates one properties file per entity, using the naming convention <DomainName>$<EntityName>.properties.
i18n Mode vs Literal Mode
The generator supports two caption strategies:
- Literal Mode (i18n disabled)
-
Captions and descriptions are embedded directly in the generated code:
Customer.NAME.as() .column() .caption("Name") .description("Customer full name") - i18n Mode (i18n enabled)
-
Captions and descriptions are loaded from resource bundles:
// EntityType with resource bundle reference EntityType TYPE = DOMAIN.entityType("customer", Customer.class.getName()); // No caption() or description() calls - loaded from properties Customer.NAME.as() .column() .nullable(false)
The framework automatically loads captions and descriptions from the properties file matching the fully qualified class name of the entity interface.
|
Note
|
When using i18n mode, create additional properties files with locale suffixes (e.g., Store$Customer_de.properties, Store$Customer_fr.properties) for internationalization support.
|
Test Generation
When test generation is enabled, the generator creates a JUnit test class that extends DomainTest to verify domain model integrity. The test class includes a test method per entity that exercises full CRUD operations and validates constraints. The test may need further configuration to run successfully.
For further information see Domain model testing.
Best Practices
Choosing Output Mode
Use API/Implementation separation when:
-
Building applications with RMI or HTTP connections
-
Multiple client applications share the same domain API
-
You want lighter client classpaths (API only, no implementation)
-
Following strict architectural separation
Use Combined mode when:
-
Building simple local-JDBC applications
-
The domain model is small (<20 entities)
-
You prefer fewer files to maintain
-
Deployment simplicity outweighs architectural purity
Output Directory Strategy
The generator can write to any directory (relative or absolute paths). A simple workflow:
-
Generate to local directories - Use simple relative paths like
"api","impl", or"combined"in your working directory -
Review and customize - Examine the generated code, make any immediate adjustments
-
Copy to modules - If using separate modules, copy the generated directories to your module source trees
This approach keeps the generator configuration simple while supporting any project structure. There’s no need to configure the generator to write directly into complex module hierarchies.
|
Tip
|
Domain generation is typically a one-shot operation. Generating to simple local directories and copying files manually provides more control and flexibility than trying to configure direct module paths. |
DTO Selection Strategy
-
Enable DTOs for entities that cross architectural boundaries (e.g., REST APIs, messaging systems)
-
If you want nested foreign key references in DTOs, enable DTOs for those referenced entities as well
-
Foreign keys to entities without DTOs are simply excluded from the DTO
-
Not every entity needs a DTO - be selective based on your application’s needs
Schema Settings Workflow
-
Connect to database
-
Select schema but don’t populate yet
-
Right-click → Settings to configure naming conventions
-
Now populate schema with Cmd+Enter or double-click
-
Settings are saved in user preferences and reused next time
Version Control
-
Commit generated code - It’s source code, not build artifacts
-
Customize after generation - The generator output is a starting point
-
Don’t regenerate blindly - Manual customizations will be lost
-
Use version control to track changes - Diff generated vs customized code
Customization Pattern
The generator produces standard Codion domain models. After generation, customize as needed:
-
Add EntityValidator implementations for business rules
-
Define derived attributes for calculated values
-
Add denormalized attributes for performance optimization
-
Configure foreign key fetch depth with
referenceDepth() -
Implement custom toString() formatters
-
Add custom condition types for complex queries
|
Tip
|
Generate once, customize as needed, and use version control to preserve your customizations. Don’t treat the generator as a round-trip tool. |
Database Support
The generator works with any JDBC-compliant database. Tested databases include:
-
H2 Database (in-memory and file-based)
-
PostgreSQL 12+
-
Oracle Database 11g+
-
MariaDB 10.3+
-
MySQL 8.0+ (via MariaDB driver)
Each database requires its appropriate JDBC driver on the runtime classpath. See Chinook demo.
|
Important
|
When using H2 with init scripts, H2 does not allow path traversal. Use absolute paths for codion.db.initScripts.
|
Keyboard Navigation
The generator UI supports keyboard-driven workflows:
| Shortcut | Action |
|---|---|
Alt+1 - Alt+5 |
Navigate between UI sections (schema table, entity table, tabs, etc.) |
Cmd+Enter / Ctrl+Enter |
Populate selected schema |
Ctrl+F |
Focus search field in code view |
Cmd+C / Ctrl+C |
Copy code to clipboard (when code view focused) |
|
Tip
|
The search field in code tabs highlights all occurrences of the search term, making it easy to locate specific entities or attributes in generated code. |
Examples
For complete working examples:
-
Configuration: Chinook demo
-
Generated Code:
tools/generator/domain/src/test/resources/(Chinook, World, Petstore) -
Hand-crafted Domains: See domain model sections in demo tutorials:
The generator produces code that follows the same patterns as these hand-crafted examples, although the structure may differ, making it easy to compare generated vs manually-written domain models.
2. Common
2.1. Common Reactive
2.1.1. Reactive classes
Three common classes used throughout the framework are Event, State and Value and their respective observers Observer and ObservableState.
|
Note
|
Not all available methods are included in the diagrams below, see javadocs for details. |
Event
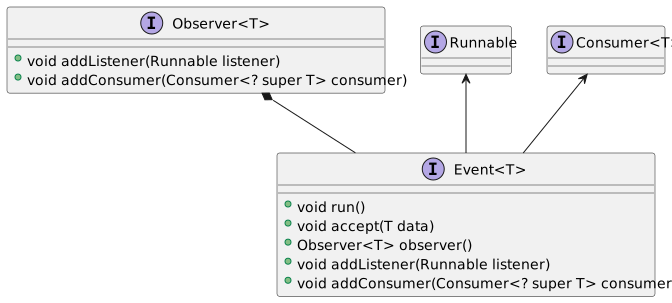
The Event class is a synchronous event implementation used throughout the framework. Classes typically expose observers for their events via public accessors. Events are triggered by calling the run method in case no data is associated with the event or accept in case data should be propogated to consumers.
The associated Observer instance can not trigger the event and can be safely passed around.
Event listeners must implement either Runnable or Consumer, depending on whether they are interested in the data associated with the event.
|
Note
|
Both listeners and consumer are notified each time the event is triggered, regardless of whether run or accept is used, listeners and consumers are notified in the order they were added. |
Events are instantiated via factory methods in the Event class.
// specify an event propagating
// a String as the event data
Event<String> event = Event.event();
// an observer manages the listeners
// for an Event but can not trigger it
Observer<String> observer = event.observer();
// add a listener if you're not
// interested in the event data
observer.addListener(() -> System.out.println("Event occurred"));
event.run();//output: 'Event occurred'
// or a consumer if you're
// interested in the event data
observer.addConsumer(data -> System.out.println("Event: " + data));
event.accept("info");//output: 'Event: info'
// Event implements Observer so
// listeneres can be added directly without
// referring to the Observer
event.addConsumer(System.out::println);Observer
The Observer class provides a way to add conditional listeners via Observer.when().
private void observer() {
// React to a specific value or predicate
Value<Integer> value = Value.nullable();
value.when(1)
.addListener(() -> System.out.println("Value is one"));
value.when(2)
.addConsumer(System.out::println);
value.when(Objects::isNull)
.addListener(() -> System.out.println("Value is null"));
value.when(1)
.addListener(() -> System.out.println("one"));
value.when(2)
.addListener(() -> System.out.println("two"));
value.when(v -> v > 10)
.addConsumer(v -> System.out.println("Large value: " + v));
// React to boolean states
State enabled = State.builder()
.when(true, () -> System.out.println("Enabled"))
.when(false, () -> System.out.println("Disabled"))
.build();
}Value
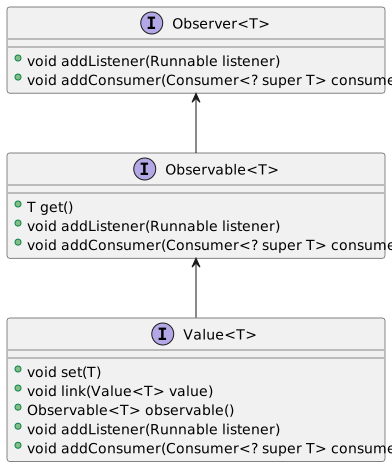
A Value wraps a value and provides a change observer.
Values are instantiated via factory methods in the Value class.
Values can be linked so that changes in one are reflected in the other.
// a nullable value with 2 as the initial value
Value<Integer> value =
Value.nullable(2);
value.set(4);
// a non-null value using 0 as null substitute
Value<Integer> otherValue =
Value.nonNull(0);
// linked to the value above
value.link(otherValue);
System.out.println(otherValue.get());// output: 0
otherValue.set(3);
System.out.println(value.get());// output: 3
System.out.println(value.is(3));// output: true
value.set(null);
System.out.println(otherValue.get());// output: 0
value.addConsumer(System.out::println);
otherValue.addListener(() ->
System.out.println("Value changed: " + otherValue.get()));Values can be non-nullable if a nullValue is specified when the value is initialized. Null is then translated to the nullValue when set.
Integer initialValue = 42;
Integer nullValue = 0;
Value<Integer> value =
Value.builder()
.nonNull(nullValue)
.value(initialValue)
.build();
System.out.println(value.isNullable());//output: false
System.out.println(value.get());// output: 42
value.set(null); //or value.clear();
value.isNull(); //output: false;
System.out.println(value.get());//output: 0Linking
Values of the same type can be linked, instead of synchronizing them manually with listeners. Linking is bidirectional and the current value of the original propagates to the linked value when the link is established. This is the mechanism binding input components to values throughout the framework.
Value<Integer> value = Value.nullable();
Value<Integer> linked = Value.nullable();
// linking propagates the current value
// of the original value to the linked one
linked.link(value);
value.set(2);
System.out.println(linked.get());// output: 2
// linking is bidirectional, so a change
// in either value propagates to the other
linked.set(3);
System.out.println(value.get());// output: 3Notification strategies
By default, listeners are notified only when a value actually changes (Notify.CHANGED) — setting a value equal to the current one is a no-op. Notify.SET notifies on every set, whether the value changed or not.
// CHANGED, the default: listeners are notified
// only when the value actually changes
Value<Integer> counter = Value.builder()
.nonNull(0)
.notify(Value.Notify.CHANGED)
.build();
counter.addListener(() -> System.out.println("changed"));
counter.set(1);// output: 'changed'
counter.set(1);// no output, value did not change
// SET: listeners are notified each
// time the value is set
Value<Integer> status = Value.builder()
.nonNull(0)
.notify(Value.Notify.SET)
.build();
status.addListener(() -> System.out.println("set"));
status.set(1);// output: 'set'
status.set(1);// output: 'set'ValueCollection
ValueSet<Integer> valueSet =
ValueSet.<Integer>builder()
.value(Set.of(1, 2, 3))
.build();
valueSet.addListener(() -> System.out.println("Values changed"));
valueSet.add(4); //output: Values changed
valueSet.add(1); //no change, no output
valueSet.remove(1); //output: Values changed
System.out.println(valueSet.contains(1)); //output: false
valueSet.clear();
ValueList<Integer> valueList =
ValueList.<Integer>builder()
.value(List.of(1, 2, 3))
.build();
valueList.addListener(() -> System.out.println("Values changed"));
valueList.add(4); //output: Values changed
valueList.add(1); //output: Values changed
valueList.remove(1); //output: Values changed
System.out.println(valueList.contains(1)); //output: true
valueList.clear();State
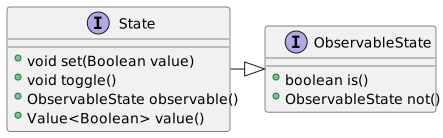
The State class encapsulates a boolean state and provides read only access and a change observer via ObservableState. A State implements Value<Boolean> and is non-nullable with null translating to false.
States are instantiated via factory methods in the State class.
// a boolean state, false by default
State state = State.state();
// an observable manages the listeners for a State but can not modify it
ObservableState observable = state.observable();
// a not observable is always available, which is
// always the reverse of the original state
ObservableState not = state.not();
// add a listener notified each time the state changes
observable.addListener(() -> System.out.println("State changed"));
state.set(true);//output: 'State changed'
observable.addConsumer(value -> System.out.println("State: " + value));
state.set(false);//output: 'State: false'
// State extends ObservableState so listeners can be added
// directly without referring to the ObservableState
state.addListener(() -> System.out.println("State changed"));private static final class IntegerValue {
private final State negative = State.state(false);
private final Value<Integer> integer = Value.builder()
.nonNull(0)
.consumer(value -> negative.set(value < 0))
.build();
/**
* Increment the value by one
*/
public void increment() {
integer.update(value -> value + 1);
}
/**
* Decrement the value by one
*/
public void decrement() {
integer.update(value -> value - 1);
}
/**
* @return an observer notified each time the value changes
*/
public Observer<Integer> changed() {
return integer.observable();
}
/**
* @return a state observer indicating whether the value is negative
*/
public ObservableState negative() {
return negative.observable();
}
}Any Action or JComponent enabled status can be linked to a State instance via the Utilities.enabled() method.
State composition
State updateEnabled = State.state();
State insertEnabled = State.state();
State recordNew = State.state();
State recordModified = State.state();
ObservableState saveButtonEnabled = State.and(
State.or(insertEnabled, updateEnabled),
State.or(recordNew, recordModified));
JButton saveButton = new JButton("Save");
Utilities.enabled(saveButtonEnabled, saveButton);State state = State.state();
Action action = new AbstractAction("action") {
@Override
public void actionPerformed(ActionEvent e) {
System.out.println("Hello Action");
}
};
Utilities.enabled(state, action);
System.out.println(action.isEnabled());// output: false
state.set(true);
System.out.println(action.isEnabled());// output: trueControls can also be linked to a State instance.
State state = State.state();
CommandControl control = Control.builder()
.command(() -> System.out.println("Hello Control"))
.enabled(state)
.build();
System.out.println(control.isEnabled());// output: false
state.set(true);
System.out.println(control.isEnabled());// output: true|
Note
|
When a State or Event is linked to a Swing component, for example its enabled state, all state changes must happen on the Event Dispatch Thread. |
State groups
A State.Group ensures that at most a single member state is active at a time — radio button semantics:
// a state group ensures that only a single
// state is active at a time, like radio buttons
State one = State.state();
State two = State.state();
State three = State.state();
State.group(one, two, three);
one.set(true);
System.out.println(two.is());// output: false
two.set(true);
System.out.println(one.is());// output: false2.1.2. Weak listeners
Every observer accepts listeners via weak references — addWeakListener(), addWeakConsumer() — which do not prevent the listener from being garbage collected. A short-lived component observing a long-lived model should use a weak listener (or remove its listeners when discarded), otherwise the model keeps the discarded component reachable forever. Dead references are cleaned up automatically; the caller must simply ensure something holds a strong reference to the listener for as long as it should stay active.
Value<Integer> value = Value.nullable();
Runnable listener = () -> System.out.println("Value changed");
// a weak listener does not prevent garbage collection of the
// listener instance; a component observing a model that outlives
// it should use a weak listener, or remove its listeners when discarded.
// Note that something must keep a strong reference to the listener,
// here it is a local variable, so this only works within this scope
value.addWeakListener(listener);
value.set(42);// output: 'Value changed'
// weak references to garbage collected
// listeners are cleaned up automatically2.1.3. Threading
Listener management — adding and removing — is thread-safe on all reactive classes. Mutation and notification are not: set(), run() and accept() are designed to be called from a single thread, the UI thread in a typical application. A background thread with a result for a value hands it to the UI thread first — in Swing via SwingUtilities.invokeLater or, better, a ProgressWorker whose onResult already runs there.
Listeners are notified synchronously, in the order they were added, and an exception thrown by a listener prevents the remaining ones from being notified — listeners performing risky work handle their own exceptions.
2.2. Common Database
Core JDBC related classes.
2.2.1. Database
The Database class represents a DBMS instance and provides connections to that instance.
There are multiple ways to aquire a Database instance.
-
By specifying a JDBC url via a system property.
System.setProperty("codion.db.url", "jdbc:h2:mem:h2db");
Database database = Database.instance();-
By setting the JDBC url configuration value directly (which also sets the system property).
Database.URL.set("jdbc:h2:mem:h2db");
Database database = Database.instance();-
By instantiating a DatabaseFactory directly.
String url = "jdbc:h2:mem:h2db";
DatabaseFactory databaseFactory = DatabaseFactory.instance(url);
Database database = databaseFactory.create(url);-
By instantiating a DBMS specific DatabaseFactory directly.
String url = "jdbc:h2:mem:h2db";
H2DatabaseFactory databaseFactory = new H2DatabaseFactory();
Database database = databaseFactory.create(url);A Database instance provides java.sql.Connection instances via the createConnection method.
Database.URL.set("jdbc:h2:mem:h2db");
Database database = Database.instance();
User user = User.parse("scott:tiger");
java.sql.Connection connection = database.createConnection(user);2.3. Common Model
2.3.1. File Preferences
FilePreferences.filePreferences(String) provides a file-based implementation of the Java Preferences API that removes the restrictive length limitations of the default implementation.
Motivation
The default Java Preferences API imposes the following restrictions:
-
Maximum key length: 80 characters
-
Maximum value length: 8,192 characters (8 KB)
-
Maximum node name length: 80 characters
These limits can be problematic when storing configuration data such as serialized table column preferences or other structured data that may exceed these limits.
Usage
// Then use preferences normally
Preferences prefs = UserPreferences.file("my.config.file");
prefs.put("my.very.long.key.name.that.exceeds.80.chars", "my huge value...");
prefs.flush(); // Writes to ~/.codion/my.config.file.jsonFile Storage
Preferences are stored in a JSON file at a platform-specific location:
-
Windows:
%LOCALAPPDATA%\Codion{filename}.json -
macOS:
~/Library/Preferences/Codion/{filename}.json -
Linux:
~/.config/codion/{filename}.json(follows XDG Base Directory specification) -
Other:
~/.codion/{filename}.json
|
Note
|
The global preferences file location can also be specified via FilePreferences.PREFERENCES_LOCATION if these default locations do not fit your use-case. |
The file uses the following JSON format:
{
"normal.key": "normal value",
"very.long.key.that.exceeds.eighty.characters": "value",
"key.with.large.value": "... 100KB of text ...",
"key.with.newlines": "Line 1\nLine 2\nLine 3"
}|
Note
|
When storing JSON data as a preference value (such as serialized column preferences), the JSON content is properly escaped and stored as a JSON string value. This double-encoding is handled automatically - you store and retrieve your JSON strings normally through the Preferences API. |
Features
-
No length restrictions - Keys and values can be of any length
-
JSON format - Human-readable and easily editable
-
Thread-safe - Safe for concurrent access within a single JVM
-
Multi-JVM safe - File locking ensures safe concurrent access from multiple JVMs
-
Atomic writes - Changes are written atomically to prevent corruption
-
Drop-in replacement - Uses the standard Java Preferences API
-
Full hierarchy support - Create nested preference nodes with paths
Hierarchy Support
The file preferences implementation supports the full Java Preferences node hierarchy:
Preferences root = UserPreferences.file("my.config.file");
// Create nested preference nodes
Preferences appNode = root.node("myapp");
Preferences uiNode = appNode.node("ui");
Preferences dbNode = appNode.node("database");
// Store preferences at different levels
uiNode.put("theme", "dark");
uiNode.put("font.size", "14");
dbNode.put("connection.url", "jdbc:postgresql://localhost/mydb");
dbNode.put("connection.pool.size", "10");
// Navigate to nodes using paths
Preferences ui = root.node("myapp/ui");
String theme = ui.get("theme", "light"); // "dark"
// List child nodes
String[] appChildren = appNode.childrenNames(); // ["ui", "database"]
// Remove entire node and its children
dbNode.removeNode();
root.flush();The hierarchical structure is stored as nested JSON objects:
{
"myapp": {
"ui": {
"theme": "dark",
"font.size": "14"
},
"database": {
"connection.url": "jdbc:postgresql://localhost/mydb",
"connection.pool.size": "10"
}
}
}Concurrency and Multi-JVM Access
The file preferences implementation is designed to be safe for concurrent access:
-
Within a single JVM: All operations are synchronized using internal locks
-
Across multiple JVMs: File locking ensures only one JVM can write at a time
-
Atomic writes: Changes are written to a temporary file and atomically moved
-
External changes: The
sync()method reloads the file if modified externally
// JVM 1
Preferences prefs1 = UserPreferences.file("my.config.file");
prefs1.put("shared.value", "from JVM 1");
prefs1.flush();
// JVM 2
Preferences prefs1 = UserPreferences.file("my.config.file");
prefs2.sync(); // Reload to see changes from JVM 1
String value = prefs2.get("shared.value", null); // "from JVM 1"The implementation uses a 5-second timeout for acquiring file locks to prevent deadlocks.
2.4. ProgressWorker
ProgressWorker provides a fluent API for constructing background task workers for a variety of task types.
|
Note
|
ProgressWorker instances can not be reused. Tasks, on the other hand, can be made stateful and reusable if required. |
2.4.1. Task
// A non-progress aware task, producing no result
ProgressWorker.Task task = () -> {
// Perform the task
};
ProgressWorker.builder()
.task(task)
.onException(exception ->
Dialogs.exception()
.owner(applicationFrame)
.show(exception))
.execute();2.4.2. TaskHandler
// TaskHandler encapsulates the task and its handlers in a single class.
// Handler interface methods are called first, followed by
// any handlers added via the builder, in the order they were added.
// This enables a layered approach where the handler interface
// handles model-level concerns (logging, state updates) while
// builder handlers handle UI-level concerns (displaying dialogs).
ProgressWorker.TaskHandler task = new TaskHandler() {
@Override
public void execute() throws Exception {
// Perform the task
}
// Called first on exception: log the error (model-level)
@Override
public void onException(Exception exception) {
LOG.log(Level.WARNING, exception.getMessage());
}
};
ProgressWorker.builder()
.task(task)
// Called after the handler's onException: display the error (UI-level)
.onException(exception -> Dialogs.exception()
.owner(applicationFrame)
.show(exception))
.execute();2.4.3. ResultTask
// A non-progress aware task, producing a result
ProgressWorker.ResultTask<String> task = () -> {
// Perform the task
return "Result";
};
ProgressWorker.builder()
.task(task)
.onResult(result ->
showMessageDialog(applicationFrame, result))
.onException(exception ->
Dialogs.exception()
.owner(applicationFrame)
.show(exception))
.execute();2.4.4. ResultTaskHandler
// ResultTaskHandler encapsulates a result-producing task and its handlers.
// The handler's onResult and onException are called first (model-level),
// then the builder's handlers are called after (UI-level).
ResultTaskHandler<String> task = new ResultTaskHandler<String>() {
@Override
public String execute() throws Exception {
// Perform the task
return "Result";
}
// Called first on success: log the result (model-level)
@Override
public void onResult(String result) {
LOG.log(Level.INFO, result);
}
// Called first on exception: log the error (model-level)
@Override
public void onException(Exception exception) {
LOG.log(Level.WARNING, exception.getMessage());
}
};
ProgressWorker.builder()
.task(task)
// Called after the handler's onResult: display the result (UI-level)
.onResult(result -> showMessageDialog(applicationFrame, result))
// Called after the handler's onException: display the error (UI-level)
.onException(exception -> Dialogs.exception()
.owner(applicationFrame)
.show(exception))
.execute();2.4.5. ProgressTask
// A progress aware task, producing no result
ProgressWorker.ProgressTask<String> task = progressReporter -> {
// Perform the task
progressReporter.report(42);
progressReporter.publish("Message");
};
ProgressWorker.builder()
.task(task)
.onProgress(progress ->
System.out.println("Progress: " + progress))
.onPublish(message ->
showMessageDialog(applicationFrame, message))
.onException(exception ->
Dialogs.exception()
.owner(applicationFrame)
.show(exception))
.execute();2.4.6. ProgressTaskHandler
// ProgressTaskHandler encapsulates a progress-aware task and its handlers.
// The handler's methods are called first (model-level),
// then the builder's handlers are called after (UI-level).
ProgressTaskHandler<String> task = new ProgressTaskHandler<String>() {
@Override
public void execute(ProgressReporter<String> progressReporter) throws Exception {
// Perform the task
for (int i = 0; i < maximum(); i++) {
progressReporter.report(i);
progressReporter.publish("Message " + i);
}
}
@Override
public void onProgress(int progress) {
System.out.println("Progress: " + progress);
}
@Override
public void onPublish(List<String> message) {
displayMessage(message);
}
// Called first on exception: log the error (model-level)
@Override
public void onException(Exception exception) {
LOG.log(Level.WARNING, exception.getMessage());
}
};
ProgressWorker.builder()
.task(task)
// Called after the handler's onException: display the error (UI-level)
.onException(exception -> Dialogs.exception()
.owner(applicationFrame)
.show(exception))
.execute();2.4.7. ProgressResultTask
// A reusable, cancellable task, producing a result.
// Displays a progress bar in a dialog while running.
var task = new DemoProgressResultTask();
ProgressWorker.builder()
.task(task.prepare(142))
.execute();static final class DemoProgressResultTask implements ProgressResultTaskHandler<Integer, String> {
private final JProgressBar progressBar = progressBar()
.indeterminate(false)
.stringPainted(true)
.string("")
.build();
// Indicates whether the task has been cancelled
private final AtomicBoolean cancelled = new AtomicBoolean();
// A Control for setting the cancelled state
private final Control cancel = Control.builder()
.command(() -> cancelled.set(true))
.caption("Cancel")
.mnemonic('C')
.build();
// A panel containing the progress bar and cancel button
private final JPanel progressPanel = borderLayoutPanel()
.center(progressBar)
.east(button()
.control(cancel))
.build();
// The dialog displaying the progress panel
private final JDialog dialog = Dialogs.builder()
.component(progressPanel)
.owner(applicationFrame)
// Trigger the cancel control with the Escape key
.keyEvent(KeyEvents.builder()
.keyCode(VK_ESCAPE)
.action(cancel))
// Prevent the dialog from closing on Escape
.disposeOnEscape(false)
.build();
private int taskSize;
@Override
public Integer execute(ProgressReporter<String> progressReporter) throws Exception {
List<Integer> result = new ArrayList<>();
for (int i = 0; i < taskSize; i++) {
Thread.sleep(50);
if (cancelled.get()) {
throw new CancelException();
}
result.add(i);
reportProgress(progressReporter, i);
}
return result.stream()
.mapToInt(Integer::intValue)
.sum();
}
@Override
public int maximum() {
return taskSize;
}
@Override
public void onStarted() {
dialog.setVisible(true);
}
@Override
public void onProgress(int progress) {
progressBar.setValue(progress);
}
@Override
public void onPublish(List<String> strings) {
progressBar.setString(strings.get(0));
}
@Override
public void onDone() {
dialog.setVisible(false);
}
@Override
public void onCancelled() {
showMessageDialog(applicationFrame, "Cancelled");
}
@Override
public void onException(Exception exception) {
Dialogs.exception()
.owner(applicationFrame)
.show(exception);
}
@Override
public void onResult(Integer result) {
showMessageDialog(applicationFrame, "Result : " + result);
}
// Makes this task reusable by resetting the internal state
private DemoProgressResultTask prepare(int taskSize) {
this.taskSize = taskSize;
progressBar.getModel().setMaximum(taskSize);
cancelled.set(false);
return this;
}
private void reportProgress(ProgressReporter<String> reporter, int progress) {
reporter.report(progress);
if (progress < taskSize * 0.5) {
reporter.publish("Going strong");
}
else if (progress > taskSize * 0.5 && progress < taskSize * 0.85) {
reporter.publish("Half way there");
}
else if (progress > taskSize * 0.85) {
reporter.publish("Almost done");
}
}
}2.5. Swing Common Model
2.5.1. Table Model
FilterTableModel
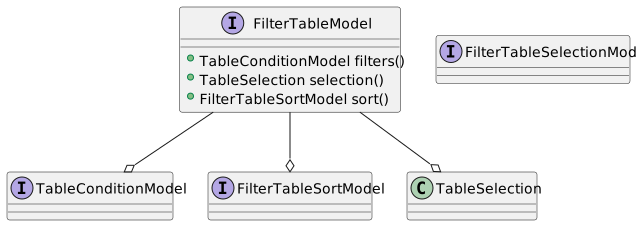
The SwingFilterTableModel is a table model central to the framework.
// Define a record representing the table rows
public record Person(String name, int age) {
// Constants identifying the table columns,
// used as column header captions by default.
public static final String NAME = "Name";
public static final String AGE = "Age";
}// Implement TableColumns, which specifies the column identifiers,
// the column class and how to extract column values from row objects
public static final class PersonColumns implements TableColumns<Person, String> {
private static final List<String> COLUMNS = List.of(NAME, AGE);
@Override
public List<String> identifiers() {
return COLUMNS;
}
@Override
public Class<?> columnClass(String column) {
return switch (column) {
case NAME -> String.class;
case AGE -> Integer.class;
default -> throw new IllegalArgumentException();
};
}
@Override
public Object value(Person person, String column) {
return switch (column) {
case NAME -> person.name();
case AGE -> person.age();
default -> throw new IllegalArgumentException();
};
}
}// Implement a Editor for handling row edits
private static final class PersonEditor implements RowEditor<Person, String> {
// We need the underlying IncludedItems instance to replace the edited
// row since the row objects are records and thereby immutable
private final IncludedItems<Person> items;
private PersonEditor(SwingFilterTableModel<Person, String> tableModel) {
this.items = tableModel.items().included();
}
@Override
public boolean editable(Person person, String identifier) {
// Both columns editable
return true;
}
@Override
public void set(Object value, int rowIndex, Person person, String identifier) {
switch (identifier) {
case NAME -> items.set(rowIndex, new Person((String) value, person.age()));
case AGE -> items.set(rowIndex, new Person(person.name(), (Integer) value));
}
}
}// Implement an item supplier responsible for supplying
// the data when the table items are refreshed.
// Without one the model can be populated by adding items manually
Supplier<Collection<Person>> items = () -> List.of(
new Person("John", 42),
new Person("Mary", 43),
new Person("Andy", 33),
new Person("Joan", 37));
// Build the table model, providing the TableColumns
// implementation along with the item supplier and row editor.
SwingFilterTableModel<Person, String> tableModel =
SwingFilterTableModel.builder()
.columns(new PersonColumns())
.items(items)
.rowEditor(PersonEditor::new)
// Populate the model right away
.refresh(true)
.build();Selection
FilterListSelection<Person> selection = tableModel.selection();
// Print the selected items when they change
selection.items().addConsumer(System.out::println);
// Print a message when the minimum selected index changes
selection.index().addListener(() ->
System.out.println("Selected index changed"));
// Select the first row
selection.index().set(0);
// Select the first two rows
selection.indexes().set(List.of(0, 1));
// Fetch the selected items
List<Person> items = selection.items().get();
// Or just the first (minimum index)
Person item = selection.item().get();
// Select a specific person
selection.item().set(new Person("John", 42));
// Select all persons over 40
selection.items().set(person -> person.age() > 40);
// Increment all selected indexes by
// one, moving the selection down
selection.indexes().increment();
// Clear the selection
selection.clear();Filters
TableConditionModel<String> filters = tableModel.filters();
// Filter out people under 40 years old
ConditionModel<Integer> ageFilter = filters.get(Person.AGE);
ageFilter.set().greaterThanOrEqualTo(40);
// Not necessary since filters auto-enable by default
// when operators and operands are specified
ageFilter.enabled().set(true);
// Filter is automatically disabled when it is cleared
ageFilter.clear();
// Filter out anyone besides John and Joan
ConditionModel<String> nameFilter = filters.get(NAME);
nameFilter.caseSensitive().set(false);
nameFilter.set().equalTo("jo%");
// Clear all filters
filters.clear();Sorting
FilterTableSort<Person, String> sort = tableModel.sort();
// Sort by age and name, ascending
sort.ascending(AGE, NAME);
// Sort by age, descending,
// set() clears the previous sort
sort.order(AGE).set(DESCENDING);
// add sorting by name, ascending,
// add() adds to any previous sort
sort.order(NAME).add(ASCENDING);
// Clear the sorting
sort.clear();2.6. Swing Common UI
2.6.1. Table UI
FilterTable
The FilterTable is a JTable subclass central to the framework.
// See FilterTableModel example
SwingFilterTableModel<Person, String> tableModel = createFilterTableModel();
FilterTable<Person, String> table =
FilterTable.builder()
.model(tableModel)
.cellRenderer(Person.AGE, Integer.class, renderer -> renderer
.horizontalAlignment(SwingConstants.CENTER))
.doubleClick(Control.command(() ->
tableModel.selection().item().optional()
.ifPresent(System.out::println)))
.autoResizeMode(JTable.AUTO_RESIZE_ALL_COLUMNS)
.build();Columns
FilterTableColumnModel<String> columns = table.columnModel();
// Reorder the columns
columns.visible().set(Person.AGE, Person.NAME);
// Print hidden columns when they change
columns.hidden().addConsumer(System.out::println);
// Hide the age column
columns.visible(Person.AGE).set(false);
// Only show the age column
columns.visible().set(Person.AGE);
// Reset columns to their default location and visibility
columns.reset();Search
FilterTableSearchModel search = table.search();
// Search for the value "43" in the table
search.predicate().set(value -> value.equals("43"));
RowColumn searchResult = search.results().current().get();
System.out.println(searchResult); // row: 1, column: 1
// Print the next available result
search.results().next().ifPresent(System.out::println);2.6.2. Input Controls
Control
State somethingEnabledState = State.state(true);
CommandControl control = Control.builder()
.command(() -> System.out.println("Doing something"))
.caption("Do something")
.mnemonic('D')
.enabled(somethingEnabledState)
.build();
JButton somethingButton = new JButton(control);
Control.ActionCommand actionCommand = actionEvent -> {
if ((actionEvent.getModifiers() & ActionEvent.SHIFT_MASK) != 0) {
System.out.println("Doing something else");
}
};
CommandControl actionControl = Control.builder()
.action(actionCommand)
.caption("Do something else")
.mnemonic('S')
.build();
JButton somethingElseButton = new JButton(actionControl);ToggleControl
State state = State.state();
ToggleControl toggleStateControl = Control.builder()
.toggle(state)
.build();
JToggleButton toggleButton = Components.toggleButton()
.toggle(toggleStateControl)
.text("Change state")
.mnemonic('C')
.build();
Value<Boolean> booleanValue = Value.nonNull(false);
ToggleControl toggleValueControl = Control.builder()
.toggle(booleanValue)
.build();
JCheckBox checkBox = Components.checkBox()
.toggle(toggleValueControl)
.text("Change value")
.mnemonic('V')
.build();
Value<Boolean> nullableBooleanValue = Value.nullable();
ToggleControl nullableToggleControl = Control.builder()
.toggle(nullableBooleanValue)
.build();
NullableCheckBox nullableCheckBox = Components.nullableCheckBox()
.toggle(nullableToggleControl)
.build();Controls
Controls controls = Controls.builder()
.control(Control.builder()
.command(this::doFirst)
.caption("First")
.mnemonic('F'))
.control(Control.builder()
.command(this::doSecond)
.caption("Second")
.mnemonic('S'))
.control(Controls.builder()
.caption("Submenu")
.control(Control.builder()
.command(this::doSubFirst)
.caption("Sub-first")
.mnemonic('b'))
.control(Control.builder()
.command(this::doSubSecond)
.caption("Sub-second")
.mnemonic('u')))
.build();
JMenu menu = Components.menu()
.controls(controls)
.build();
Control firstControl = Control.builder()
.command(this::doFirst)
.caption("First")
.mnemonic('F')
.build();
Control secondControl = Control.builder()
.command(this::doSecond)
.caption("Second")
.mnemonic('S')
.build();
Controls twoControls = Controls.builder()
.controls(firstControl, secondControl)
.build();
JPanel buttonPanel = Components.buttonPanel()
.controls(twoControls)
.build();2.6.3. Input Components
Binding model data to UI components is accomplished by linking a Value instance to an instance of its subclass ComponentValue, which represents a value based on an input component.
//a nullable integer value, initialized to 42
Value<Integer> integerValue =
Value.nullable(42);
//create a spinner linked to the value
JSpinner spinner =
Components.integerSpinner()
.link(integerValue)
.build();
//create a NumberField component value, basically doing the same as
//the above, with an extra step to expose the underlying ComponentValue
ComponentValue<NumberField<Integer>, Integer> numberFieldValue =
Components.integerField()
//linked to the same value
.link(integerValue)
.buildValue();
//fetch the input field from the component value
NumberField<Integer> numberField = numberFieldValue.component();Text
TextField
Value<String> stringValue = Value.nullable();
JTextField textField =
Components.stringField()
.link(stringValue)
.preferredWidth(120)
.transferFocusOnEnter(true)
.build();Value<Character> characterValue = Value.nullable();
JTextField textField =
Components.characterField()
.link(characterValue)
.preferredWidth(120)
.transferFocusOnEnter(true)
.build();Numbers
Integer
Value<Integer> integerValue = Value.nullable();
NumberField<Integer> integerField =
Components.integerField()
.link(integerValue)
.range(0, 10_000)
.grouping(false)
.build();Long
Value<Long> longValue = Value.nullable();
NumberField<Long> longField =
Components.longField()
.link(longValue)
.grouping(true)
.build();BigInteger
Value<BigInteger> bigIntegerValue = Value.nullable();
NumberField<BigInteger> bigIntegerField =
Components.bigIntegerField()
.link(bigIntegerValue)
.fractionDigits(2)
.groupingSeparator('.')
.decimalSeparator(',')
.build();Date & Time
LocalTime
Value<LocalTime> localTimeValue = Value.nullable();
TemporalField<LocalTime> temporalField =
Components.localTimeField()
.link(localTimeValue)
.dateTimePattern("HH:mm:ss")
.build();Boolean
CheckBox
//non-nullable so use this value instead of null
boolean nullValue = false;
Value<Boolean> booleanValue =
Value.builder()
.nonNull(nullValue)
.value(true)
.build();
JCheckBox checkBox =
Components.checkBox()
.link(booleanValue)
.text("Check")
.horizontalAlignment(SwingConstants.CENTER)
.build();Selection
ComboBox
Value<String> stringValue = Value.nullable();
DefaultComboBoxModel<String> comboBoxModel =
new DefaultComboBoxModel<>(new String[] {"one", "two", "three"});
JComboBox<String> comboBox =
Components.comboBox()
.model(comboBoxModel)
.link(stringValue)
.preferredWidth(160)
.build();Supplier<Collection<String>> items = () ->
List.of("One", "Two", "Three");
SwingFilterComboBoxModel<String> model =
SwingFilterComboBoxModel.builder()
.items(items)
.nullItem("-")
.build();
JComboBox<String> comboBox =
Components.comboBox()
.model(model)
.mouseWheelScrolling(true)
.build();
// Hides the 'Two' item.
model.items().included().predicate()
.set(item -> !item.equals("Two"));
// Prints the selected item
model.selection().item()
.addConsumer(System.out::println);
// Refreshes the items using the supplier from above
model.items().refresh();Completion provides a way to enable completion for combo boxes.
The available completion modes are:
Combo boxes created via Components have completion enabled by default, with MAXIMUM_MATCH being the default completion mode.
The default completion mode is controlled via the Completion.COMPLETION_MODE configuration value.
Strings are normalized by default during completion, that is, accents are removed, i.e. á, í and ú become a, i and u. To enable accented character sensitivity, normalization can be turned off, either globally via the Completion.NORMALIZE configuration value or individually via the combo box builder.
SwingFilterComboBoxModel<String> model =
SwingFilterComboBoxModel.builder()
.items(List.of("Jon", "Jón", "Jónsi"))
.nullItem("-")
.build();
JComboBox<String> comboBox =
Components.comboBox()
.model(model)
// Auto completion
.completionMode(Completion.Mode.AUTOCOMPLETE)
// Accented characters not normalized
.normalize(false)
.build();Custom
TextField
In the following example we link a value based on a Person class to a component value displaying text fields for a first and last name.
class Person {
final String firstName;
final String lastName;
public Person(String firstName, String lastName) {
this.firstName = firstName;
this.lastName = lastName;
}
@Override
public String toString() {
return lastName + ", " + firstName;
}
}
class PersonPanel extends JPanel {
final JTextField firstNameField = new JTextField();
final JTextField lastNameField = new JTextField();
public PersonPanel() {
setLayout(new GridLayout(2, 2));
add(new JLabel("First name"));
add(new JLabel("Last name"));
add(firstNameField);
add(lastNameField);
}
}
class PersonPanelValue extends AbstractComponentValue<PersonPanel, Person> {
public PersonPanelValue(PersonPanel component) {
super(component);
//We must call notifyListeners() each time this value changes,
//that is, when either the first or last name changes.
component.firstNameField.getDocument()
.addDocumentListener((DocumentAdapter) e -> notifyObserver());
component.lastNameField.getDocument()
.addDocumentListener((DocumentAdapter) e -> notifyObserver());
}
@Override
protected Person getComponentValue() {
return new Person(component().firstNameField.getText(), component().lastNameField.getText());
}
@Override
protected void setComponentValue(Person value) {
component().firstNameField.setText(value == null ? null : value.firstName);
component().lastNameField.setText(value == null ? null : value.lastName);
}
}
Value<Person> personValue = Value.nullable();
PersonPanel personPanel = new PersonPanel();
Value<Person> personPanelValue = new PersonPanelValue(personPanel);
personPanelValue.link(personValue);2.6.4. Dialogs
Component
Event<?> close = Event.event();
JButton closeButton = Components.button()
.control(Control.builder()
.command(close::run)
.caption("Close"))
.build();
Dialogs.builder()
.component(closeButton)
.owner(window)
.title("Dialog")
.disposeOnEscape(false)
.closeObserver(close)
.show();Selection
Items
Dialogs.select()
.list(List.of("One", "Two", "Three"))
.owner(window)
.title("Select a number")
.select()
.single()
.ifPresent(System.out::println);Collection<String> selected = Dialogs.select()
.list(List.of("One", "Two", "Three", "Four"))
.owner(window)
.title("Select numbers")
.select()
.multiple();Files
File file = Dialogs.select()
.files()
.owner(window)
.title("Select a file")
.selectFile();Collection<File> files = Dialogs.select()
.files()
.owner(window)
.title("Select files")
.filter(new FileNameExtensionFilter("PDF files", "pdf"))
.selectFiles();File fileToSave = Dialogs.select()
.files()
.owner(window)
.title("Select file to save")
.confirmOverwrite(false)
.filter(new FileNameExtensionFilter("Text files", "txt"))
.selectFileToSave("default-filename");File directory = Dialogs.select()
.files()
.owner(window)
.title("Select a directory")
.selectDirectory();Collection<File> directories = Dialogs.select()
.files()
.owner(window)
.title("Select directories")
.selectDirectories();File fileOrDirectory = Dialogs.select()
.files()
.owner(window)
.title("Select file or directory")
.selectFileOrDirectory();Collection<File> filesOrDirectories = Dialogs.select()
.files()
.owner(window)
.title("Select files and/or directories")
.selectFilesOrDirectories();Action Dialogs
Input
ComponentValue<NumberField<Integer>, Integer> component =
Components.integerField()
.value(42)
.buildValue();
Integer input = Dialogs.input()
.component(component)
.owner(window)
.title("Input")
.valid(State.present(component))
.show();Exception
Dialogs.exception()
.owner(window)
.title("Exception")
// Don't include system properties
.systemProperties(false)
.show(exception);Calendar
Dialogs.calendar()
.owner(window)
.title("Calendar")
.selectLocalDate()
.ifPresent(System.out::println);Progress
Progress dialogs provide feedback during long-running operations. To prevent unnecessary visual noise, progress dialogs support configurable delays for both showing and hiding the dialog.
The .delay() method accepts two parameters: the delay before showing the dialog (in milliseconds) and the delay before hiding it. These delays are based on human-computer interaction research:
-
Show delay (350ms default): Operations completing in under ~300ms feel instantaneous to users, so showing a progress indicator would be distracting. A delay of 350ms ensures the dialog only appears for operations that users actually perceive as taking time.
-
Hide delay (800ms default): When an operation completes just after the dialog appears, hiding it immediately would create a jarring flash. The hide delay smooths this transition and reduces the perceived duration of short operations by avoiding the visual disruption of rapidly appearing and disappearing dialogs.
Dialogs.progressWorker()
.task(this::performTask)
.owner(window)
.title("Performing task")
.delay(500, 1000)
.onSuccess(this::handleResult)
.onException(this::handleException)
.execute();2.7. Common Utilities
Codion provides a few classes with miscellanous utility functions.
2.7.1. TaskScheduler
TaskScheduler provides a simple, lightweight way to execute tasks periodically on a background thread.
Basic Usage
Create a scheduler that runs a task at fixed intervals:
// Build a scheduler that runs a task every 5 seconds
TaskScheduler scheduler =
TaskScheduler.builder()
.task(() -> System.out.println("Running scheduled task"))
.interval(5, TimeUnit.SECONDS)
.initialDelay(10) // Wait 10 seconds before first execution
.name("My Task Scheduler") // Name for debugging
.build();
// Start the scheduler
scheduler.start();
// Check if it's running
boolean running = scheduler.running();
// Stop the scheduler when done
scheduler.stop();Auto-Start
Use the start() method to build and start the scheduler in one step:
// Build and start in one step
TaskScheduler scheduler =
TaskScheduler.builder()
.task(this::performMaintenance)
.interval(30, TimeUnit.SECONDS)
.name("Maintenance Task")
.start(); // Builds and starts immediatelyThread Naming
The name() method sets the thread name, which is useful for debugging and thread dumps:
TaskScheduler scheduler =
TaskScheduler.builder()
.task(maintenanceTask)
.interval(30, TimeUnit.SECONDS)
.name("Connection Maintenance") // Appears in thread dumps
.start();|
Tip
|
Always name your scheduler threads descriptively to make debugging easier. |
Custom ThreadFactory
For advanced control over thread creation, provide a custom ThreadFactory:
// Use a custom ThreadFactory for advanced control
TaskScheduler scheduler =
TaskScheduler.builder()
.task(() -> System.out.println("Custom thread task"))
.interval(1, TimeUnit.MINUTES)
.threadFactory(runnable -> {
Thread thread = new Thread(runnable);
thread.setDaemon(true);
thread.setPriority(Thread.MIN_PRIORITY);
thread.setName("Custom Task Thread");
return thread;
})
.start();|
Note
|
When using a custom threadFactory(), the name() setting is ignored since the ThreadFactory has full control over thread creation.
|
Common Use Cases
TaskScheduler is ideal for:
-
Connection maintenance - Periodically cleaning up idle connections
-
Cache cleanup - Removing stale cache entries
-
Statistics collection - Gathering metrics at regular intervals
-
Health checks - Monitoring system health
-
Periodic saves - Auto-saving user preferences or state
All scheduler threads are daemon threads by default, so they won’t prevent JVM shutdown.